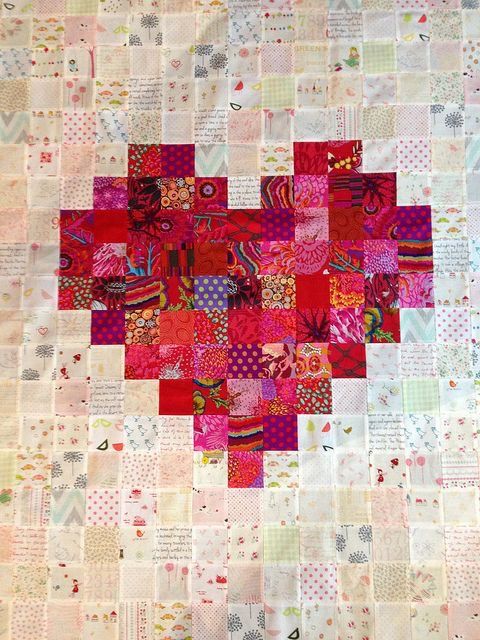
Pixelated Heart Quilt Pattern
The world of quilting is full of creativity and charm, and few designs capture the playful spirit of quilters quite like The Stitchin’ Chicks Quilt Pattern. From its name alone, this pattern evokes community, color, and the joy of making something by hand. Whether you’re a seasoned quilter or a curious beginner, this pattern offers both structure and freedom, allowing your personality to shine through every stitch.
In this article, we’ll explore The Stitchin’ Chicks Quilt Pattern step by step. You’ll find practical tips, fabric cutting guides, and detailed instructions to help you create your own beautiful quilt. More than just a how-to, this guide celebrates the essence of quilting: storytelling through fabric, patience, and the satisfaction of crafting something lasting.
By following this tutorial, you’ll discover how The Stitchin’ Chicks Quilt Pattern can transform your quilting journey. Let’s dive into the details, so you can confidently bring this pattern to life in your sewing room.

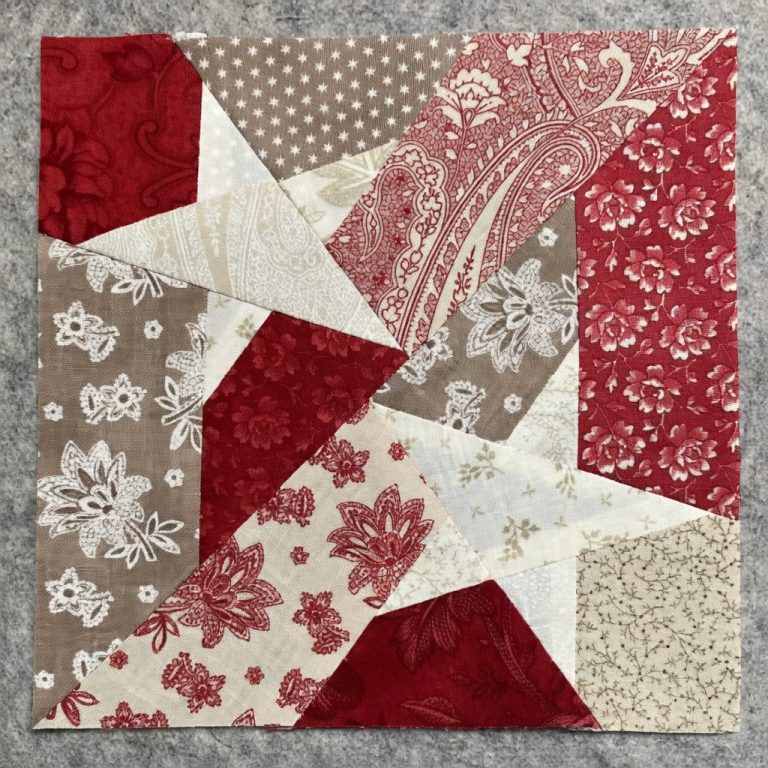
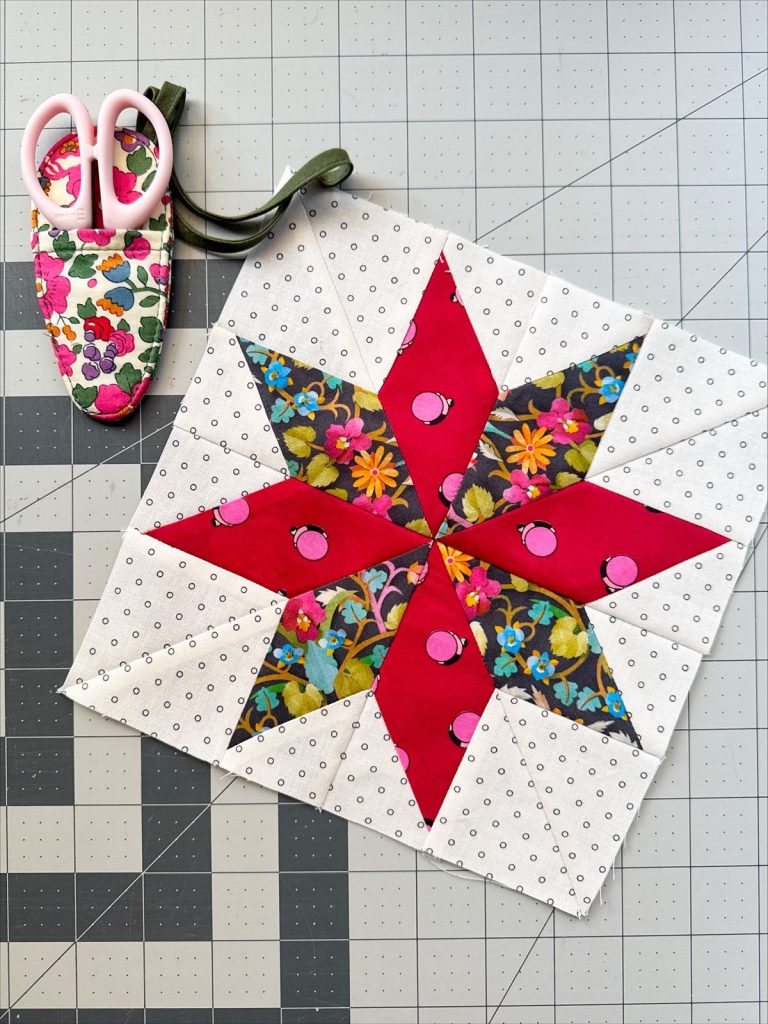
The Stitchin’ Chicks Quilt Pattern is known for its playful and modern look while staying deeply rooted in traditional quilting techniques. At its heart, this pattern combines simple geometric shapes that create a dynamic and cheerful layout, perfect for gifts, wall hangings, or cozy throws.
One of the unique aspects of The Stitchin’ Chicks Quilt Pattern is its blend of blocks: squares, rectangles, and half-square triangles (HSTs). This makes it approachable for beginners yet still engaging for experienced quilters looking to play with color placement.
Choosing fabrics for this quilt pattern is part of the fun. Many quilters love using bright, contrasting fabrics to highlight the bold design, but you can also create a softer, more vintage look with muted tones and florals.
The layout of The Stitchin’ Chicks Quilt Pattern often follows a repeating motif that can be customized in size and complexity. Whether you make a small baby quilt or a larger bed quilt, the steps remain the same—you simply adjust the number of blocks.
Before you start cutting, take time to plan your color scheme and layout on graph paper or digital software. Seeing how your chosen fabrics interact will help you avoid surprises later.
Lastly, gather all your tools: rotary cutter, self-healing mat, quilting ruler, pins, and a reliable sewing machine. Preparation is key to making the process smooth and enjoyable.
Creating The Stitchin’ Chicks Quilt Pattern requires precise fabric cutting, which helps your quilt come together perfectly. Here’s a detailed cutting guide for a throw-size quilt approximately 60” x 70”. Adjust the quantities if you want to make it smaller or larger.
Start by selecting 5 different fabrics: three prints and two solids. Assign them to roles: background, feature blocks, and accent blocks. The contrast between prints and solids adds visual interest to The Stitchin’ Chicks Quilt Pattern.
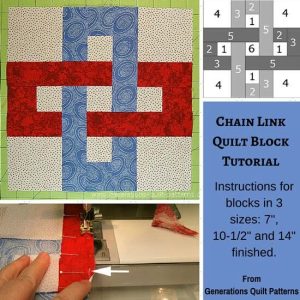
Cutting guide:
From your feature fabrics, you’ll also need to make half-square triangles. Pair each feature square (A and B) with a background square to create 30 HSTs for each print.
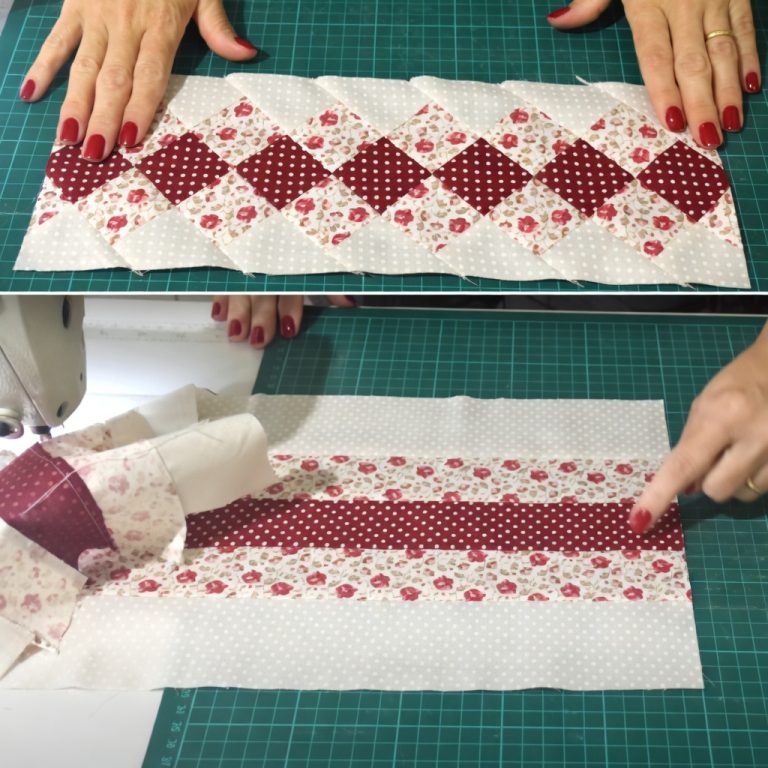
To make the HSTs, draw a diagonal line on the back of each feature fabric square, place it right sides together with a background square, stitch ¼” from both sides of the line, cut along the line, then press open.
Once you’ve cut all pieces, organize them into labeled stacks. This step might seem simple, but it keeps your workspace tidy and your mind clear.
Having your fabrics pre-cut and organized will make the sewing phase quicker and more satisfying.
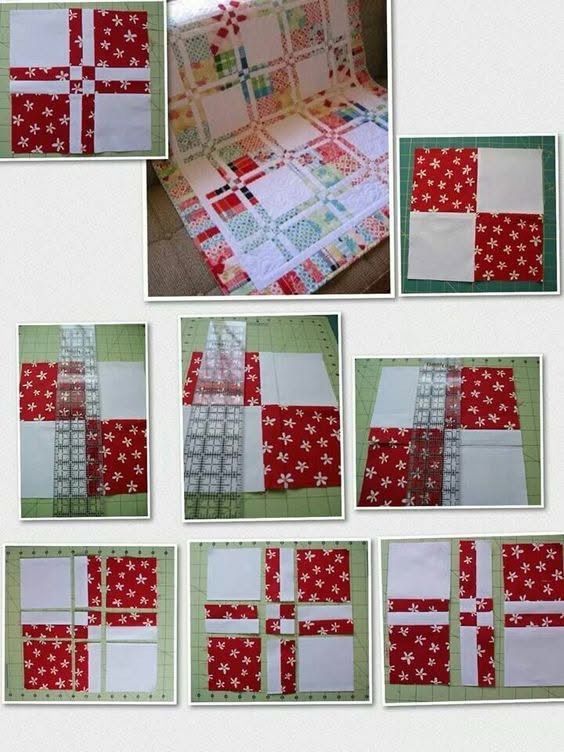
Now, let’s build The Stitchin’ Chicks Quilt Pattern block by block. This part of quilting brings your chosen fabrics to life as they come together in a balanced, colorful design.
Begin by sewing your half-square triangles. Trim them to 4” x 4” to ensure consistent sizing. These will add movement to your quilt and are a signature element of The Stitchin’ Chicks Quilt Pattern.
Next, join feature fabric squares and HSTs into larger blocks. For each block, combine:
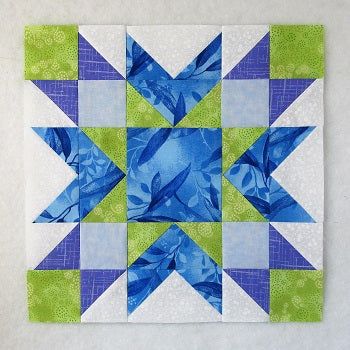
Arrange them to create a dynamic pattern, ensuring the points of your HSTs face outward or form a chevron, depending on your chosen design.
After making several blocks, press seams carefully. Use a warm iron and press seams open or to one side to reduce bulk and keep your quilt top flat.
Lay out all your blocks on a large surface or design wall. This step is important to see the overall pattern and adjust blocks if needed for balance or color distribution.
Sew blocks together into rows, then join the rows to complete the quilt top. Double-check your measurements and seam allowances as you go.
Finally, add the border strips using accent fabrics. Sew the 2.5” x 8.5” rectangles along the sides and top/bottom edges to frame your quilt beautifully.
With the quilt top of The Stitchin’ Chicks Quilt Pattern assembled, the next steps will turn it into a finished quilt ready to be loved and used.
Make your quilt sandwich: lay the backing fabric right side down, place the batting on top, and center your quilt top (right side up). Smooth out wrinkles to prevent puckering during quilting.
Baste the layers together. Use curved safety pins or spray basting adhesive to secure the quilt sandwich, paying extra attention to corners and edges.
Quilt as desired. Straight-line quilting works beautifully with The Stitchin’ Chicks Quilt Pattern, emphasizing its geometric shapes. Free-motion quilting adds a playful texture if you prefer.
Trim the excess batting and backing, then prepare your binding. Cut strips 2.5” wide, sew them end to end, fold in half lengthwise, and press.
Attach the binding by sewing it to the quilt’s front, folding it over the edge, and hand- or machine-stitching it to the back. Take your time here—it gives your quilt a polished finish.
Once finished, admire your quilt! The Stitchin’ Chicks Quilt Pattern not only showcases your skills but also becomes a treasured heirloom full of color and creativity.
Crafting The Stitchin’ Chicks Quilt Pattern is more than sewing fabric; it’s about bringing your creativity to life, stitch by stitch. With the detailed cutting guide, assembly instructions, and finishing tips above, you can confidently create a quilt that feels both modern and timeless.
The process teaches patience, precision, and artistic expression. By making The Stitchin’ Chicks Quilt Pattern, you’re continuing a beautiful tradition of storytelling through fabric—one that you can share with family and friends.
We hope this guide helps you start your own version of The Stitchin’ Chicks Quilt Pattern. If you try it, we’d love to hear about your fabric choices, challenges, and final result. Share your thoughts, tips, or questions in the comments below—let’s keep the quilting community vibrant and inspiring.
Happy quilting!


