
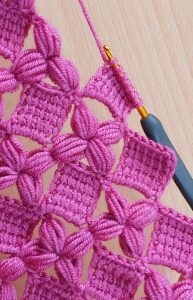
Star Oklohama Quilt Block Pattern
Creating an Oven glove is more than just a fun sewing project — it’s an opportunity to blend safety, creativity, and practicality into one handmade masterpiece. Right from the kitchen to your sewing table, the Oven glove has become an indispensable accessory, whether you’re a beginner or a seasoned crafter. In this article, we’ll explore the art of making your own Oven glove, sharing an easy-to-follow pattern, detailed fabric cuts and measurements, and helpful tips to ensure your project turns out perfectly.
Oven glove making not only saves you money but also allows you to customize your kitchen style. You can select fabrics that match your decor or express your personality, turning a simple kitchen tool into a statement piece. Plus, a handcrafted Oven glove makes a thoughtful, practical gift for friends and family.
This guide is designed to help you from start to finish, ensuring your Oven glove is durable, comfortable, and heat resistant. So gather your materials, prepare your sewing machine, and let’s dive into the world of handmade Oven glove crafting.

When creating your own Oven glove, the choice of materials is crucial for both safety and comfort. The outer layer should always be made from 100% cotton fabric. Cotton is heat-resistant, durable, and washable, making it ideal for everyday kitchen use.
Inside your Oven glove, a layer of insulating material is essential. The most popular option is insulated batting like Insul-Bright, which reflects heat away from your hand. You can also add a layer of regular cotton batting for extra thickness and comfort. This double-layer technique keeps your hand well protected from hot oven racks and pans.
The lining fabric, which will touch your hand, should also be cotton. Soft cotton provides comfort and absorbs any sweat or moisture, making your Oven glove practical during extended cooking or baking sessions.
When choosing fabric patterns, remember that darker colors or prints help hide stains from frequent use. Consider using pre-washed fabric to prevent shrinkage later, ensuring your Oven glove keeps its shape wash after wash.
Finally, high-quality thread is important. A strong, heat-resistant cotton or polyester thread will help your Oven glove withstand repeated use and cleaning without falling apart.
By choosing the right materials, your homemade Oven glove will combine safety, style, and durability — essential features for this everyday kitchen accessory.
Before you start sewing, precise cutting and preparation make all the difference in how your Oven glove turns out. Below are the recommended fabric cuts and measurements to make a standard adult-sized Oven glove.
Outer fabric (cotton): Cut 2 pieces measuring 12 inches high x 7 inches wide each. These will form the outside of your Oven glove.
Insulated batting (Insul-Bright): Cut 2 pieces in the same size, 12 x 7 inches, to protect your hands from heat.
Cotton batting (optional extra padding): Cut 2 pieces, also 12 x 7 inches.
Lining fabric (cotton): Cut 2 pieces measuring 12 x 7 inches.
Bias tape or fabric strips: Cut a strip about 2 inches wide and 30 inches long for finishing the edge and adding a hanging loop.
Stacking order is very important for your Oven glove: place the outer fabric on top, insulated batting underneath, cotton batting next (if used), and the lining fabric at the bottom. This layered “sandwich” ensures both heat resistance and comfort.
For easier sewing, use fabric clips or pins to keep the layers aligned. Mark your Oven glove shape onto the fabric, tracing around a template or an existing glove. Remember to leave about ½ inch seam allowance all around the traced shape.
Double-check your cuts and alignment before you move to the next step. Precise measurements and preparation are the key to a professional-looking Oven glove.
Now it’s time to bring your Oven glove to life! Follow these detailed steps to sew a sturdy and stylish kitchen accessory.
Step 1: Quilting the layers Begin by quilting each stack of fabric layers together: outer fabric, insulated batting, cotton batting, and lining fabric. Sew diagonal lines about 1½ inches apart, creating a quilted look that keeps the layers from shifting.
Step 2: Cut the glove shape Using your traced template, carefully cut out the glove shape from each quilted panel. Remember to keep the thumb curved and comfortable to fit your hand naturally.
Step 3: Sew the two sides together Place the quilted panels right sides together and sew around the edge with a ½ inch seam allowance, leaving the wrist opening unsewn. Backstitch at the start and end to secure the seam.
Step 4: Clip curves and turn To help your Oven glove fit smoothly, clip the curved edges carefully without cutting through the seam. Then turn the glove right side out, pushing out the thumb and fingertip areas gently with a blunt tool.
Step 5: Add the bias tape Fold the bias tape over the raw edge of the wrist opening, pinning it in place. Sew around to finish the edge neatly. If you’d like, use part of the bias tape to create a small loop so you can hang your Oven glove on a hook.
Step 6: Final touches Give your finished Oven glove a quick press with an iron (on a low setting) to smooth out seams. Check for loose threads, trim them, and your Oven glove is ready to use!
By following these steps, you’ll create a functional and attractive Oven glove perfect for baking, roasting, or gifting.
Your handmade Oven glove is fully customizable to reflect your personality and style. Experiment with colorful prints, modern geometric patterns, or even holiday-themed fabrics. For a matching set, make two Oven gloves or add coordinating pot holders.
Adding embroidery or appliqué designs is another way to personalize your Oven glove. Simple words like “Bake” or “Hot” can add a fun, handmade charm. Always remember to use heat-safe threads for any decoration.
To keep your Oven glove in great shape, wash it in cold water with mild detergent. Avoid bleach, which can weaken fibers and fade colors. Air drying is recommended to prevent shrinking, though a tumble dry on low heat can also work.
Regularly check the seams and padding of your Oven glove. Over time, frequent use may compress the batting or loosen stitches. Repairing small areas early will keep your glove effective and safe.
You can also refresh your Oven glove by making a new cover for the old padding, giving it a second life. It’s a sustainable choice that keeps waste out of landfills.
With a little care and creativity, your Oven glove will remain both a practical and beautiful part of your kitchen routine for years to come.
Q: What’s the best fabric for an Oven glove? A: 100% cotton for the outer and lining fabric is best, paired with insulated batting like Insul-Bright.
Q: Can I wash my Oven glove in the machine? A: Yes, machine wash cold and air dry to preserve shape and safety.
Q: Is cotton batting necessary along with insulated batting? A: It adds extra thickness and comfort but isn’t strictly required.
Q: How do I size an Oven glove for smaller or larger hands? A: Adjust the template, adding or removing about ½–1 inch in width and length.
Q: What sewing machine settings should I use? A: A medium stitch length (about 2.5mm) and a strong cotton or polyester thread.
Q: Can I add a silicone layer? A: Yes! A food-grade silicone fabric layer can add extra heat protection
Crafting your own Oven glove is a rewarding project that combines safety, creativity, and practicality. With quality materials, precise measurements, and careful stitching, your handmade Oven glove will become a trusted kitchen companion. Whether you make one as a gift or keep it for yourself, this project adds a personal, stylish touch to any kitchen. Ready to start? Grab your fabric, follow this guide, and create an Oven glove that’s uniquely yours. And don’t forget to share your creations or ask questions below — your feedback inspires future tutorials!


