
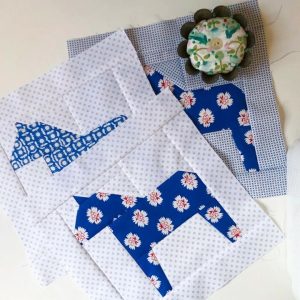
Mother Hen Block Quilt Pattern
The Acoustic Threads Quilt is more than just a quilting project—it’s a beautiful fusion of rhythm, creativity, and traditional craftsmanship. Right from the first stitch to the last binding, this project brings warmth and harmony into your sewing space. With its unique design that resembles the gentle waves of sound, the Acoustic Threads Quilt has become a beloved choice for quilters who want something classic yet artistic.
In this comprehensive guide, we’ll walk you through everything you need to create your very own Acoustic Threads Quilt. We’ll detail all the fabric cuts and measurements, explain the assembly process, and share practical tips for quilting success. Whether you’re a beginner or an experienced quilter, this guide is written to make the process smooth and enjoyable.
Let’s discover how to transform simple fabrics into an Acoustic Threads Quilt masterpiece that looks stunning on a bed, a sofa, or even as a wall hanging. Grab your favorite fabrics, prepare your sewing machine, and let’s get started.

Selecting the right materials is essential to achieving the characteristic look of the Acoustic Threads Quilt. This quilt pattern often shines when you mix contrasting tones—light, medium, and dark fabrics that create depth, just like musical layers.
First, choose four main fabrics:
Second, prepare your cutting table and rotary cutter. Iron your fabrics to remove any wrinkles, ensuring precise cuts.
Third, decide the finished size. This guide is for a throw-sized quilt approximately 60” x 70”. You can adjust if you want a larger bed quilt or a smaller lap quilt.
Fourth, gather essential tools: cutting mat, quilting ruler, thread matching your fabrics, pins or clips, and your sewing machine.
Fifth, keep your workspace organized. Place fabric scraps in a basket—you might use them for matching pillows or a smaller project.
Sixth, remember to pre-wash fabrics, especially dark and bright tones. It helps prevent color bleeding and shrinkage.
The heart of the Acoustic Threads Quilt lies in accurate cutting. The quilt’s flowing pattern emerges from careful arrangement of strips and rectangles.
Step 1: Cut from Fabric A (light tone):
Step 2: Cut from Fabric B (medium tone):
Step 3: Cut from Fabric C (dark tone):
Step 4: Cut from Fabric D (accent print):
Step 5: Cut for binding:
Step 6: Cut batting and backing:
Keep the pieces organized by labeling them with sticky notes. This helps during the assembly process so your pattern flows correctly.
Now let’s bring your Acoustic Threads Quilt to life. This pattern creates a movement effect similar to sound waves, hence the name.
Step 1:
Arrange your cut rectangles into vertical columns. Mix light, medium, dark, and accent fabrics to avoid repeated colors next to each other.
Step 2:
Start sewing rectangles in each column together with a ¼” seam allowance. Press seams open to keep the quilt flat.
Step 3:
Once each column is assembled, lay all columns side by side on a design wall or floor. Adjust placement until you achieve the balanced, wave-like look.
Step 4:
Sew the columns together, again with a ¼” seam allowance. Check that the seams align where needed.
Step 5:
Add the border strips (Fabric A): sew them to the quilt’s sides first, then top and bottom. This frames your Acoustic Threads Quilt beautifully.
Step 6:
Press the quilt top completely. Your quilt sandwich is ready: backing (wrong side up), batting in the middle, and quilt top (right side up).
Use safety pins or spray baste to hold the layers together. This prevents shifting during quilting.
The final stage transforms your pieced top into a finished Acoustic Threads Quilt. This is where quilting stitches add texture and depth.
Step 1:
Choose your quilting design. Straight-line quilting or gentle wave patterns echo the quilt’s name beautifully.
Step 2:
Start quilting from the center, moving outward. This keeps the quilt flat and prevents puckers.
Step 3:
Use a walking foot if quilting straight lines. For free-motion quilting, use an open-toe foot and practice on scraps first.
Step 4:
Once quilting is done, trim the excess batting and backing to match the quilt top’s edges.
Step 5:
Sew the binding strips together end to end. Fold lengthwise with wrong sides together. Attach the binding to the quilt’s front using a ¼” seam.
Step 6:
Fold the binding over to the back and hand-stitch or machine-stitch it down. Give your Acoustic Threads Quilt a final press.
Admire your work! The flow of colors and shapes will create an effect as soothing as acoustic music.
Creating an Acoustic Threads Quilt is a rewarding project, combining artistic choices with precise technique. The pattern’s flowing design captures the spirit of music and movement, making it unique among quilt patterns.
Using the measurements and steps shared here, you can confidently piece together your quilt. Remember, the beauty of quilting is that no two quilts are ever exactly alike. Your choice of colors and quilting stitches will make your Acoustic Threads Quilt truly yours.
We hope this guide inspires you to start stitching today. If you’ve made an Acoustic Threads Quilt, share photos online to inspire others. Quilting is not just about fabric—it’s about creativity, patience, and love sewn into every seam.
Enjoy every stitch, and let your Acoustic Threads Quilt bring warmth and harmony to your home.
