
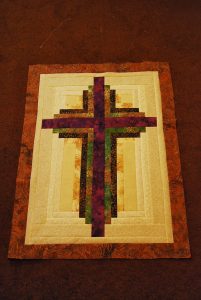
Spiral Sunburst Quilt Pattern
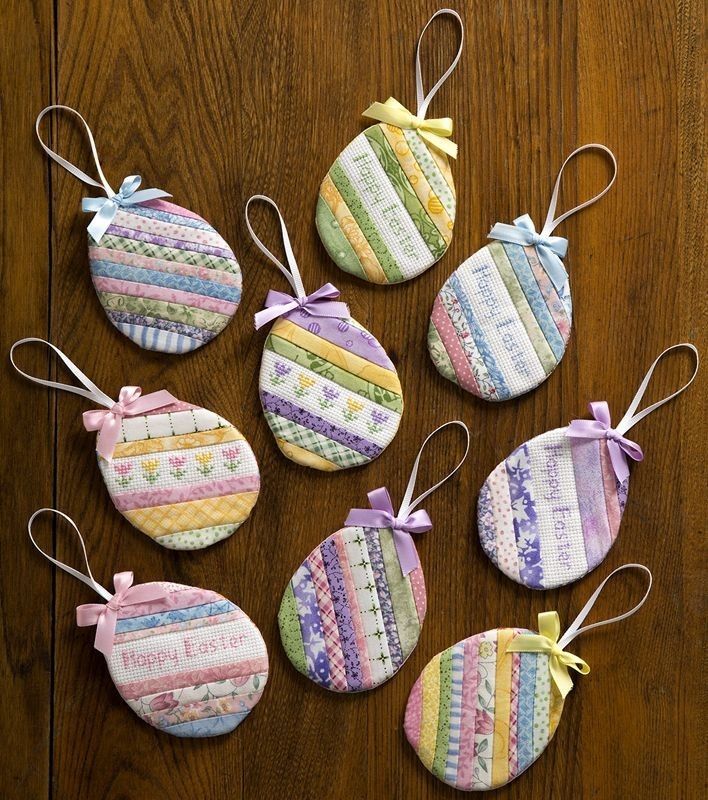
Fabric Easter Eggs Beginner Sewing Tutorial is a fun, creative, and simple craft project perfect for anyone looking to add a personal, handmade touch to Easter decorations. Whether you’re new to sewing or an experienced crafter, these soft fabric eggs bring color, warmth, and a unique charm to your holiday decor. Making them yourself is not only rewarding but also a wonderful way to use up beautiful fabric scraps.
In this article, you’ll learn how to create a lovely set of fabric Easter eggs, complete with all the steps, fabric cuts, and measurements you need. We’ll walk through everything carefully, so even beginners will feel confident to start. Plus, these eggs can be personalized in endless ways, making them a delightful gift or keepsake.
Read on and discover how to follow this Fabric Easter Eggs Beginner Sewing Tutorial. You’ll see that sewing these decorative eggs is easier than it looks and incredibly satisfying when you see the final result.
The first step in our Fabric Easter Eggs Beginner Sewing Tutorial is selecting the right materials. Choose colorful cotton fabrics, preferably in soft pastel prints or floral patterns, to match the spring and Easter theme. Cotton is easy to sew and holds its shape well, making it perfect for this beginner sewing project.
You’ll need to cut six oval pieces for each egg you plan to make. Each fabric oval should measure approximately 3 inches (7.5 cm) in height and 2 inches (5 cm) across at the widest point. This size makes a charming small egg, but you can adjust the template to make larger or smaller eggs depending on your preference.
Other essential tools include sharp fabric scissors, a fabric marker or chalk, pins or clips, a sewing machine (or needle for hand sewing), polyester stuffing or cotton filling, and matching thread. Using high-quality thread helps your eggs keep their shape and last longer.
Print or draw an egg-shaped template on thick paper or cardboard. This template helps ensure that all your fabric pieces are the same size and shape, which is especially important when assembling the egg later.
If you like a more textured look, consider mixing different types of fabric, like linen or felt, with cotton. Combining textures adds depth and makes each egg unique, while still following our Fabric Easter Eggs Beginner Sewing Tutorial.
Finally, prepare a clean and organized workspace. Having all your tools and materials within easy reach makes sewing more enjoyable and prevents mistakes or missing pieces.
Now that you have your fabrics and tools ready, it’s time to cut your fabric pieces according to the Fabric Easter Eggs Beginner Sewing Tutorial. Place your egg template on the back of the fabric and trace around it with a fabric marker or chalk.
Remember, each fabric egg requires six oval pieces. For a set of six eggs, you’ll need thirty-six fabric ovals. You can use the same fabric for all pieces or mix and match for a patchwork style, which looks charming and festive.
Cut the ovals carefully with sharp fabric scissors, keeping the edges smooth. Clean cuts make sewing easier and help your finished eggs look neater and more professional.
Once you’ve cut all the pieces, lay them out in the order you plan to sew them. For example, alternate colors or prints so each egg has a balanced look. Planning your pattern ahead of time is part of the fun and creativity of this Fabric Easter Eggs Beginner Sewing Tutorial.
If you want to add extra decoration, like small fabric appliqués or embroidery, now is the best time to do it. Stitch them onto the oval pieces before assembling the egg to avoid sewing through multiple layers later.
Lightly press the fabric pieces with an iron to remove any wrinkles. Smooth fabric helps your seams line up better and makes sewing easier, especially for beginners following this Fabric Easter Eggs Beginner Sewing Tutorial.
Now comes the main sewing part of the Fabric Easter Eggs Beginner Sewing Tutorial. Start by placing two fabric ovals right sides together and pin or clip along one side (from the top point to the bottom point of the egg shape).
Sew along this pinned edge using a 1/4 inch (0.6 cm) seam allowance. Backstitch at the start and end to secure your stitches. Open the two pieces, right sides out, and press the seam flat if you like a crisp finish.
Next, take a third fabric oval and place it right sides together with one of the sewn pieces. Pin or clip along the next edge and sew as before. Continue this process, adding the fourth, fifth, and finally the sixth oval, always sewing along the curved side.
After attaching the last piece, you’ll have a nearly complete egg shape. Carefully sew the final seam, leaving a small opening of about 1 inch (2.5 cm) near the bottom. This opening allows you to turn the egg right side out and stuff it.
Turn the egg right side out through the opening. Use a blunt tool, like a chopstick or the eraser end of a pencil, to gently push out the seams so the egg takes its shape. This step is essential for achieving the smooth, rounded look described in this Fabric Easter Eggs Beginner Sewing Tutorial.
Stuff the egg with polyester fiberfill or cotton filling until it feels firm but still soft. Finally, hand-stitch the opening closed using a ladder stitch or whip stitch for an invisible finish.
Congratulations—you’ve now completed a Fabric Easter Eggs Beginner Sewing Tutorial egg! But you can make your project even more special with some creative finishing touches and display ideas.
Consider adding decorative trims like lace, small bows, or ribbon loops to hang the eggs on an Easter tree. Glue or hand-stitch them carefully so they stay secure and add an elegant detail.
If you enjoy embroidery, you could add small words like “Joy” or “Spring” on some of the egg panels. Embroidered flowers, hearts, or initials also make lovely, personalized decorations.
For a playful touch, sew small felt shapes like bunnies or chicks onto the eggs before assembling them. These little details turn simple fabric eggs into keepsake pieces that family and friends will cherish.
You can also make a set of eggs in coordinating colors to create a centerpiece bowl display. Mix patterns like polka dots, florals, and stripes to keep it visually interesting while still cohesive.
Another idea from this Fabric Easter Eggs Beginner Sewing Tutorial is to use scented filling. Add a few drops of lavender oil to the stuffing so your eggs release a light fragrance—a perfect addition to your Easter table or gift baskets.
Finally, take pride in your handmade decorations! Whether you make a single egg or dozens, each one reflects your creativity and adds warmth to your Easter celebrations.
This Fabric Easter Eggs Beginner Sewing Tutorial has shown how easy and rewarding it can be to create beautiful fabric Easter eggs. By choosing colorful fabrics, carefully cutting and sewing each piece, and adding creative touches, you can make unique holiday decorations that bring joy year after year.
Remember to experiment with colors, textures, and sizes to make your eggs truly yours. Even beginners can achieve charming results by following the clear steps and using the right tools and techniques.
Sewing these eggs is not just about crafting; it’s about adding handmade warmth and love to your home during a special time of year. Share your creations, give them as gifts, or keep them as a family tradition.
If you enjoyed this Fabric Easter Eggs Beginner Sewing Tutorial, why not share it with friends or on social media? Your creativity might inspire someone else to start sewing too!
Thank you for reading, and happy Easter sewing! Let us know if you’d like more tutorials, patterns, or sewing tips—we’d love to help you create more beautiful projects.


