
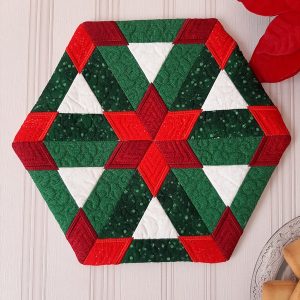
Spiral Sunburst Quilt Pattern
If you love sewing, creating something practical yet stylish is always rewarding — and nothing fits that description better than a Reversible Bag Tutorial. From weekend shopping trips to storing your craft supplies, a reversible bag is versatile, eco-friendly, and fun to make. This guide is designed especially for beginners and experienced sewists who want to craft a project that looks professionally finished.
The beauty of a Reversible Bag Tutorial lies in its simplicity: you get two looks in one, simply by flipping the bag inside out. It’s also a fantastic way to play with your favorite fabrics and mix patterns, giving you endless creative freedom. Plus, it makes a thoughtful handmade gift that anyone would love.
In this article, you’ll learn step-by-step how to create your own reversible bag, complete with the exact fabric cuts and measurements needed. We’ll guide you through fabric selection, cutting, sewing, and finishing touches, ensuring your Reversible Bag Tutorial journey is enjoyable and successful.

Selecting the right fabric is the foundation of a perfect Reversible Bag Tutorial. Go for medium-weight cotton, canvas, or linen — fabrics that are durable yet flexible enough to turn easily. Consider mixing prints: floral on one side and geometric on the other for a modern twist.
For this Reversible Bag Tutorial, you’ll need to cut the following fabric pieces:
Begin by folding your fabrics neatly and ironing out any wrinkles. A crisp fabric makes cutting and sewing easier and helps your bag look clean and professional. Use a rotary cutter and quilting ruler for the most accurate cuts.
Next, label your pieces: outer fabric front and back, lining front and back, and two handles for each side. Keeping your pieces organized is a small step that saves time and confusion later in your Reversible Bag Tutorial.
If you’d like, add interfacing to your outer fabric pieces and handles for extra structure. Cut the interfacing slightly smaller (about ¼ inch or 6 mm inside the edges) to reduce bulk at the seams.
Finally, check all your measurements again before moving on to sewing. Precise cutting ensures your reversible bag aligns perfectly on both sides, giving it a polished finish.
Now comes the fun part of this Reversible Bag Tutorial — bringing your project to life with your sewing machine! Start with the outer fabric pieces. Place them right sides together, pin along the sides and bottom, and stitch using a ½ inch (1.3 cm) seam allowance.
Repeat this step with the lining fabric pieces. Remember to backstitch at the beginning and end of each seam to secure your stitches. Consistent seam allowances are key for a professional-looking reversible bag.
Next, create a flat bottom for your bag by boxing the corners. To do this, pinch each bottom corner of the outer bag so the side seam aligns with the bottom seam, forming a triangle. Measure 2″ (5 cm) from the tip and draw a line straight across, then sew along this line. Trim off the excess fabric about ¼ inch (6 mm) from the seam. Repeat on the other corner and on both corners of the lining.
Turn the outer bag right side out and leave the lining wrong side out. Press your seams carefully — especially the boxed corners — to help your bag hold its shape.
If you added interfacing earlier, you’ll notice your bag stands better on its own. This step in the Reversible Bag Tutorial really makes a difference if you plan to carry heavier items.
Now set the bag body aside while you work on the handles, the finishing touch that ties your reversible bag together.
Handles are a crucial part of this Reversible Bag Tutorial, balancing style and function. Take two handle strips and place them right sides together. Sew along both long edges with a ½ inch seam allowance. Repeat for the second handle.
Turn each handle right side out using a safety pin or turning tool. Press them flat, making sure the seams are on the edges. Topstitch about ¼ inch (6 mm) from both long edges for durability and a neat look.
Now, position the handles on the outer fabric: measure 3 inches (7.5 cm) from each side seam and pin the ends of one handle to the top edge, ensuring the loop is not twisted. Repeat for the other handle on the opposite side.
Do the same for the lining fabric, aligning the handles to mirror the outer bag. This step ensures your bag looks consistent and balanced, whichever side is on display.
With handles pinned, place the outer bag (right side out) inside the lining bag (wrong side out). The right sides of both bags should face each other. Align the top edges and pin all around.
Sew around the entire top edge using a ½ inch seam allowance, leaving a 3-inch (7.5 cm) opening between the handles for turning.
Almost done with your Reversible Bag Tutorial! Carefully pull the entire bag through the opening so the right sides of both the outer and lining fabrics show. Push out the corners gently and smooth the seams with your fingers.
Tuck in the raw edges of the opening and press the top edge of the bag flat. To close the turning gap and add strength, topstitch around the entire top edge about ¼ inch (6 mm) from the edge.
Check the handles to ensure they’re secure and evenly positioned. If desired, you can add an extra row of topstitching on the handles for reinforcement, especially if you plan to carry heavier items.
Now flip your bag inside out to test its reversible magic! Both sides should look clean, with neat seams and boxed corners that help the bag stand.
Take a moment to admire your work: you’ve completed your very own Reversible Bag Tutorial, and your handmade creation is ready to use or gift.
Remember to wash and press your bag gently before first use, and avoid overloading it to keep the shape looking fresh and beautiful.
What size is the finished reversible bag?
The finished bag measures approximately 14″ (35.5 cm) wide by 14″ (35.5 cm) tall, excluding the handles.
Can I make the reversible bag larger or smaller?
Absolutely! Adjust the rectangle sizes in this Reversible Bag Tutorial to your preferred dimensions, keeping the same construction steps.
What fabrics work best?
Medium-weight cotton, canvas, or linen are ideal as they provide structure but remain easy to sew.
Do I really need interfacing?
Interfacing is optional, but it gives the bag extra strength and helps it stand up better.
Can beginners follow this Reversible Bag Tutorial?
Yes! This is a great first project that teaches basic cutting, boxing corners, and handle attachment.
Can I add pockets?
Definitely! Sew pockets onto the lining pieces before assembling for added functionality.
We hope this Reversible Bag Tutorial inspires you to create your own stylish, practical accessory. Handmade projects like this are not only useful but also deeply satisfying to craft. With simple steps, precise fabric cuts, and a bit of creativity, your reversible bag becomes a unique reflection of your style.
Did you enjoy this guide? Share your finished bags or ideas for other projects in the comments! Your feedback helps us improve future tutorials and keeps the creative community thriving. Happy sewing!


