
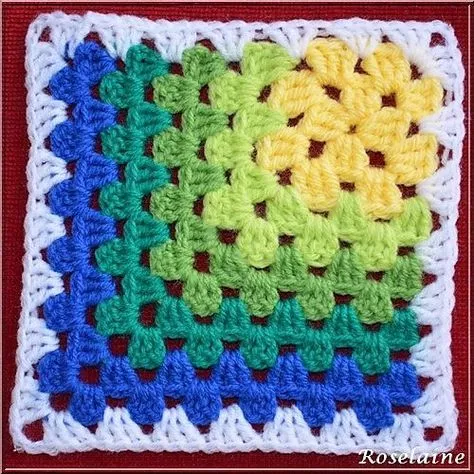
Spiral Sunburst Quilt Pattern
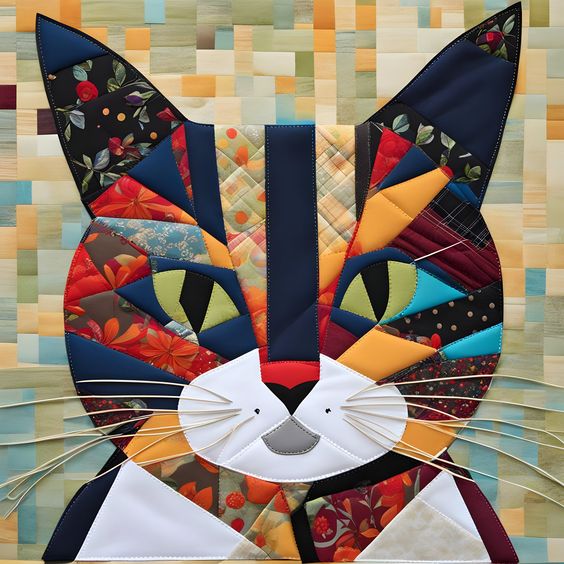
The Cat patchwork quilt is more than just a warm covering—it’s a creative expression of love for our feline friends, stitched together with care and imagination. Bringing together the charm of patchwork and the timeless appeal of cats, this project offers endless possibilities for customization and creativity. Whether you’re making it for yourself, as a heartfelt gift, or even to sell, a Cat patchwork quilt can turn into a family heirloom that celebrates craftsmanship and character.
Creating a Cat patchwork quilt isn’t only about sewing; it’s about storytelling. Each fabric square and triangle can reflect a part of your life, your cat’s personality, or the cozy corners of your home. The joy of seeing your quilt take shape—block by block—is immensely satisfying, and it brings a unique handmade touch to any bedroom or living room.
In this article, you’ll discover everything you need to get started: from choosing the right fabrics and understanding the cuts to sewing the quilt top, assembling the layers, and adding final touches. Follow this detailed guide to craft your very own Cat patchwork quilt, even if you’re a beginner.
The first step in making a beautiful Cat patchwork quilt is choosing the fabrics that will bring your design to life. Look for cotton fabrics in soft pastels, vibrant prints, or even cat-themed patterns that reflect your personal style. Combining solids with prints often gives a balanced look to the quilt.
Select at least six different fabrics: three with cat prints and three in solid complementary colors. These will be cut and arranged into a harmonious design. Choose fabrics of similar weight and quality to avoid uneven seams during sewing. Wash and iron all fabrics before cutting to prevent shrinking later.
Here are the cuts and measurements you’ll need for a small lap-size Cat patchwork quilt (approx. 40″ x 60″):
Before sewing, plan your layout by laying out the pieces on a large table or floor. This helps visualize the overall design and keeps the Cat patchwork quilt balanced and symmetrical.
Once the pieces are arranged, label them in rows so you remember the order. This preparation step ensures your sewing process goes smoothly and your Cat patchwork quilt comes together beautifully.
Lastly, make sure your sewing machine is ready: use a new needle, have neutral thread prepared, and keep your ironing board nearby for pressing seams as you go.
Start by sewing the squares together into rows. Take the first square and the next in the row, place them right sides together, and sew along one side with a 1/4″ seam allowance. Continue adding squares until your row is complete.
Press each seam as you finish sewing to keep the quilt top flat. Alternating cat print squares with solid squares helps highlight the playful design of the Cat patchwork quilt. Repeat this for each row until you have all rows sewn.
Next, sew the rectangles into blocks. Pair a cat print rectangle with a solid rectangle, right sides together, and stitch along the long side. Press seams open or to one side. These blocks add variety to the design and make the quilt look more dynamic.
Now it’s time to join the rows. Place two rows right sides together, align the seams carefully, and sew them together with a 1/4″ seam allowance. Continue until all rows and rectangle blocks are attached, forming the quilt top.
After joining, add the border strips around the edges. Sew the shorter strips (40″) to the top and bottom, then attach the longer strips (60″) to the sides. Press all seams again to keep the quilt top smooth.
By this point, your Cat patchwork quilt top should be complete. Take a moment to admire it and make any necessary adjustments before moving on to quilting and finishing.
Finally, trim any uneven edges, so your quilt layers will line up perfectly in the next steps. The cleaner the edges, the easier it is to attach the quilt back and batting.
To assemble the quilt, you’ll need batting and backing fabric at least 2″ larger on each side than the quilt top. For a 40″ x 60″ quilt top, cut batting and backing about 44″ x 64″.
Lay the backing fabric right side down on a flat surface. Place the batting on top, then the quilt top right side up. Smooth out any wrinkles and secure all layers together with quilting pins or safety pins.
You can quilt by hand or machine. A simple straight-line quilting method works beautifully for a Cat patchwork quilt. Using your machine’s walking foot, sew straight lines about 2″ apart, running horizontally and vertically across the quilt.
As you sew, check often to avoid puckers and keep the layers aligned. Begin quilting from the center and move outward to keep the quilt balanced.
After quilting, trim the batting and backing fabric to match the quilt top’s edges. This step prepares the quilt for binding, which finishes and protects the edges.
To make the binding, sew the 2.5″ strips end-to-end to create one long strip. Fold it in half lengthwise, wrong sides together, and press. Align the raw edges with the quilt’s edge and sew around the quilt, mitering the corners.
Fold the binding over to the back and hand-stitch it in place using an invisible stitch. Take your time here; a neat binding gives your Cat patchwork quilt a professional look.
Finally, give your finished quilt a gentle wash and dry to soften it and make it ready for cozy use or gifting.
One of the joys of quilting is adding your unique touches. For a Cat patchwork quilt, consider using embroidery to outline some cat shapes on the solid squares. This adds texture and a personal signature to your quilt.
Appliqué is another creative option. Cut small cat silhouettes from fabric scraps and appliqué them onto the quilt top before quilting. Use a blanket stitch or zigzag stitch to secure them.
You could also add a special label to the back, noting the date and the quilt’s story. Labels transform quilts into keepsakes, reminding future generations of the maker’s love and effort.
Color choice plays a big role in the quilt’s mood. Soft pastels create a gentle, vintage look, while bright colors give a modern, playful feel. Choose what feels right for the quilt’s purpose.
If you’re gifting the quilt, think about the recipient’s favorite colors or cats to personalize the design even more. Handmade gifts become treasured when they reflect the personality of the giver and receiver.
Lastly, remember that perfection isn’t the goal. Every stitch, even the crooked ones, adds character to your Cat patchwork quilt. The beauty lies in its handmade nature and the story it tells.
Making a Cat patchwork quilt is a journey of creativity, patience, and love. From choosing fabrics and cutting precise pieces to sewing rows and adding your personal touches, each step is rewarding and relaxing.
Whether you keep it for yourself, gift it to a loved one, or pass it down as an heirloom, your Cat patchwork quilt will carry warmth and personality that only handmade items can offer.
Ready to start? Gather your fabrics, prepare your sewing machine, and let your creativity guide you. A cozy, charming Cat patchwork quilt awaits—stitched with love, one square at a time.


