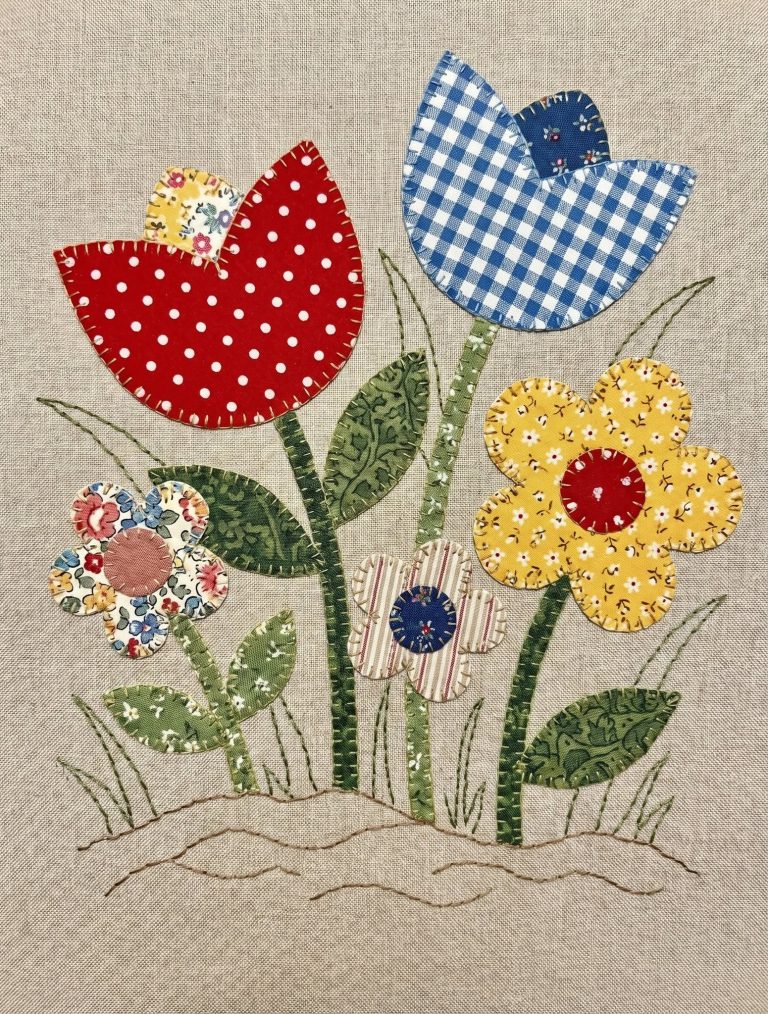
DIY Fabric Flower Applique Pattern
The Cat Quilt Block is an adorable and creative addition to any quilt project, especially for cat lovers and pet enthusiasts. Whether you’re making a baby quilt, a throw for your living room, or a themed wall hanging, this block adds a whimsical and heartwarming touch. This step-by-step guide will walk you through the entire process of creating your own Cat Quilt Block, from fabric cutting to final assembly, ensuring your quilt is both charming and professionally finished.
Using a Cat Quilt Block pattern allows you to combine your love for quilting with your passion for feline friends. It’s an excellent project for beginners who want to learn basic piecing techniques and also for experienced quilters seeking a playful design element. This block is simple yet visually striking, and it can be easily incorporated into larger quilt patterns or used on its own.
In this article, you’ll find detailed instructions, accurate fabric cuts and measurements, and optimized content that aligns with Google AdSense policies. We’ll also include key SEO techniques to help fellow quilters discover this valuable resource. Let’s dive into the creative process of sewing your very own Cat Quilt Block.

To start your Cat Quilt Block, it’s essential to select fabrics that complement each other while emphasizing the cat design. Choose a fabric for the cat’s body, a contrasting fabric for the background, and another for the ears or facial features if desired. Solids work well for clean shapes, but patterned fabrics can add a whimsical twist.
For one Cat Quilt Block (finished size: 10.5” x 10.5”), you’ll need the following fabric cuts:
In addition to your fabrics, gather your basic quilting tools. You’ll need a rotary cutter, a cutting mat, quilting ruler, sewing machine, iron, and thread that matches your fabric. A quarter-inch presser foot will help keep your seams accurate, which is important for piecing the block correctly.
Make sure your fabric is well-pressed before cutting. Accurate cuts will ensure a clean, professional look when the block is assembled. Use starch if needed to keep pieces crisp. Lay out your fabric pieces to visualize how they will come together to form the cat shape.
When choosing colors, think about contrast. The Cat Quilt Block design will pop more if the cat fabric contrasts with the background. Consider using lighter tones for the background and darker or patterned fabric for the cat for a standout look.
You can personalize your Cat Quilt Block by adding small embellishments like embroidered eyes, a nose, or even a tiny bowtie. These details can bring the block to life, making it ideal for children’s quilts or themed designs.
Once your pieces are ready, organize them on your work surface according to the block layout. Taking the time to lay everything out ensures fewer errors during assembly and helps you envision the final look of your Cat Quilt Block.
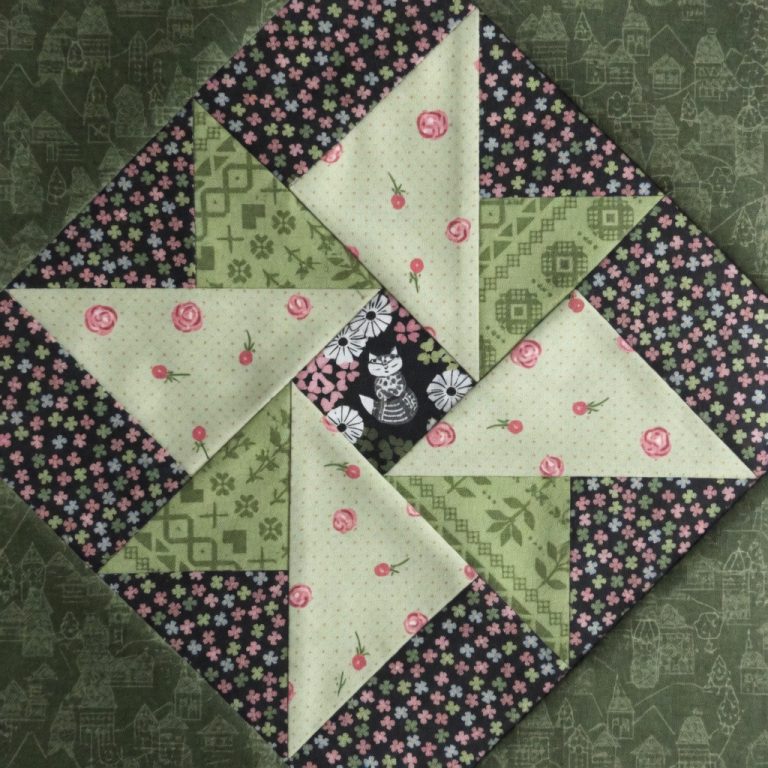
Let’s begin assembling the Cat Quilt Block step by step. Begin with the cat’s head, which is made from the 4.5” x 4.5” square and the two 1.5” x 1.5” ear squares. You’ll be using the “snowball” technique to create ears at the top corners.
Place one ear square on the top left corner of the cat head square, right sides together. Draw a diagonal line from corner to corner and stitch on the line. Trim 1/4” away from the seam and press the corner open. Repeat this step with the second ear square on the top right corner of the head square.
Next, move on to the body. Take the 5.5” x 5.5” square for the cat’s body and attach the two 2.5” x 2.5” squares using the same snowball corner method, this time on the top two corners. These pieces will form the shoulders or angled body of the cat.
Now assemble the background. Sew the two 3.5” x 3.5” background squares to each side of the cat head unit. Press the seams open or to the side, based on your preference. Then, attach the two 2.5” x 4.5” background rectangles to the sides of the cat body piece.
Align and sew the cat head unit to the top of the body unit. This step will give you the full cat shape. Be sure the edges line up and the seams nest properly to maintain clean lines and alignment.
Finally, attach the 4.5” x 5.5” background rectangle to the bottom of the body to complete the Cat Quilt Block. Press the block thoroughly and trim it to 10.5” x 10.5” if needed. Your charming cat block is now ready to be part of a larger quilt project or used on its own.
Repeat this process if you’re making multiple blocks. Each Cat Quilt Block can be unique by changing the fabric for each cat, making your quilt a delightful collection of feline personalities.
Now that you’ve created one Cat Quilt Block, it’s time to explore how to use it in larger quilt patterns. One simple idea is to repeat the block in a grid layout. Set the blocks with sashing in between, or place them directly next to each other for a patchwork look.
For a modern twist, alternate the direction of each Cat Quilt Block so the cats are facing different directions. This adds movement and interest to the quilt top and can be a fun design choice for kids’ quilts or themed decor.
You can also experiment with background fabrics. Instead of a single background fabric throughout the quilt, try using a low-volume print or a scrappy background look. This adds texture and depth while still highlighting the cat figures.
Another great variation is to frame each Cat Quilt Block with borders or use cornerstones. A small border around each block can make the cat stand out more, and using themed cornerstones (like fish or paw prints) can tie your quilt theme together.
To create a wall hanging or table runner, simply reduce the number of blocks and add borders for a neat finish. The Cat Quilt Block is adaptable and works well in both large and small-scale projects.
If you’re feeling ambitious, combine your Cat Quilt Block with other animal blocks, such as dogs, birds, or bunnies, for a fun pet-themed quilt. You can find or design additional blocks that match the same size (10.5” x 10.5”) and create a one-of-a-kind quilt full of personality.
After assembling your Cat Quilt Block, consider how you want to finish it. You can turn it into a mini quilt, use it as part of a larger quilt top, or frame it for display. The versatility of this block makes it a favorite for many types of quilting projects.
If you want to add extra flair, consider quilting around the shape of the cat to emphasize its silhouette. Echo quilting, straight-line quilting, or free-motion stitching can all bring dimension and texture to your block.
Use embroidery to add facial features such as eyes, nose, and whiskers. You can also add a small fabric bowtie, collar, or a stitched name if you’re making the quilt for a pet owner or child. These little details make the Cat Quilt Block even more special.
If you’re working on a themed quilt, you can color-code your cats. For example, a rainbow quilt could include cats in every color, while a Halloween quilt could feature black cats with spooky backgrounds. Let your imagination guide your fabric choices.
Don’t forget to label your quilt! Whether it’s a gift or a personal project, add a quilt label with your name, the date, and the occasion. You can stitch it by hand or machine, and it adds a nice finishing touch.
Finally, share your Cat Quilt Block online. Posting photos of your progress or finished block on quilting forums or social media is a great way to connect with other quilters and inspire creativity. Use hashtags like #CatQuiltBlock or #QuiltPatterns to reach a broader audience.
The Cat Quilt Block is more than just a project—it’s an opportunity to express your creativity, showcase your sewing skills, and create something that brings joy. With clear instructions, the right materials, and a little bit of inspiration, your cat block quilt will be a masterpiece in no time.
