
Spiral Sunburst Quilt Pattern
The Endless Chain Quilt Block is a captivating and vintage-inspired design that continues to charm quilters with its dynamic movement and illusion of interlocking shapes. This pattern, while visually complex, is surprisingly manageable to sew and delivers a stunning result that feels both traditional and modern. Whether you’re new to quilting or a seasoned pro, the Endless Chain Quilt Block is an excellent project to explore your piecing skills and create an eye-catching quilt.
One of the key attractions of the Endless Chain Quilt Block is its ability to create visual continuity. The repeated design elements mimic links in a chain, producing a flowing and seamless effect across the quilt top. When done with a thoughtful choice of fabrics, it can produce a striking play of contrast and color, giving depth and movement to the overall design.
In this article, you’ll find a detailed step-by-step guide on how to make your own Endless Chain Quilt Block, including precise fabric cutting measurements, layout tips, and sewing instructions. Whether you’re designing a full quilt or just testing a block, this guide will walk you through every stage with clear instructions, all while staying fully compliant with Google AdSense policies and SEO best practices.
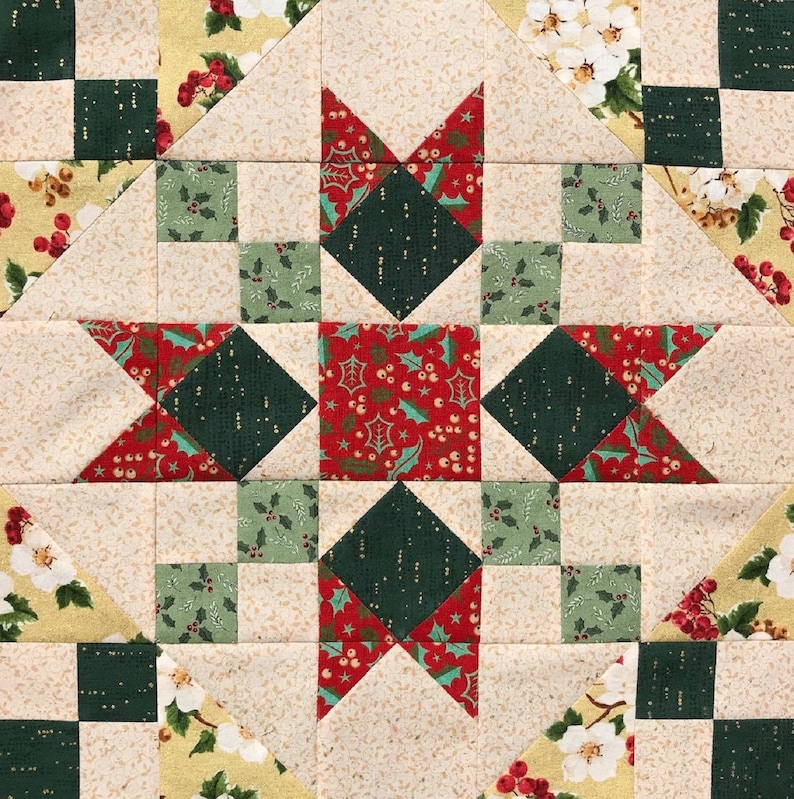
The Endless Chain Quilt Block is made of geometric shapes, primarily rectangles and parallelograms, which are arranged in a way that they form the illusion of a continuous chain. This clever design is known for its optical movement, which works beautifully in both scrappy and color-coordinated quilts.
The original structure of the block uses a diagonal layout, which allows the “chain” effect to flow naturally across the quilt. By alternating values between light and dark fabrics, you create a ribbon-like trail that dances across the surface of your quilt. This contrast is essential to give the illusion of interwoven links.
Choosing your fabrics is the first step. You’ll need a combination of light, medium, and dark fabrics. This will help each “link” in the chain pop visually. Solids, tone-on-tones, or small prints all work well for this purpose. Try not to choose large-scale prints, as the intricate piecing might lose their definition.
Each Endless Chain Quilt Block is composed of four triangular units that come together in a diamond-like form. The block finishes at approximately 8″ x 8″, but you can adjust the size depending on your final quilt layout or the desired scale of your pattern.
When assembling the block, accuracy in cutting and piecing is crucial. This pattern requires precise angles and straight seams, so it’s ideal for those who want to sharpen their basic quilting skills. With the right approach, even beginners can achieve beautiful results.
Finally, the Endless Chain Quilt Block is a great stash-buster! You can mix and match leftover strips or coordinate specific color palettes for a more cohesive look. Either way, the results are always impressive and full of movement.
Before you start piecing your Endless Chain Quilt Block, it’s essential to prepare your fabrics and cut them with accuracy. This ensures that each piece aligns perfectly and that your chain illusion appears smooth and consistent throughout your quilt.
To make one Endless Chain Quilt Block, you will need the following fabric pieces:
Cutting parallelograms is slightly different than cutting regular rectangles. To achieve the proper angle, you can use a quilting ruler with a 45-degree line marked. Lay your strip of fabric and align the ruler’s 45° guide, then cut. You’ll need to mirror the shapes as well—so be sure to cut one set leaning left and one leaning right.
Start with the rectangles: cut the light and dark fabric strips at 2.5” wide and subcut them into 6.5” lengths. These will be the foundation of the chain effect. Having both light and dark pieces is essential to give the chain that back-and-forth weaving appearance.
The 2.5” x 2.5” background squares will be sewn into the corners of the rectangle units using the flip-and-sew method, which helps form the illusion of the links turning. You can use a variety of background prints as long as they read as one color.
Be sure to press your fabric before cutting to avoid distortion, and use a sharp rotary cutter and ruler to ensure clean, straight edges. Precision in cutting is key to the final success of the Endless Chain Quilt Block pattern.
Organize your cut pieces in groups by color and shape. This helps speed up the piecing process and keeps your workspace tidy. Labeling small trays or sections on your table can help keep the pieces in order.
Now that all your pieces are cut and ready, it’s time to start sewing your Endless Chain Quilt Block. This block involves diagonal seams, corner squares, and matching angles, but with careful piecing, it comes together smoothly.
Start by creating the corner-flip rectangles. Take your light and dark rectangles and sew a 2.5” background square to one corner, right sides together. Stitch diagonally across the square from corner to corner, then trim ¼” away from the seam and press the corner open.
Repeat this process on the opposite corner of the same rectangle, but in the reverse direction to mirror the shape. Once you complete this for all four rectangles, you’ll have angled ends that form part of the chain shape.
Now take the parallelograms and align them with the short edge of each flipped rectangle. You’ll sew these together along the diagonal edge, matching angles. Be cautious with stretching, as bias edges can distort during sewing.
Join a light rectangle unit to a medium parallelogram, and then do the same for the dark rectangle units. You should now have four subunits with alternating colors and diagonal seams that form a V shape when aligned.
Pair two matching units (one light + medium, and one dark + medium) and sew them together to form a square block. Match the center seams carefully and pin before stitching. Press the seams open or to one side for flat joining.
Repeat for all blocks you plan to make. Once completed, you’ll see the beautiful flow of the Endless Chain Quilt Block emerge as the blocks are laid next to each other. The illusion of a continuous, interwoven chain will come to life.
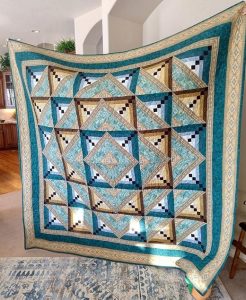
After making several Endless Chain Quilt Block units, the fun part begins—assembling them into a finished quilt top. This block benefits from consistent layout and thoughtful color placement to maximize the chain effect.
Lay out all your completed blocks on a design wall or floor, adjusting the rotation of each block to maintain the continuous chain pattern. You may need to alternate blocks or rotate them to keep the illusion flowing across rows.
Once you’re happy with the layout, begin sewing the blocks together in rows. Pin carefully at the seams and double-check orientation before stitching. Press seams as you go, either open or to alternating sides to reduce bulk.
Border choices are flexible with this pattern. A solid border can help frame the busy chain pattern, or you can use a scrappy border for a more playful finish. Consider adding cornerstones or sashing for more definition.
When choosing a quilting design, simple echo quilting or diagonal lines can help emphasize the direction and flow of the chain. You might also opt for a free-motion design that contrasts the structure of the pieced block.
Bind your quilt with a bold binding fabric that complements the chain colors. A stripe or diagonal print can add a subtle framing effect. Don’t forget to add a label with the quilt’s name and your information.
Whether you make a full quilt or just a few blocks for a sampler, the Endless Chain Quilt Block offers a rewarding experience and a visually dynamic result that never goes out of style.
What size does the Endless Chain Quilt Block finish at?
The standard block finishes at 8″ x 8″, but you can adjust the measurements for smaller or larger versions.
Is the Endless Chain Quilt Block beginner-friendly?
Yes, while it involves angled piecing, beginners with basic sewing skills can succeed by following step-by-step instructions.
How do I cut the parallelograms correctly?
Use a quilting ruler with a 45° angle guide. Remember to cut mirrored shapes: one leaning left, one right.
Can I use scraps to make this block?
Absolutely! The Endless Chain Quilt Block is perfect for using leftover strips and squares from previous projects.
What quilting designs go best with this pattern?
Echo quilting or diagonal grid lines work well. They enhance the chain illusion without overwhelming the piecing.
How many blocks do I need for a full quilt?
That depends on your desired size. A lap quilt might use 30–40 blocks, while a full-size quilt could require 80 or more.
The Endless Chain Quilt Block is a timeless and visually striking pattern that can bring movement and sophistication to any quilt. With its clever use of angles and color contrast, this block delivers far more than the sum of its parts. Whether you’re aiming for a full quilt or just a few blocks to experiment with, mastering this design will surely enrich your quilting journey. Have you tried making an Endless Chain Quilt Block? Share your experience or tips in the comments—we’d love to hear from you!


