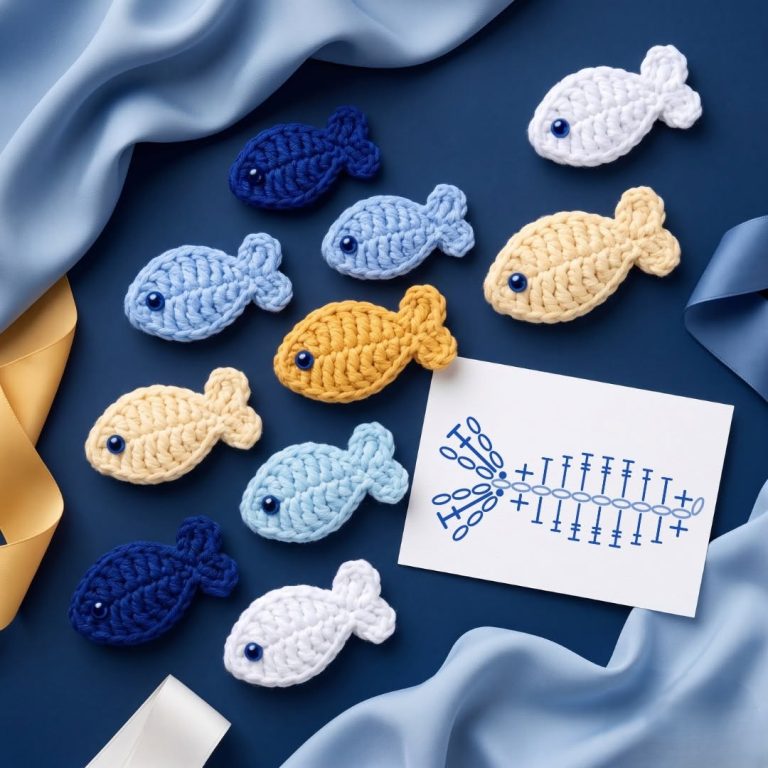
Crochet Easy Mini Fish Pattern
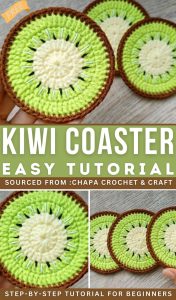
If you’re looking for a fun and festive way to add a handmade touch to your holiday décor, this crochet pattern for Christmas coasters is the perfect project. These charming coasters make wonderful gifts, ideal accents for your holiday table, and cozy craft projects for a relaxing winter day. With just a bit of yarn and your favorite crochet hook, you can create cheerful coasters that bring warmth and joy to your home.
This crochet pattern for Christmas coasters is beginner-friendly and requires only basic stitches, making it an excellent choice whether you’re just starting or you’re a seasoned crocheter looking for a quick seasonal project. In this article, you’ll find a detailed step-by-step guide, including exact measurements and materials, so you can confidently follow along and enjoy the process.
To help you stay organized and creative, we’ve divided the article into four essential sections. We’ll go over the materials and measurements, the complete pattern instructions, ideas for customizing your coasters, and tips for gifting and displaying your handmade creations. Let’s get started with this joyful crochet pattern for Christmas coasters that will surely become a holiday favorite.

Before diving into the crochet pattern for Christmas coasters, it’s important to gather all necessary materials and understand the required cuts and measurements. This preparation step will ensure a smooth and enjoyable crafting experience from start to finish.
For each coaster, you’ll need a medium-weight worsted yarn in festive colors like red, green, white, and gold. Cotton yarn is preferred as it is absorbent and easy to work with. Choose colors that match your Christmas décor or create a cheerful mix for variety. You’ll also need a 4.0 mm (G-6) crochet hook.
Each coaster in this crochet pattern for Christmas coasters will measure approximately 4.5 inches (11.5 cm) in diameter when finished. If you prefer square coasters, you can adjust the shape in the customization section later. To keep the measurements consistent, consider using a stitch marker to mark the beginning of your rounds.
You’ll also need scissors, a tapestry needle for weaving in ends, and optional embellishments such as tiny bells, beads, or ribbon. These extras can add a festive sparkle to your coasters, especially if you plan to give them as gifts or use them for holiday parties.
Cutting fabric is not required unless you want to back your crochet with a piece of felt or fabric for additional support. If so, cut a 5-inch (12.5 cm) square or circle of fabric or felt to match each coaster’s shape. Use a hot glue gun or fabric glue to adhere the fabric backing once the coaster is complete and dry.
Now that your materials are ready, you’re all set to dive into the crochet pattern for Christmas coasters and bring some handmade magic into your holiday celebrations.
This crochet pattern for Christmas coasters is worked in the round and consists of simple stitches: chain (ch), single crochet (sc), double crochet (dc), and slip stitch (sl st). We’ll create a festive round coaster with a simple snowflake-inspired design. Follow this guide step by step.
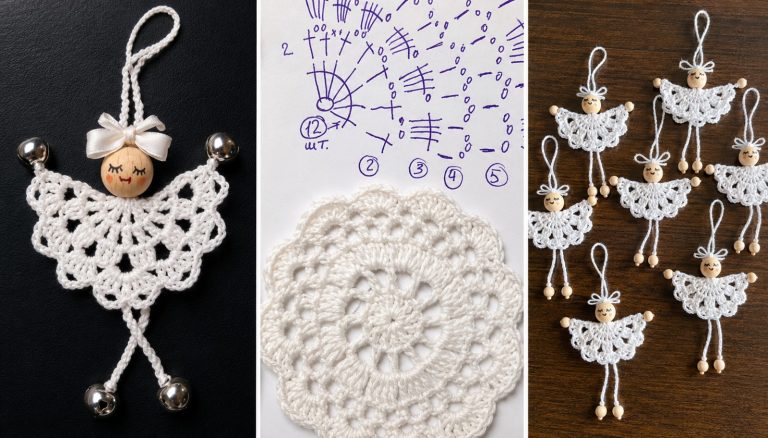
Round 1: Start with a magic ring. Chain 2 (does not count as a stitch), and work 12 double crochets (dc) into the ring. Pull the ring closed and join with a slip stitch (sl st) to the first dc. (12 sts)
Round 2: Chain 2. Work 2 dc in each stitch around. Join with a sl st. You should have 24 stitches. This round expands your circle and builds the coaster’s base.
Round 3: Chain 1. 1 sc in next stitch, 2 sc in next stitch — repeat from * to * around. Join with a sl st. (36 sts) This round creates a more defined and stable shape.
Round 4: Change color if desired. Chain 3. Skip one stitch, dc in next stitch, ch 1 — repeat around. Join with a sl st. This round forms small spaces that resemble snowflake holes and adds texture.
Round 5: Chain 1. Work 1 sc in each stitch and chain space around. Join with sl st. (36 sts) This closes up the holes slightly while keeping the design lacy and decorative.
Finishing: Fasten off and weave in all ends using your tapestry needle. Block your coaster to shape by gently wetting it and pinning it into shape on a soft surface. Let it dry completely.
You’ve now completed one full crochet pattern for Christmas coasters! Repeat the process to create as many coasters as you need. Make a set of four, six, or even eight to use for holiday dinners or to give as a gift set.
One of the joys of working with a crochet pattern for Christmas coasters is the freedom to personalize it to match your style or theme. Let’s explore creative ways to make your coasters unique and festive.
Try using glitter yarn or metallic thread to give your coasters a sparkling effect. Gold or silver yarns look beautiful when used as edging or worked into a star or snowflake design in the center. These small touches elevate the entire look.
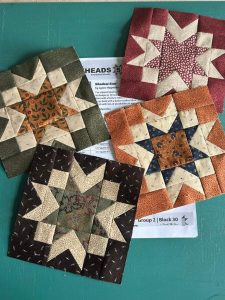
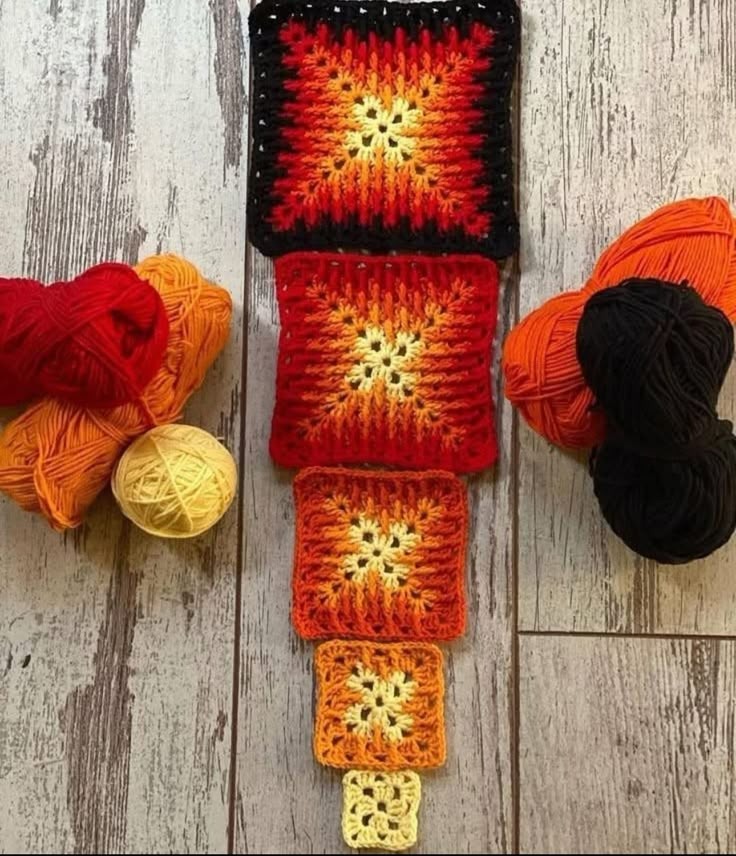
You can change the base shape of the coaster. Instead of a circle, try making a granny square with Christmas colors. Begin with red in the center, followed by white, then green on the outer edges. The same stitch count and measurements will apply, but you’ll work in square rows instead of rounds.
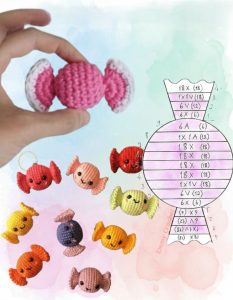
Add appliqués like tiny holly leaves, stars, or miniature Christmas trees to the center of your coaster using leftover yarn. These add dimension and charm, turning each coaster into a mini work of art.
Use embroidery thread to stitch messages like “Joy,” “Peace,” or “Noel” across the top of the coaster after crocheting it. This adds a handmade touch and makes each piece extra meaningful for holiday gifting.
If you’d like to turn the coaster into an ornament or hanging decoration, simply crochet a loop of 15 chains at the top after finishing the last round. You can hang it on the tree or use it to decorate wrapped gifts.
Lastly, consider using this crochet pattern for Christmas coasters as a base for other projects—such as placemats, garlands, or mug rugs. By adjusting the size and quantity, you can turn this simple pattern into a complete set of handmade holiday décor.
Handmade coasters using this crochet pattern for Christmas coasters make wonderful presents for friends, family, coworkers, and neighbors. Their charm and utility are sure to be appreciated during the holiday season.
Package a set of four coasters in a small kraft paper box tied with twine and a sprig of holly or pine. Add a handmade tag that says, “Crocheted with Love.” This simple yet beautiful presentation makes the gift extra special and memorable.
Pair the coaster set with a festive mug and a packet of hot cocoa or tea. Wrap them together in cellophane and tie with a ribbon. This cozy, themed gift is ideal for teachers, coworkers, or your holiday hostess.
If you’re participating in a holiday craft fair or market, offering sets of coasters in different color palettes can attract a wider audience. Label each coaster with the name of the pattern, such as “Candy Cane Coaster” or “Snowflake Sparkle.”
Personalize each coaster by embroidering initials or short names on the back using a contrasting yarn color. This makes each piece unique and adds a thoughtful touch to your holiday gifts.
Don’t forget to add care instructions when gifting. Let recipients know they can spot clean the coasters with mild soap and air dry flat. Since cotton yarn is durable, your handmade coasters will last through many holiday seasons.
By following this crochet pattern for Christmas coasters, you’re not just creating decorations—you’re making memories. Whether gifted, sold, or used in your own home, these coasters add handmade charm that warms every heart during the holidays.
Creating your own crochet pattern for Christmas coasters is a delightful and rewarding project. With simple stitches, festive colors, and a little creativity, you can transform yarn into beautiful and practical holiday decorations or heartfelt gifts. This pattern is perfect for crocheters of all levels and can be customized in countless ways to reflect your unique holiday spirit.
By following the steps and tips provided in this guide, you’ll master this fun pattern in no time. The finished coasters not only serve a functional purpose but also help create a cozy and festive atmosphere that celebrates the joy of handmade crafts.
So grab your hook, gather your yarn, and start stitching your own crochet pattern for Christmas coasters today. Whether you’re crafting for loved ones or adding charm to your home, each stitch brings a little more warmth to the holiday season.
FAQs
1. What yarn is best for Christmas crochet coasters?
Cotton yarn is ideal for coasters due to its durability and absorbency. Choose festive shades for holiday cheer.
2. Can beginners follow this pattern?
Absolutely. This crochet pattern for Christmas coasters is beginner-friendly and uses basic stitches.
3. How many coasters can I make with one skein?
You can usually make 6–8 coasters from one 100g skein, depending on the pattern size and stitch tightness.
4. Can I wash the coasters?
Yes. Hand wash in cold water and lay flat to dry for best results.
5. Can I sell the coasters I make with this pattern?
Yes, you can sell the finished items. Just avoid copying or reselling the pattern itself.
6. How do I block my coasters for best shape?
Lightly wet the finished coaster, shape it with your hands, and pin it to a soft surface. Let it air dry completely.


