
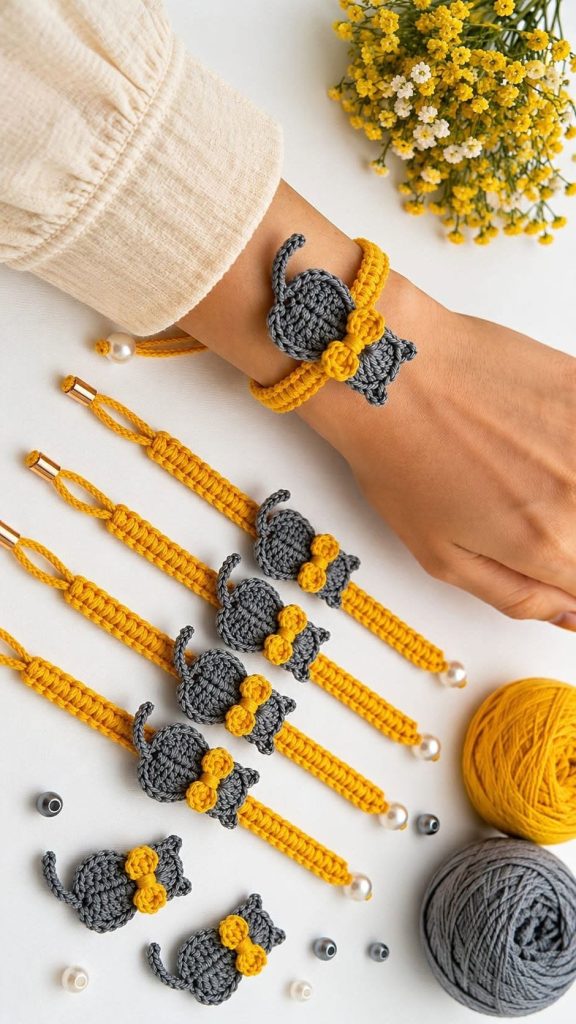
Crochet Cat Hair Ties Pattern
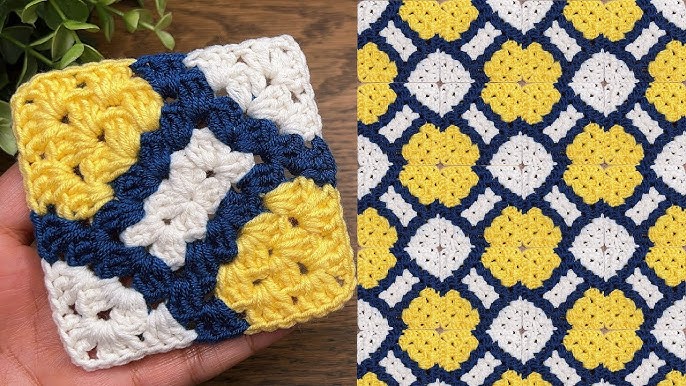
Starting a crochet journey often begins with the Easy and Beautiful Granny Square – Crochet Pattern. This timeless design has been loved by beginners and experts alike for generations. It is a versatile piece that can be used to create blankets, cushions, bags, clothing details, and even wall art. The charm of this square lies in its simplicity while still allowing for endless creativity.
When crocheters talk about granny squares, they usually refer to the traditional pattern of clusters of stitches worked in rounds. What makes the Easy and Beautiful Granny Square – Crochet Pattern so appealing is that it is not only quick to make but also allows you to mix and match colors and textures. With just a few simple stitches, you can bring a project to life that looks unique and handmade with love.
Another reason why the Easy and Beautiful Granny Square – Crochet Pattern is so popular is its accessibility. Even if you are new to crochet, you can master this pattern in no time. With basic knowledge of chains, double crochet, and slip stitches, you are ready to create a piece that can grow into something larger or remain as a stand-alone item. Now, let’s dive deeper into how you can create this classic piece and discover the many possibilities it brings.
The Easy and Beautiful Granny Square – Crochet Pattern starts with learning the essential stitches. Typically, this includes the chain stitch, slip stitch, and double crochet. These form the foundation for building the iconic square shape. Practicing these stitches helps develop muscle memory, making the process smoother and more enjoyable.
Once you master the basics, you can begin your first round of the granny square. It usually starts with a small loop formed from chains, followed by clusters of double crochet stitches. These clusters are separated by chains to create corners, which will later give the square its distinct shape.
Beginners often love this pattern because it feels repetitive yet satisfying. As you add more rounds, you see the square expanding right in front of your eyes. Unlike other crochet projects that take weeks or months, a granny square can be completed in a short time, giving you instant results.
One important tip is to choose yarn that glides easily on your hook, especially if this is your first project. A medium-weight yarn paired with the correct hook size will make the stitches more visible and manageable.
The beauty of this pattern is that mistakes are easy to spot and fix. If you miss a stitch or create an extra chain, you can simply unravel a few stitches and redo them without losing the entire square. This gives beginners the confidence to keep going.
In short, understanding the basics allows you to appreciate the elegance of the Easy and Beautiful Granny Square – Crochet Pattern and sets the stage for endless creative projects.
To create an Easy and Beautiful Granny Square – Crochet Pattern, start with a slip knot on your hook. Chain four stitches and join with a slip stitch to form a ring. This ring is the center of your square.
In the first round, chain three (this counts as your first double crochet), and then make two more double crochets into the ring. Add a chain of two to form the first corner. Repeat the process of three double crochets followed by two chains until you have four groups. Join with a slip stitch to finish the round.
The second round begins in any corner space. Chain three, add two double crochets, chain two for the corner, then add three more double crochets into the same space. Move to the next corner space and repeat the process. This builds the square outward and keeps the shape balanced.
Each additional round works the same way, adding clusters into each space and forming corners with chains. The repetition is soothing, and you can make the square as small or as large as you like.
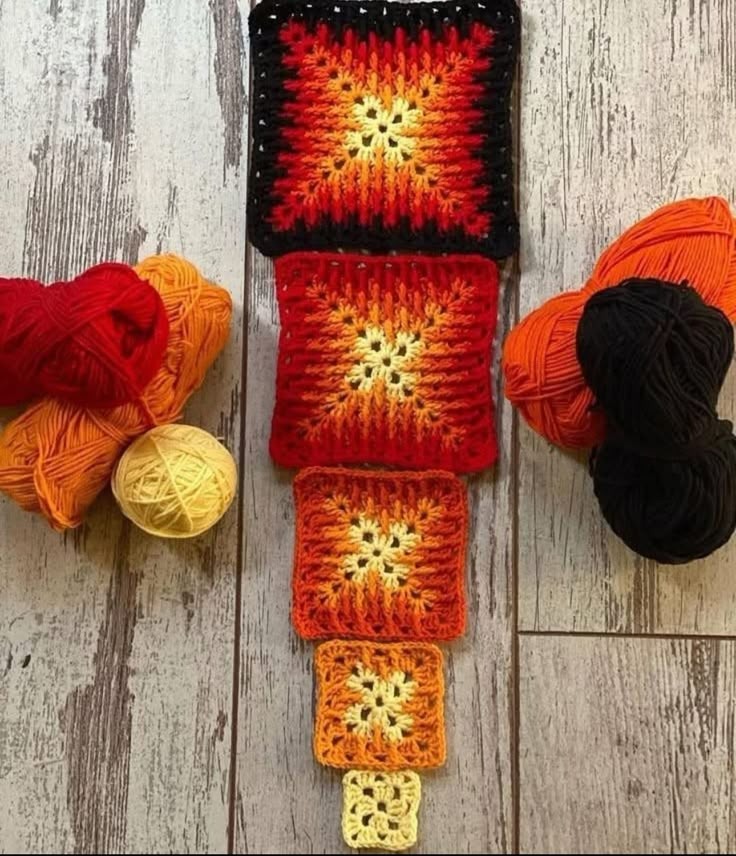
Color changes add a special touch to the Easy and Beautiful Granny Square – Crochet Pattern. You can switch yarn colors at the end of any round to create stripes, checkerboard effects, or vibrant rainbow combinations. The possibilities are endless and allow you to make every square truly one of a kind.
By following these step-by-step instructions, even beginners can quickly see how rewarding this pattern can be. With just a few rounds, you will have a completed granny square ready to be used in a project.
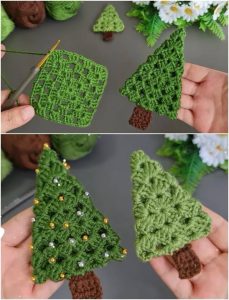
One of the most exciting aspects of the Easy and Beautiful Granny Square – Crochet Pattern is its versatility. You are not limited to making blankets, although those are the most popular projects. Granny squares can be transformed into almost anything you can imagine.
Blankets made from multiple granny squares are cozy and full of personality. Each square can be a different color combination, making the finished piece vibrant and unique. The assembly process is simple, and it gives you the freedom to create a design that reflects your style.
Granny square cushions are another great option. By making two squares and sewing them together, you can easily create a decorative pillow cover. This adds a handmade touch to your home and is an excellent way to use leftover yarn.
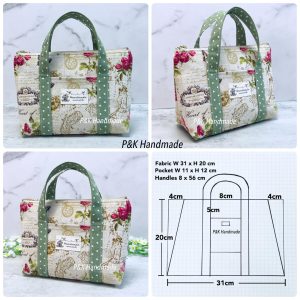
For fashion lovers, granny squares can be turned into bags, vests, cardigans, or even skirts. Crochet fashion has made a big comeback, and the granny square is at the center of this trend. It is not just a nostalgic craft anymore but also a modern design element.
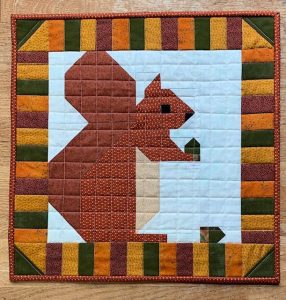
Home décor ideas are endless with this pattern. Coasters, table runners, and even wall hangings can be made using granny squares. Each project allows you to express creativity and add warmth to your surroundings.
What makes all these options possible is the adaptability of the pattern. The Easy and Beautiful Granny Square – Crochet Pattern is like a building block: by putting the pieces together, you can design small or large projects that showcase your skills and personality.
Even though the Easy and Beautiful Granny Square – Crochet Pattern is beginner-friendly, a few tips can make the process smoother and more enjoyable. First, always keep your tension consistent. Uneven tension can make the square look lopsided or too tight. Practice helps you achieve a balance.
Blocking your squares is another important step. Once finished, dampen your squares and pin them into shape. Let them dry flat, and you will have perfect squares ready to be joined together. This gives your project a professional finish.
If you are planning a multi-color project, weave in ends as you go. Leaving them all for the end can feel overwhelming. By weaving them in after each color change, you save time and make the final steps much easier.
Experiment with yarn types. Cotton yarn is great for home décor items like coasters, while acrylic yarn is soft and warm, perfect for blankets. Choosing the right yarn for your project enhances both the look and functionality.
Do not be afraid to play with size. By using a larger hook, you can create oversized granny squares for a bold look. Smaller hooks give you tighter, more delicate results. Both options are valid, depending on your project.
Finally, remember to enjoy the process. Crochet is not only about the finished product but also about the relaxation and joy it brings. The Easy and Beautiful Granny Square – Crochet Pattern is a perfect project to remind you of that.
1. What is the easiest way to start a granny square?
The easiest way is to make a chain ring with four chains and a slip stitch, then begin working double crochet clusters into the ring.
2. Can I make a granny square with any type of yarn?
Yes, you can use any yarn. However, medium-weight yarn is best for beginners because it makes the stitches more visible and easier to manage.
3. How do I change colors in a granny square?
To change colors, finish the round you are working on, cut the yarn, and join a new color with a slip stitch into any corner space.
4. How do I join granny squares together?
You can join them with slip stitches, single crochet, or by sewing them with a tapestry needle. The method depends on the look you prefer.
5. Why do my granny squares curl instead of lying flat?
Curling usually happens because of tight tension or skipped stitches. Try to relax your grip and count carefully to ensure accuracy.
6. How big can a granny square be?
A granny square can be as small or as large as you want. Some projects use single oversized squares for a blanket, while others use hundreds of small ones.
7. Is blocking necessary for granny squares?
Blocking is not required but highly recommended. It helps even out stitches and ensures all your squares are the same size.
8. Can beginners make granny squares easily?
Yes, granny squares are one of the most beginner-friendly crochet projects, making them perfect for learning the basics of crochet.
The Easy and Beautiful Granny Square – Crochet Pattern is more than just a crochet design; it is a timeless craft that connects creativity, relaxation, and practicality. From learning the basic stitches to creating blankets, cushions, or clothing, the granny square offers endless opportunities. With step-by-step instructions, tips, and inspiration, this article has shown you how simple yet powerful this pattern can be.
Now it’s your turn! Try the Easy and Beautiful Granny Square – Crochet Pattern, experiment with colors, and create projects that bring joy to you and others. Share your honest opinion and suggestions—your feedback helps keep this craft alive and inspiring for everyone.

