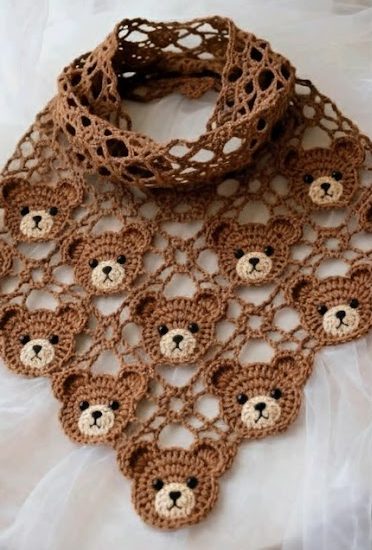
Lace Shawl with Bear Applique Pattern
The Lattice Baby Quilt Tutorial is the perfect project for anyone who loves creating cozy, handmade treasures with a touch of elegance. This pattern is simple enough for beginners yet beautiful enough to impress even experienced quilters. The lattice design creates a stunning woven effect that highlights your favorite fabrics while maintaining a clean, classic look. Whether you’re making this quilt for a baby shower, a nursery, or a keepsake gift, the Lattice Baby Quilt is a timeless piece that combines creativity and comfort in one delightful project.
Making a Lattice Baby Quilt is not just about sewing fabrics together — it’s about creating something filled with love and intention. Each cut, stitch, and color choice adds personality and charm to the final piece. This Lattice Baby Quilt Tutorial will guide you through each step, from fabric selection to finishing touches, ensuring that your quilt looks professional while keeping the process enjoyable and relaxing. The result is a quilt that’s soft, durable, and full of warmth — perfect for wrapping up a little one in handmade comfort.
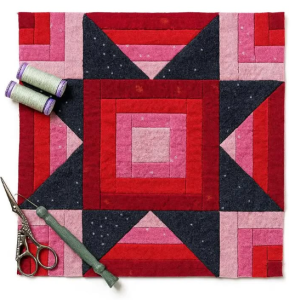
Before diving into the details, it’s important to understand that the lattice pattern gives this quilt its distinctive charm. The crisscross design, made up of fabric strips arranged in an overlapping layout, creates visual depth and sophistication. It’s a versatile design that works well with both solid colors and patterned fabrics. You’ll be amazed at how the Lattice Baby Quilt brings fabrics to life through clever arrangement and thoughtful sewing techniques. Now, let’s explore step-by-step how to bring this quilt to life in your own sewing room.
Selecting the right materials is the foundation of a successful Lattice Baby Quilt Tutorial. Start with soft, high-quality cotton fabrics, as they are easy to work with and gentle on a baby’s skin. You will need a combination of light and dark fabrics to create contrast in the lattice pattern. Solid colors or small prints often work best for this type of design since they emphasize the woven appearance.
You’ll also need batting for the inside layer of the quilt. Choose a lightweight, soft batting that provides warmth without making the quilt too bulky. Cotton or bamboo batting is ideal for baby quilts because it’s breathable and machine washable. Remember that the comfort and safety of the baby are your top priorities when selecting materials.
In addition to fabrics and batting, you’ll need quality thread that matches or complements your color scheme. Prewash your fabrics before cutting to prevent shrinkage later. This simple step ensures that your quilt maintains its shape and size after washing. Proper preparation makes all the difference in how your Lattice Baby Quilt looks and lasts.
When choosing your lattice fabrics, consider contrast and coordination. For example, use light-colored strips on a darker background or vice versa. This creates a striking visual effect that enhances the lattice layout. You can also experiment with pastels for a soft, baby-friendly appearance or bolder hues for a more modern look.
Having all your materials organized before starting helps keep your sewing process smooth and enjoyable. Keep your cutting tools sharp and your workspace clean. A rotary cutter, self-healing mat, and quilting ruler will make cutting precise strips much easier.
Finally, remember that the goal of this Lattice Baby Quilt Tutorial is not perfection but creativity. Don’t be afraid to mix colors and patterns that speak to you. The quilt will reflect your personal style, making it even more meaningful as a handmade gift.
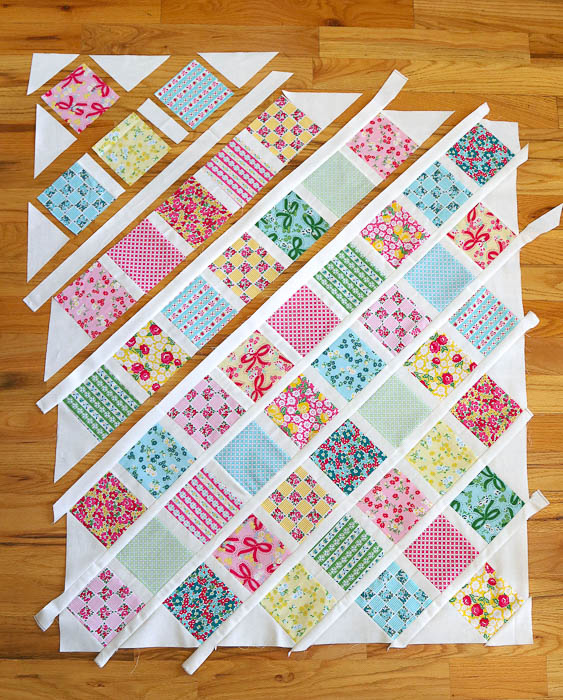
Now that your materials are ready, it’s time to bring your Lattice Baby Quilt to life. Begin by cutting your fabric into strips. The exact dimensions may vary, but 2½-inch wide strips are a great starting point. You’ll need enough strips to create both the vertical and horizontal parts of the lattice. Consistency in your cutting will ensure that your quilt pieces fit together perfectly.
Once the strips are ready, arrange them in a crisscross pattern. Start by laying the vertical strips evenly across your workspace. Then, place the horizontal strips over them, weaving over and under to create the lattice effect. Take your time aligning each piece so that the intersections meet neatly. This is the heart of the Lattice Baby Quilt Tutorial, where the design truly takes shape.
After you’re satisfied with the layout, sew the strips together one row at a time. Press each seam flat before adding the next strip — this step helps keep your quilt top smooth and professional-looking. Continue adding rows until your entire quilt top is complete.
If you want to add an extra touch of elegance, consider using contrasting thread for topstitching. It will highlight the lattice intersections beautifully. Quilting is both an art and a craft, so small details like this can elevate the entire project.
When your quilt top is done, trim the edges to make sure everything is even. A square and balanced quilt top ensures that layering and quilting later will go smoothly. The lattice pattern can look intricate, but once you get into the rhythm of sewing the strips together, you’ll find it both soothing and rewarding.
The Lattice Baby Quilt Tutorial emphasizes precision and patience. Take your time aligning seams and pressing fabric. Even small adjustments can make a big difference in the finished quilt’s look and feel.
With your lattice top complete, it’s time to assemble the quilt sandwich — the top, batting, and backing. Lay the backing fabric flat on your work surface, wrong side up. Smooth out any wrinkles, as they can cause puckering later. Next, place the batting on top, followed by your lattice quilt top, right side up.
Make sure all layers are centered and smooth. Pin or baste the layers together to keep them from shifting during quilting. Safety pins or basting spray are popular options. The Lattice Baby Quilt Tutorial recommends starting quilting from the center and working your way outward to maintain even tension.
You can choose from several quilting methods. Straight-line quilting along the lattice lines is a simple yet elegant choice. It emphasizes the woven pattern and adds texture. Alternatively, you can use free-motion quilting if you want a more intricate and artistic finish.
Take care when quilting near the intersections of your lattice. These areas have multiple fabric layers, so slow down your machine to avoid skipped stitches. Regularly check the back of your quilt to make sure the stitches look neat on both sides.
Once quilting is complete, trim the excess batting and backing around the edges. Make sure everything is square and aligned. A clean, even edge will make binding much easier later on.
Assembling the layers is one of the most satisfying parts of the Lattice Baby Quilt Tutorial because you finally get to see your design come together as a cohesive, cozy piece. It’s also the step that transforms your flat fabric into a warm, textured quilt ready for finishing touches.
The final step of the Lattice Baby Quilt Tutorial is binding — the process of enclosing the raw edges to give your quilt a polished, durable finish. Cut strips of fabric about 2½ inches wide for your binding. Fold and press them in half lengthwise. Attach the binding by sewing it to the front of the quilt, right sides together, then folding it over to the back and stitching it down.
Mitered corners give your quilt a professional appearance. To achieve this, stop sewing a quarter inch before each corner, fold the binding neatly, and continue stitching along the next edge. With a bit of practice, you’ll master this technique easily.
After attaching the binding, give your quilt a final press. Ironing not only smooths wrinkles but also sets the seams, enhancing the overall look. You can add a label to the back with your name and the date, a lovely way to personalize your Lattice Baby Quilt.
Before gifting or using the quilt, give it a gentle wash to make it soft and fluffy. Use a mild detergent and tumble dry on low heat. The quilt will develop a slight crinkle, giving it that classic handmade look that makes baby quilts so special.
At this stage, take a moment to admire your creation. The combination of the lattice pattern, soft fabrics, and careful craftsmanship results in a quilt that’s both beautiful and functional. It’s a heartfelt gift that will be treasured for years to come.
Completing the Lattice Baby Quilt Tutorial is an accomplishment worth celebrating. Every stitch represents creativity and care, and the finished product is proof of your dedication and skill.
1. What size should a Lattice Baby Quilt be?
Most Lattice Baby Quilts measure around 36 x 45 inches, but you can adjust the size based on personal preference or the baby’s needs.
2. Can I use flannel instead of cotton for this quilt?
Yes! Flannel is a cozy alternative that’s perfect for colder climates. Just remember that flannel tends to stretch, so handle it gently during cutting and sewing.
3. Do I need a quilting machine for this project?
No. A regular sewing machine works perfectly fine for a Lattice Baby Quilt Tutorial, especially if you use straight-line quilting.
4. How do I keep the lattice strips from shifting?
Pin or baste carefully before sewing. Pressing seams as you go also helps keep everything aligned and flat.
5. Can I make this quilt larger for an adult?
Absolutely. Simply increase the number of lattice strips and the backing fabric size to create a throw or bed-size version of the same pattern.
6. What’s the best way to wash a baby quilt?
Use cold water and a gentle detergent. Machine wash on a delicate cycle and dry on low heat to preserve softness and color.
The Lattice Baby Quilt Tutorial is a delightful project that blends creativity, skill, and warmth. From fabric selection to the final stitch, every step allows you to craft a unique, heartfelt piece that embodies care and artistry. The lattice design adds sophistication while keeping the process enjoyable and beginner-friendly. Whether you’re sewing as a gift or creating a keepsake, this quilt will hold sentimental value for years to come.
Now that you’ve learned how to make your own Lattice Baby Quilt, we’d love to hear from you! Share your thoughts, experiences, and suggestions in the comments. What colors or fabrics did you choose? Your feedback helps inspire other crafters and keeps the quilting community thriving with creativity and love.