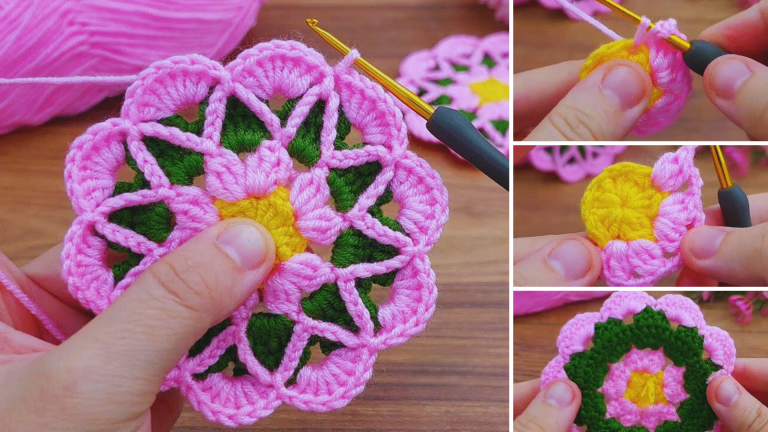
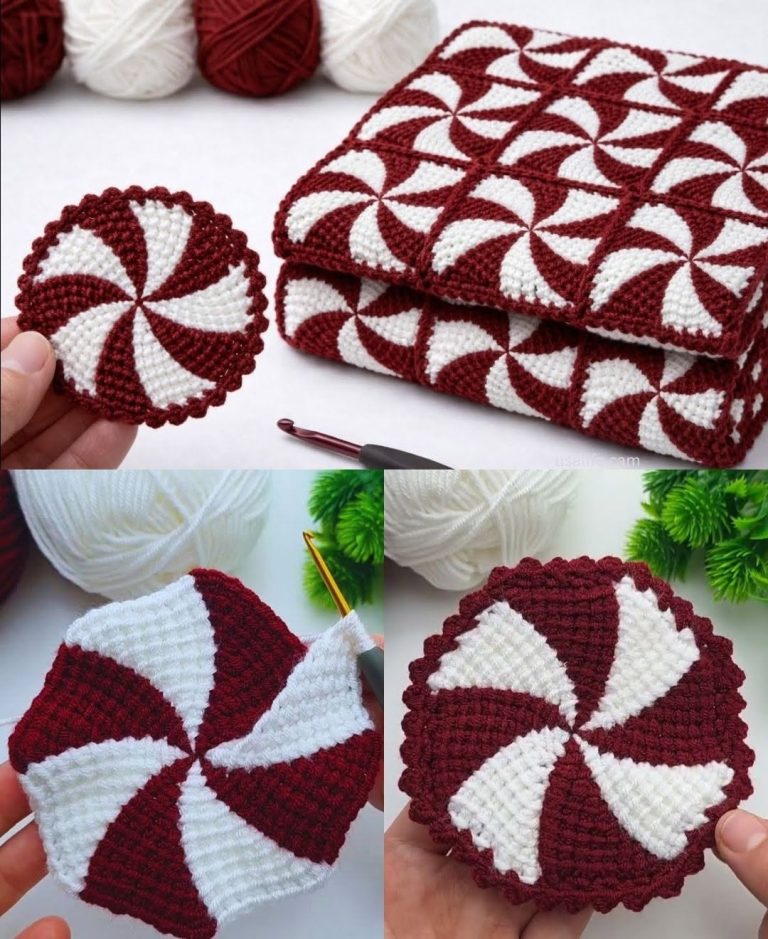
Crochet Easy Flower Coaster Pattern
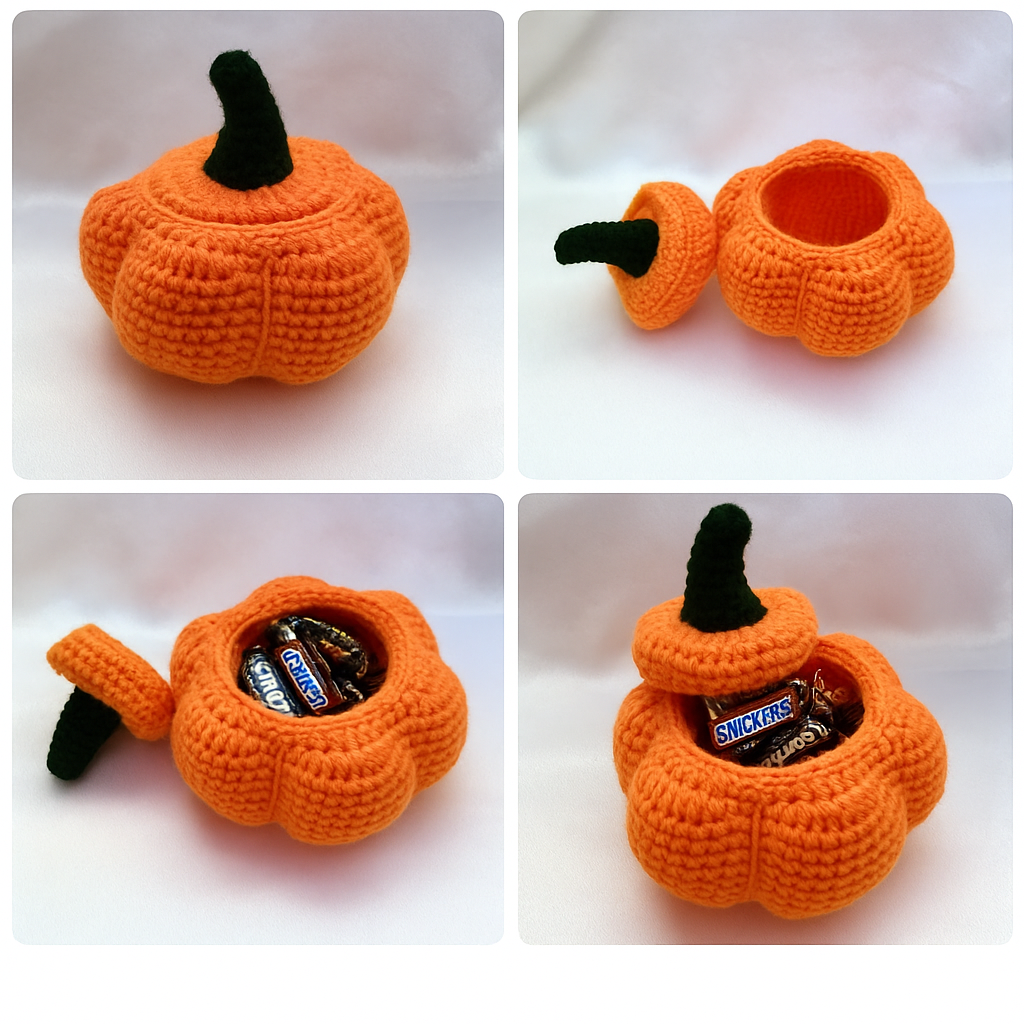
If you’re looking for a fun, festive, and easy crochet project to add a touch of autumn charm to your home, the Pumpkin Pots Crochet Pattern is a perfect choice. This delightful design allows you to create adorable pumpkin-shaped pots that can be used for decoration, gifting, or even as small storage containers for candies or crochet supplies. With this pattern, you can bring cozy fall vibes to your home while practicing your crochet skills and experimenting with vibrant yarn colors.
The beauty of the Pumpkin Pots Crochet Pattern lies in its versatility and creativity. Whether you’re a beginner looking for an easy seasonal project or an experienced crocheter searching for a unique handmade décor idea, this pattern is a wonderful way to showcase your talent. You can use these pumpkin pots to decorate your living room, kitchen, or even your craft table during Halloween and Thanksgiving seasons. The combination of texture, color, and design creates a warm and rustic aesthetic that makes any space feel more inviting.
Additionally, the Pumpkin Pots Crochet Pattern is a great project for using leftover yarn and testing different crochet stitches. You can customize each pot by changing the yarn color, adjusting the size, or adding embellishments like leaves, stems, or ribbons. The process is simple, enjoyable, and deeply rewarding—especially when you see your little pumpkins come to life with every stitch. Whether you make one or a whole collection, these crochet pumpkin pots are guaranteed to bring smiles and style to your handmade creations.
Before you begin working on your Pumpkin Pots Crochet Pattern, make sure you have all the materials and tools ready. Preparation is key for a smooth and enjoyable crafting experience. You don’t need fancy supplies—just the basics and a bit of creativity.
Start with worsted weight yarn in classic pumpkin shades like orange, mustard, or rust. You can also use shades of cream, green, or even purple for a fun twist. The Pumpkin Pots Crochet Pattern works beautifully with natural fibers like cotton or acrylic blends that hold shape well. Next, you’ll need a crochet hook that matches your yarn weight, typically around 4.0mm to 5.0mm (G or H hook).
You’ll also need a yarn needle for weaving in ends, scissors, and fiberfill stuffing if you plan to make your pot slightly puffed or structured. Some crafters like to insert a small plastic container or jar inside the crochet piece to maintain its pot shape, especially for storage use. Don’t forget to grab stitch markers to keep track of your rounds—it’s easy to lose count when working in the round!
When selecting your yarn colors, think of fall tones—burnt orange, olive green, and deep brown are perfect choices to capture the spirit of the season. For the stem and leaves, a small amount of green yarn will do. You can even add a little sparkle with metallic yarn for a whimsical look.
Lastly, always check your gauge before starting to ensure your Pumpkin Pots Crochet Pattern turns out with the correct dimensions. While exact gauge isn’t crucial for decorative items, maintaining consistent tension will make your pumpkin pot look more polished and uniform. Once your materials are gathered, you’re ready to start crocheting your festive pumpkin pot masterpiece!
Now that you have everything you need, it’s time to start creating your Pumpkin Pots Crochet Pattern. This project mainly involves working in the round and using basic crochet stitches, which makes it both relaxing and beginner-friendly.
Begin with a magic ring or chain two and work your first round of single crochet (sc) stitches into the ring. This will form the base of your pumpkin pot. Continue increasing evenly in each round until the base reaches your desired width. Once the bottom is complete, you’ll start working the sides by crocheting without increases. This will shape the body of your pot.
To achieve the signature pumpkin texture, alternate between front post double crochet (FPDC) and back post double crochet (BPDC) stitches. These stitches create the ribbed effect that mimics the grooves of a real pumpkin. Keep repeating the pattern until your pot reaches the desired height. You can make it short and wide for a pumpkin bowl or tall and narrow for a more vase-like shape.
Once the body is finished, decrease slightly to taper the top edge if desired. Then, crochet a small stem using brown or green yarn. A few rounds of single crochet worked tightly will form a cute little stem. Attach it securely to the center of the pot. For added charm, crochet one or two leaves and sew them near the stem.
After assembling all parts, weave in your yarn ends neatly using a yarn needle. You can also stiffen the sides with fabric starch if you want the pot to be firmer. Your Pumpkin Pots Crochet Pattern is now ready! It’s a simple process that produces adorable and functional results, perfect for seasonal décor or gifts.
One of the best things about the Pumpkin Pots Crochet Pattern is its versatility. These handmade pieces can be used in countless ways around your home, making them both decorative and practical. Whether you prefer minimalist or rustic style, these crochet pots fit beautifully into any setting.
Use your pumpkin pots as small plant holders—they’re perfect for succulents or artificial greenery. Just make sure to place a plastic liner inside if using real plants. Another creative idea is to use them as candy dishes during Halloween or Thanksgiving gatherings. Guests will love the festive touch!
You can also turn them into gift containers. Instead of using a regular box, place small gifts like candles, soaps, or chocolates inside your crochet pumpkin pot. Wrap it with a transparent cellophane bag and ribbon for a charming handmade presentation. It’s thoughtful, eco-friendly, and visually stunning.
For crafters, these pots make excellent storage containers for buttons, pins, or small yarn scraps. They help keep your workspace tidy while adding a warm autumn feel to your craft room. Some crocheters even use them as centerpieces for fall tablescapes, arranging them in different sizes and colors.
If you enjoy seasonal markets or sell handmade items, the Pumpkin Pots Crochet Pattern can also be a profitable idea. They’re quick to make, require minimal yarn, and have high appeal during fall months. With creative packaging and presentation, your crochet pumpkin pots can become customer favorites!
To make your Pumpkin Pots Crochet Pattern look professional and polished, a few simple tips can go a long way. Crochet is not just about following stitches—it’s about mastering tension, shaping, and creativity.
First, maintain consistent tension throughout your project. Uneven stitches can affect the final shape of your pot. If your pot seems too loose or floppy, try using a smaller hook size or tighter stitches.
Second, use stitch markers to mark the beginning of each round, especially when working in continuous rounds. This prevents losing your place and ensures the pot stays symmetrical.
Third, experiment with color combinations. Try gradient yarns or mix different shades of orange for a more realistic pumpkin effect. You can even use variegated yarn to add texture and visual interest.
Fourth, don’t skip blocking! Lightly steam block your finished pot to smooth out uneven stitches and help it maintain its shape. If you want it stiffer, apply a fabric stiffener or insert a small container inside.
Lastly, always take time to finish neatly. Weaving in ends carefully and securing attachments like stems and leaves will elevate your project’s quality. The attention to detail is what transforms a simple crochet pot into a standout handmade decoration.
1. What skill level is needed for the Pumpkin Pots Crochet Pattern?
The pattern is beginner-friendly, requiring only basic stitches like single crochet, double crochet, and post stitches. It’s a great project for anyone comfortable working in the round.
2. Can I adjust the size of the pumpkin pots?
Yes! Simply increase or decrease the number of rounds in the base to make the pot larger or smaller. You can also adjust the height by adding or removing side rounds.
3. What type of yarn works best for this pattern?
Worsted weight cotton or acrylic yarns are ideal because they provide structure and durability. Cotton gives a crisp look, while acrylic adds softness.
4. How can I make my pumpkin pot stiff enough to hold shape?
You can use fabric stiffener, starch spray, or place a plastic container inside the crochet pot for structure. Alternatively, use tighter stitches for natural firmness.
5. Can I wash my crochet pumpkin pot?
If made from washable yarn, yes. Hand-wash gently in cold water and air dry. Avoid machine washing if your pot has added embellishments.
6. Are pumpkin pots suitable as gifts?
Absolutely! They make excellent handmade gifts for holidays, especially when filled with treats or small presents.
7. Can I sell items made from this Pumpkin Pots Crochet Pattern?
Yes, you can sell finished items made using the pattern, but always give credit to the original design if it’s not your own.
8. How long does it take to make one pumpkin pot?
On average, it takes about 2–3 hours depending on your speed and the pot’s size.
9. Can I add other decorations like eyes or faces?
Of course! Adding embroidered eyes or a smile can turn your pot into a cute Halloween pumpkin or jack-o’-lantern.
10. What’s the best hook size for this pattern?
A 4mm or 5mm hook (G or H size) works well with worsted weight yarn, but always match your hook to your yarn label for best results.
The Pumpkin Pots Crochet Pattern is a delightful, easy, and creative project that brings the cozy spirit of fall into your home. From decorative pieces to practical storage, these crochet pumpkin pots are versatile, customizable, and fun to make. Whether you’re crocheting for personal enjoyment or preparing handmade gifts, this pattern offers endless possibilities to express your creativity.
We hope this guide has inspired you to start your own collection of crochet pumpkin pots. Don’t forget to share your results and let us know how your project turned out! Leave your honest opinion and suggestions below—we love hearing from fellow crochet enthusiasts. Happy crocheting!
