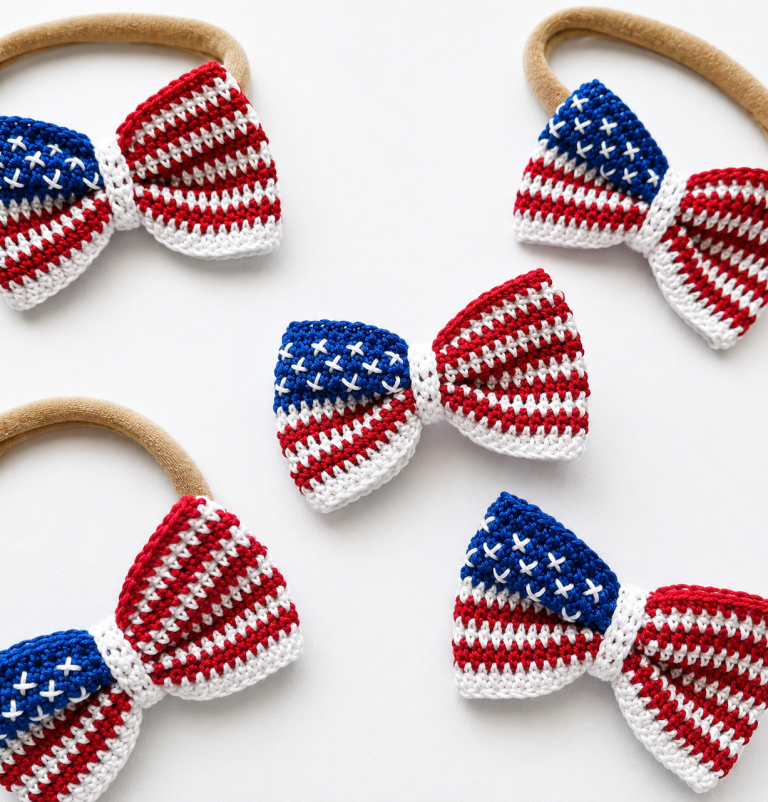
Crochet American Flag Bow Pattern
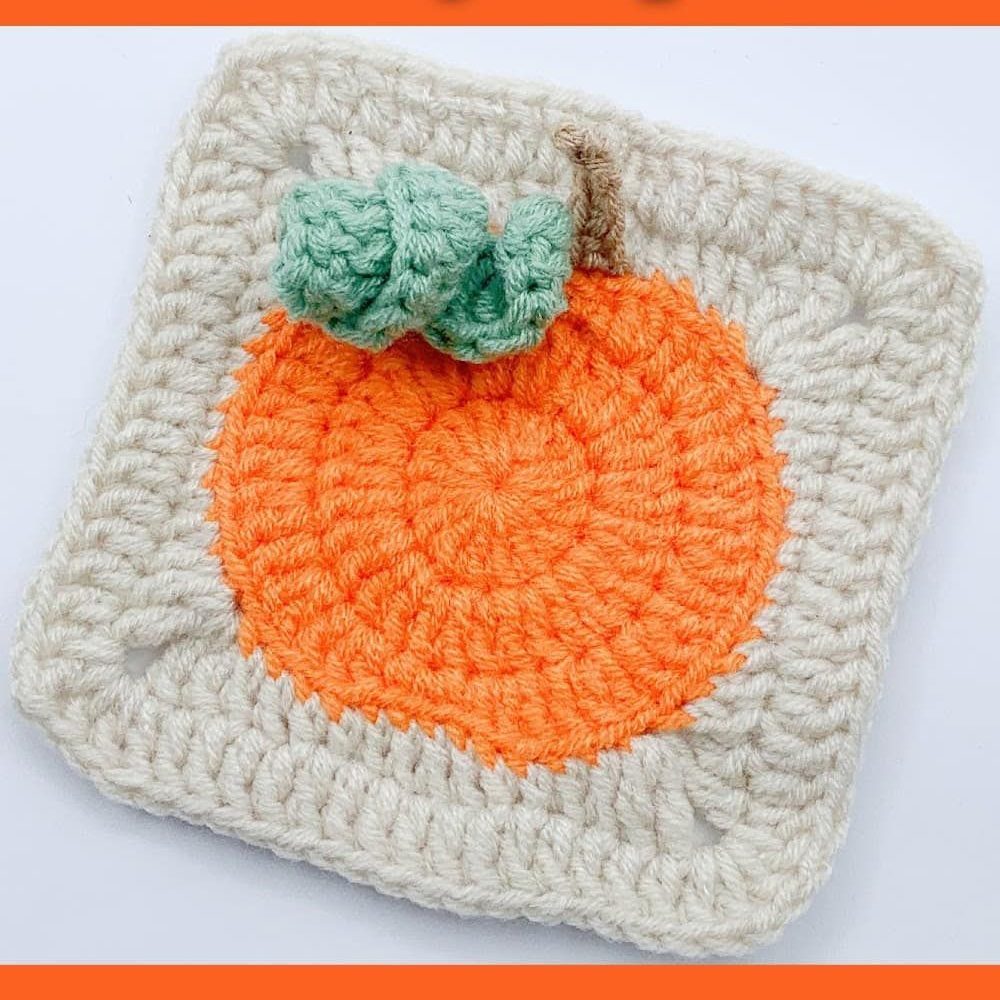
The Pumpkin Granny Square Pattern is one of the most charming crochet designs you can make for the fall season. This delightful pattern combines the traditional granny square technique with a festive pumpkin motif, creating a cozy and heartwarming piece perfect for blankets, pillows, or seasonal home decor. Whether you’re a beginner looking to expand your crochet skills or an experienced maker seeking creative inspiration, the Pumpkin Granny Square Pattern is an enjoyable project that highlights the beauty of autumn tones and handmade craftsmanship.
Crocheting pumpkins into granny squares allows you to explore texture, shape, and color blending in a way that feels both nostalgic and modern. The design can be customized using different shades of orange, brown, green, and cream to reflect the natural hues of the harvest season. With a few simple stitches and a bit of patience, you can transform yarn into a charming square that celebrates the essence of fall. The Pumpkin Granny Square Pattern is not just decorative—it’s a fun and rewarding way to express creativity while preparing for the coziest time of the year.
Another reason crafters love this pattern is its versatility. You can use these squares to make a full pumpkin-themed afghan, or combine them with other seasonal motifs such as leaves, acorns, or sunflowers. The Pumpkin Granny Square Pattern also makes a wonderful handmade gift—something truly heartfelt that showcases the love and time poured into every stitch. Plus, the process of crocheting is incredibly relaxing and meditative, helping to relieve stress while you create something beautiful.
Before starting the Pumpkin Granny Square Pattern, it’s important to gather all your materials. You’ll need medium-weight yarn in pumpkin orange for the main motif, green for the stem, and cream or beige for the background. Cotton or acrylic yarns work well for this project, depending on your personal preference. You will also need a crochet hook that matches your yarn weight—most crafters use a 4mm to 5mm hook for this type of square. Don’t forget scissors, a yarn needle for weaving in ends, and stitch markers if you like extra precision.
Choosing the right yarn color makes a big difference. For a classic autumn look, opt for warm oranges and rustic greens. If you prefer a more modern twist, try using pastel shades or even a gradient effect. The beauty of the Pumpkin Granny Square Pattern is its adaptability to any color palette or style you want to achieve.
Make sure to check your gauge before starting the full pattern. This ensures that your squares will be consistent in size, especially if you plan to join multiple pieces into a larger project like a blanket. A consistent gauge will also give your final piece a more professional and neat finish.
As you prepare to crochet, keep your workspace organized and comfortable. Having all materials within reach will make the process smoother and more enjoyable. If you’re a beginner, it may help to watch a few short video tutorials about basic stitches like chains, double crochets, and slip stitches before beginning your Pumpkin Granny Square Pattern.
Lastly, remember to enjoy the process. Crocheting is not just about the finished item—it’s also about the peaceful rhythm of the stitches, the warmth of the yarn in your hands, and the satisfaction of creating something from scratch.
To begin your Pumpkin Granny Square Pattern, start with a magic ring or a chain of four joined in a circle. This will form the center of your pumpkin. Work your first round using orange yarn, creating small clusters of stitches—usually double crochets—to form a circular shape. You’ll gradually increase each round to build the body of the pumpkin.
After completing the main body, you can shape the pumpkin by adjusting the stitch placement. For example, you can make some areas slightly tighter and others looser to give the pumpkin its characteristic curves. Don’t worry if it’s not perfect—handmade variations make every square unique and charming.
Once the pumpkin body is complete, switch to green yarn to create a small stem on top. This can be done by adding a few chains and slip stitches or by crocheting a tiny stem shape separately and sewing it on later. The little green stem adds personality and instantly makes your square recognizable as a pumpkin.
Next, you’ll work around the pumpkin to form the granny square background. Using cream or beige yarn, crochet around the pumpkin shape with chain spaces and double crochets to create the traditional granny square layout. This helps the pumpkin motif stand out beautifully while giving structure to your design.
When the square is finished, gently block it to ensure even edges and a neat appearance. Blocking means dampening the square lightly, pinning it to shape, and letting it dry flat. It makes a big difference in the final look of your Pumpkin Granny Square Pattern.
Repeat this process for as many squares as you want. You can join them using slip stitches, single crochets, or your preferred joining method to make larger projects such as table runners, tote bags, or cozy blankets.
One of the best parts about the Pumpkin Granny Square Pattern is how versatile it is. You can use your finished squares in countless creative ways beyond traditional blankets. Imagine turning them into a decorative pillow cover for your living room—it would add the perfect seasonal touch to your home.
Another great idea is to make a fall-themed wall hanging. By joining a few Pumpkin Granny Squares vertically and adding tassels at the bottom, you can create a beautiful handmade decoration. It’s a wonderful way to display your crochet skills and bring autumn vibes into your home decor.
You can also turn your pumpkin squares into coasters or pot holders by using heat-resistant yarn. These practical yet stylish accessories will bring warmth to your kitchen or dining area during the harvest season.
If you love giving handmade gifts, a set of Pumpkin Granny Square mug rugs or mini hot pads can make a thoughtful and unique present. You can personalize them by using different shades of orange or adding little embroidered details.
Another fun project is creating a tote bag using the Pumpkin Granny Square Pattern. Simply join the squares together, line the inside with fabric for durability, and add handles. It’s a perfect way to carry your crochet passion everywhere you go.
Finally, consider combining pumpkin squares with other seasonal motifs like leaves, mushrooms, or sunflowers to create a mixed fall-themed afghan. This not only adds variety but also turns your crochet project into a stunning piece of art.
To achieve a neat and professional look, pay attention to your tension. Consistent tension helps your stitches look even and prevents the square from curling or distorting. If your square looks too tight, try using a slightly larger hook; if it feels too loose, go down a size.
Choosing high-quality yarn is another key factor. A smooth, soft yarn will make your stitches pop and feel pleasant to work with. Acrylic blends are affordable and easy to care for, while cotton yarns provide excellent stitch definition for your Pumpkin Granny Square Pattern.
Experimenting with color placement can make your design stand out. You can create a gradient pumpkin by blending two shades of orange or add contrast by using a darker border. Don’t be afraid to play with colors until you find the perfect combination that fits your style.
When joining multiple squares, ensure that all edges align properly. Blocking each square before assembly helps maintain uniformity and makes sewing or crocheting them together much easier.
Adding finishing touches like decorative borders can elevate your project. A simple scalloped or picot edge adds elegance and frames the pumpkin design beautifully.
Lastly, always weave in your yarn ends carefully to keep the back of your work tidy. A clean finish not only looks better but also ensures durability, especially if your Pumpkin Granny Square Pattern project will be used often or washed frequently.
1. What level of crochet skill is needed for the Pumpkin Granny Square Pattern?
The pattern is suitable for beginners with basic knowledge of stitches like chain, slip stitch, and double crochet. Intermediate crocheters can add more details for texture and realism.
2. Can I use different yarn weights for this pattern?
Yes, you can. Just remember that changing yarn weight will affect the size of your square. Thicker yarns will create larger squares, while thinner ones will make smaller versions.
3. How many squares do I need for a blanket?
It depends on the desired blanket size. A lap blanket might need around 30–40 squares, while a full-size afghan could require 70 or more.
4. How can I make my pumpkin look more realistic?
Try using a slightly darker shade of orange for the outer stitches and lighter tones toward the center. You can also add subtle embroidery lines to mimic the pumpkin’s natural ridges.
5. What’s the best way to join the squares?
You can use slip stitch joins for a flat look or single crochet joins for a more defined seam. Whichever method you choose, keep your stitches even for a clean finish.
The Pumpkin Granny Square Pattern is a delightful way to bring handmade warmth into your home during the autumn season. With its playful design, vibrant colors, and endless creative possibilities, this pattern offers both relaxation and artistic expression. Whether you use it for blankets, pillows, or decor, it’s a timeless piece that celebrates the charm of crochet.
We hope this article has inspired you to try making your own Pumpkin Granny Squares. If you’ve enjoyed the tutorial or have ideas and suggestions for improvement, please share your honest opinion—we’d love to hear from you!

