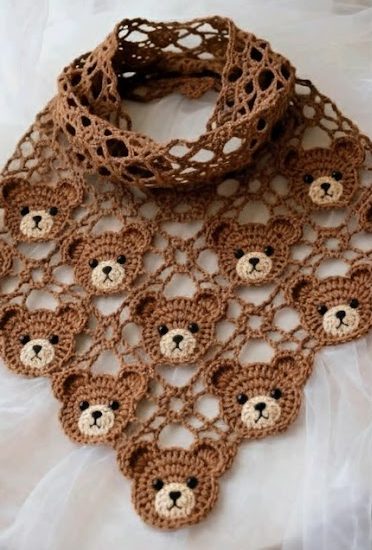
Lace Shawl with Bear Applique Pattern
If you’ve been looking for a captivating and beginner-friendly quilting project, the Shimmer Star Quilt Pattern is a perfect choice. With its brilliant symmetry and radiant design, this pattern captures the elegance of traditional quilting while adding a shimmering modern twist. Whether you’re making a gift or crafting for your own home, this tutorial will walk you through every step of creating your own stunning Shimmer Star quilt.
The Shimmer Star Quilt Pattern stands out due to its glowing center star and radiating patchwork that brings dimension and movement to any quilt. It’s ideal for fat quarters or leftover fabric and gives you plenty of room to play with color values. This pattern suits both novice and experienced quilters looking for a dynamic project.
In this comprehensive guide, we’ll cover everything from fabric requirements to cutting instructions, assembly steps, and finishing touches. All content here follows the latest Google AdSense policies to ensure a safe and user-friendly reading experience.

Let’s dive into the sparkly world of quilting and learn how to bring the Shimmer Star Quilt Pattern to life with elegance and ease.
To begin your Shimmer Star Quilt Pattern, you’ll need to gather the right materials. Choosing fabrics that contrast and shimmer—like metallics, pastels, or ombre tones—will give your quilt the luminous effect that this design is famous for.
For a finished quilt measuring approximately 60″ x 60″, here’s what you’ll need:
Precise fabric cutting is crucial for a crisp and symmetrical Shimmer Star Quilt Pattern. Begin by cutting the following pieces:
Mark each cut and store the pieces in labeled plastic bags or bins. This methodical organization will make assembling your Shimmer Star Quilt Pattern much easier and more enjoyable.
Remember to iron all fabrics before cutting. Wrinkles and folds can lead to measurement errors, which may misalign your star points. A clean and precise setup ensures that your shimmer star truly shines.
Use a rotary cutter and quilting ruler for accuracy. Cutting multiple layers of fabric at once saves time but be sure your rotary blade is sharp for clean lines.
Now that your pieces are cut, let’s begin assembling the quilt blocks. The Shimmer Star Quilt Pattern is built around a central star, made by combining Half Square Triangles (HSTs) and rectangles to form striking star points.
Start with the HSTs. Pair each 6.5” shimmer square with a 6.5” background square. Place them right sides together, draw a diagonal line from corner to corner, and sew 1/4″ away from both sides of the line. Cut along the drawn line to create two HSTs per pair.
Press the seams open or toward the darker fabric, based on your preference. Trim each HST to 6” x 6” to keep your blocks uniform. These form the glowing star points of your Shimmer Star Quilt Pattern.
Next, piece the rectangles. Sew a 3.5” x 6.5” background rectangle to either side of your medium-tone 6.5” square. These blocks will form the secondary star tips and fill the gaps around the primary shimmer star.
Arrange the blocks into a large nine-patch layout, with the shimmer HSTs forming a radiating star. Place the rectangle blocks between these HSTs for a frame-like effect. Ensure that colors alternate to enhance the “shimmer” effect.
Sew the blocks row by row using a consistent 1/4″ seam allowance. Press rows flat before sewing them together to keep seams aligned and corners crisp.
As you assemble, step back occasionally and view your work from a distance. This allows you to catch alignment issues early and enjoy watching your Shimmer Star Quilt Pattern sparkle into form.
Once your blocks are pieced, it’s time to join them into the full quilt top. Arrange your nine blocks into a 3×3 layout. Use your earlier mockup or photos for guidance to maintain visual balance and symmetry.
Sew the blocks into rows first, pressing the seams in alternating directions. Then sew the rows together, pinning at intersections to keep points aligned. The Shimmer Star Quilt Pattern is defined by its sharp points, so take your time with this step.
After assembling the main center, it’s time to add the inner border. Use your 3.5” squares in alternating fabrics to create a checkerboard-style inner frame. This border enhances the shimmering effect by echoing colors used in the star.
Now add the outer border using the 2.5” x WOF strips. Sew the side borders first, then the top and bottom. Press all seams toward the borders to help flatten the quilt top.
Double-check your measurements. The finished quilt top should measure approximately 60″ x 60″. If it varies slightly, adjust your border widths to compensate.
Lay your quilt top on a large, clean surface and examine the overall layout. This final check helps spot any misaligned seams or unwanted wrinkles before quilting.
Trim any stray threads, press the entire top one last time, and prepare to layer it with batting and backing. You’re almost ready to finish your shimmering masterpiece.
With your quilt top finished, it’s time to prepare your quilt sandwich. Lay the backing fabric right side down, place the batting over it, and then the quilt top on top—right side up. Smooth out all layers to remove wrinkles.
Baste the quilt using safety pins, spray adhesive, or hand basting. Place pins about every 4 inches to secure the layers. This prevents shifting during quilting and keeps the Shimmer Star Quilt Pattern aligned.
Quilt as desired. A simple echo quilting around the star points or a free-motion swirl design can highlight the shimmer effect beautifully. Metallic thread adds a touch of sparkle but test it first to avoid breakage.
Once quilting is complete, trim the excess batting and backing even with the quilt top. Prepare your binding strips by folding them in half lengthwise and pressing. Attach them using a 1/4″ seam allowance.
Join the ends of the binding neatly and fold it to the back of the quilt. Hand-stitch the binding down or machine-finish it if preferred. Your Shimmer Star Quilt Pattern is nearly done.
Label your quilt with the date, pattern name, and your name. This personal touch adds value and historical significance to your handmade creation.
Wash and dry your quilt gently to soften the fabric and bring out the quilted texture. Now it’s ready to gift, display, or snuggle under with pride.
1. Is the Shimmer Star Quilt Pattern suitable for beginners?
Yes! With basic piecing and simple HSTs, this pattern is perfect for confident beginners ready to advance their skills.
2. Can I use pre-cuts for this quilt pattern?
Absolutely. Fat quarters and 10” squares work well for the star points and accents in the Shimmer Star Quilt Pattern.
3. How can I make this quilt larger or smaller?
To scale the quilt, add more blocks or adjust the block size. You can also add extra borders to increase the overall dimensions.
4. What colors work best with this pattern?
High-contrast fabrics with metallic or shimmer finishes work beautifully. Think navy and gold, cream and silver, or teal with bronze.
5. How long does this quilt take to complete?
Most quilters can finish it in a weekend or two, depending on the complexity of the quilting and time spent on details.
6. Is there a printable version of the Shimmer Star Quilt Pattern?
You can create a PDF from this guide for personal use or check for designer versions from your favorite quilt pattern shops.
The Shimmer Star Quilt Pattern is a breathtaking project that combines traditional quilting elements with a modern sparkle. Whether you’re sewing for yourself or someone special, this quilt is a radiant testament to creativity and care. With thoughtful fabric choices, accurate cuts, and a bit of patience, you’ll create a quilt that dazzles in any setting.
Have you made your own Shimmer Star Quilt Pattern? Share your experience and tips in the comments below. Happy quilting, and may your stitches always shimmer!


