
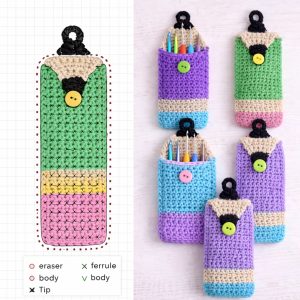
Shell bag Crochet Pattern
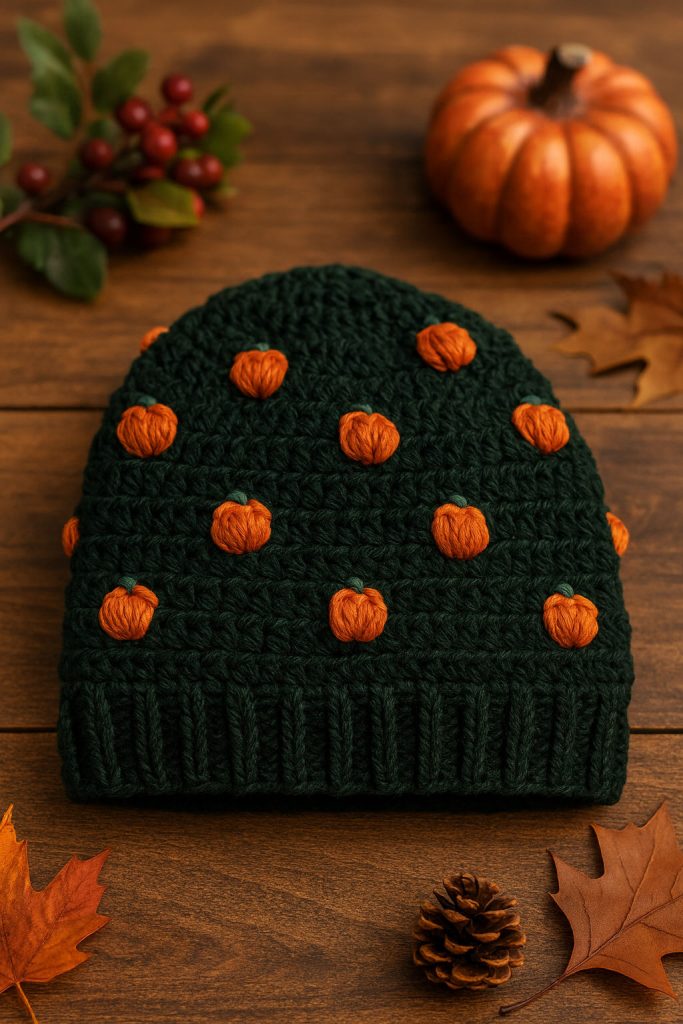
If you’re looking for a cozy and festive way to celebrate the fall season, Beanie Pumpkins – Crochet Pattern is the perfect project to try. These adorable crochet pumpkins resemble soft beanies, adding a touch of handmade charm to your home decor. Whether you’re decorating for Halloween, Thanksgiving, or just love autumn vibes, this pattern allows you to create pumpkins that are cute, cozy, and completely customizable. With just a few materials and basic crochet skills, you can craft your own collection of beanie pumpkins in no time.
Crocheting your own Beanie Pumpkins – Crochet Pattern is also an excellent way to use up leftover yarn from previous projects. You can mix and match colors, textures, and sizes to create a beautiful display. Beginners will appreciate the simplicity of the stitches, while experienced crocheters will love the opportunity to experiment with creative details such as stems, leaves, and embellishments. The beauty of this pattern is that it’s quick, relaxing, and offers endless variations — perfect for making as gifts or selling at craft fairs.
In this article, you’ll learn everything you need to know to make your own Beanie Pumpkins – Crochet Pattern, from choosing materials to finishing your project. We’ll explore the step-by-step process, helpful tips for achieving the perfect pumpkin shape, and creative ideas for customizing your crochet pumpkins. Whether you’re making one or a whole patch, this guide will inspire you to bring the warmth of handmade craft into your home this season.
To start your Beanie Pumpkins – Crochet Pattern, gather the basic materials you’ll need. Choosing the right yarn and hook will ensure your pumpkins turn out soft, well-shaped, and visually appealing. Most crocheters prefer medium-weight yarn (category 4) for this project, as it provides a firm texture without being too stiff. Acrylic, cotton, or a blend of the two works perfectly, depending on the look and feel you want.
Next, you’ll need a crochet hook that complements your yarn. A size H/8 (5.0 mm) hook is a common choice, but you can adjust the size for smaller or larger pumpkins. Make sure to also have a yarn needle for sewing your seams, scissors for cutting ends, and stuffing material to fill the pumpkin. You can use polyester fiberfill or even yarn scraps to give your pumpkin its plump, cozy shape.
When it comes to colors, let your creativity shine! Traditional shades like orange, cream, and brown are always beautiful, but modern tones such as mustard, sage green, or dusty rose can give your Beanie Pumpkins – Crochet Pattern a stylish twist. Try mixing colors to make striped or ombré pumpkins for added visual interest.
You can also add a realistic touch to your pumpkins by using a cinnamon stick or a crocheted stem for the top. This not only enhances the look but adds a subtle autumn scent if you choose real cinnamon. Don’t forget to grab some twine or ribbon for decorative accents — perfect for giving your pumpkin that farmhouse-inspired finish.
Lastly, keep a stitch marker handy to help track your rounds, especially if you’re new to crocheting in continuous spirals. With these simple tools and materials, you’ll be fully prepared to start your Beanie Pumpkins – Crochet Pattern journey.
Start by making a foundation chain according to your desired pumpkin size. A chain of 25–35 stitches usually works well for a medium pumpkin. After you’ve made your chain, work in rows of half double crochet (hdc) stitches. Continue until your piece forms a rectangle that’s about twice as wide as it is tall. This rectangular piece will later be sewn together to form the pumpkin’s body.
When you’ve finished your rows, fold the rectangle in half and use a yarn needle to sew the short ends together. This creates a tube shape, which is the base of your Beanie Pumpkins – Crochet Pattern. Next, use a running stitch along one open end of the tube and pull the yarn tight to close it. This forms the bottom of the pumpkin.
Turn the piece inside out so that the seam is hidden inside. Then, stuff your pumpkin with fiberfill until it’s firm but still squeezable. The amount of stuffing you use will determine how plump your pumpkin looks. Once it’s filled, use another running stitch around the top opening and pull tight to close it securely.
To give your pumpkin its classic shape, thread a long piece of yarn through the center from top to bottom several times, pulling slightly after each pass. This will create the pumpkin’s signature ridges. Tie off the yarn tightly at the bottom to hold the shape.
Now it’s time to add the stem. You can crochet a small brown cylinder using single crochet stitches or simply insert a small cinnamon stick into the top. Both options look charming and authentic. If you’d like, add a few green leaves or a twine bow to complete the look.
Your Beanie Pumpkins – Crochet Pattern is now ready! You can make multiple pumpkins in different sizes and colors for a stunning autumn display that adds warmth and personality to any space.
Once you’ve mastered the basic Beanie Pumpkins – Crochet Pattern, you can have fun experimenting with creative variations. Try using chunky yarn for oversized pumpkins that make a bold centerpiece. Alternatively, thin cotton yarn produces delicate mini pumpkins, perfect for table settings or garlands. Changing the yarn weight and hook size can completely transform the look of your project.
For a rustic touch, use natural fibers like jute or hemp yarn. These materials add a lovely texture and match farmhouse-style decor beautifully. If you prefer a softer look, use pastel yarns or even velvet for luxurious pumpkins that double as cozy accents. Adding buttons or embroidered designs can also make your pumpkins stand out.
Another fun idea is to crochet pumpkins with different stitch patterns. For example, try alternating rows of front post and back post half double crochets to create ribbed textures that mimic real pumpkin grooves. Shell stitches, bobbles, or puff stitches can also give your pumpkins an interesting and tactile finish.
If you want to personalize your pumpkins even more, embroider initials or small motifs on them. They make wonderful gifts when customized this way — perfect for housewarmings or fall birthdays. Kids will also love getting involved in picking colors or adding little details like felt eyes or smiles for a playful touch.
When displaying your Beanie Pumpkins – Crochet Pattern, group several sizes together in a basket, on a shelf, or as a table centerpiece. Mixing textures and tones creates visual depth and adds warmth to your fall decor. Pair them with pinecones, candles, or leaves for a truly inviting autumn arrangement.
Finally, remember that these pumpkins aren’t limited to just one season. Use neutral colors like cream and taupe, and you can keep them on display all year long. Their timeless handmade charm makes them a beautiful addition to any cozy home.
To achieve the best results with your Beanie Pumpkins – Crochet Pattern, pay attention to tension. Keeping your stitches even ensures that your pumpkin holds its shape and doesn’t look lumpy. If your fabric feels too loose, try using a smaller hook; if it feels too tight, switch to a larger one.
When stuffing your pumpkin, add small amounts of fiberfill gradually. Overstuffing can stretch the stitches, while too little filling might cause the pumpkin to collapse. Adjust the stuffing until you find the right balance between firmness and softness.
For clean seams, always sew with matching yarn and pull your stitches snugly but not too tight. This prevents visible gaps and gives your pumpkin a professional finish. You can also crochet your rectangle in the back loop only to enhance the ribbed texture, which looks particularly authentic.
If you notice your pumpkin leaning to one side, check the tension in your top and bottom closures. Make sure both ends are pulled evenly before securing them. This small detail makes a big difference in the final shape.
For added durability, especially if you plan to handle the pumpkins often, weave in your yarn ends securely and knot them well. This helps your project last for years without unraveling.
Finally, don’t be afraid to experiment. Every Beanie Pumpkins – Crochet Pattern turns out a bit unique, and that’s the beauty of handmade work. Enjoy the process, relax, and let your creativity guide you as you make your own little pumpkin patch.
Q1: What type of yarn works best for Beanie Pumpkins – Crochet Pattern?
Medium-weight yarn (category 4) such as acrylic, cotton, or blends works best. It provides the perfect texture for shaping and is easy to work with.
Q2: Can beginners make Beanie Pumpkins easily?
Yes! This pattern is beginner-friendly. If you know basic stitches like chain and half double crochet, you’ll be able to complete it easily.
Q3: How long does it take to make one Beanie Pumpkin?
Depending on size and experience, it can take anywhere from 30 minutes to 2 hours to make one pumpkin.
Q4: How do I make different sizes of Beanie Pumpkins?
Simply adjust your foundation chain and the number of rows. More stitches make a larger pumpkin; fewer stitches make a smaller one.
Q5: Can I wash my crochet pumpkins?
Yes, but hand washing is recommended. Gently wash with mild soap and let them air dry to preserve their shape.
Q6: Can I sell Beanie Pumpkins I make from this pattern?
Absolutely! Handmade Beanie Pumpkins – Crochet Pattern items are popular at markets and online shops, as long as you credit the design if it’s not originally yours.
Creating your own Beanie Pumpkins – Crochet Pattern is a fun, rewarding, and creative way to celebrate the cozy charm of fall. From choosing colors to shaping each pumpkin by hand, every step of the process lets you add your personal touch. Whether you use them to decorate your home or gift them to loved ones, these crochet pumpkins will bring warmth and happiness wherever they go.
We hope this tutorial has inspired you to grab your hook and start crocheting your own pumpkin patch. If you tried this pattern or have creative variations to share, leave your honest opinion and suggestions below — we’d love to hear how your Beanie Pumpkins – Crochet Pattern turned out!


