
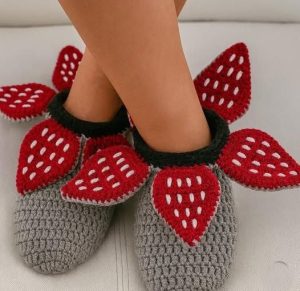
Easter Bunny Basket - Crochet Pattern
Creating your own Crochet Large Flower Bag Tutorial (with 3D Flower Motifs) is a delightful journey into the world of textured crochet art. This pattern is perfect for crocheters who love combining practical design with eye-catching floral details. In this tutorial, you’ll learn exactly how to craft a stunning, roomy bag featuring layered 3D flowers that truly pop.
Whether you’re making it as a stylish everyday accessory or a thoughtful handmade gift, this Crochet Large Flower Bag Tutorial (with 3D Flower Motifs) guides you through each step. You’ll discover how to select your yarn, assemble the floral motifs, and stitch the entire piece into a beautiful bag. Even if you’re new to creating 3D motifs, this guide keeps it clear and approachable.
In addition to the detailed Crochet Large Flower Bag Tutorial (with 3D Flower Motifs) instructions, you’ll also find fabric cuts and measurements to ensure your bag is both beautiful and durable. Let’s get started and bring these charming 3D flowers to life!
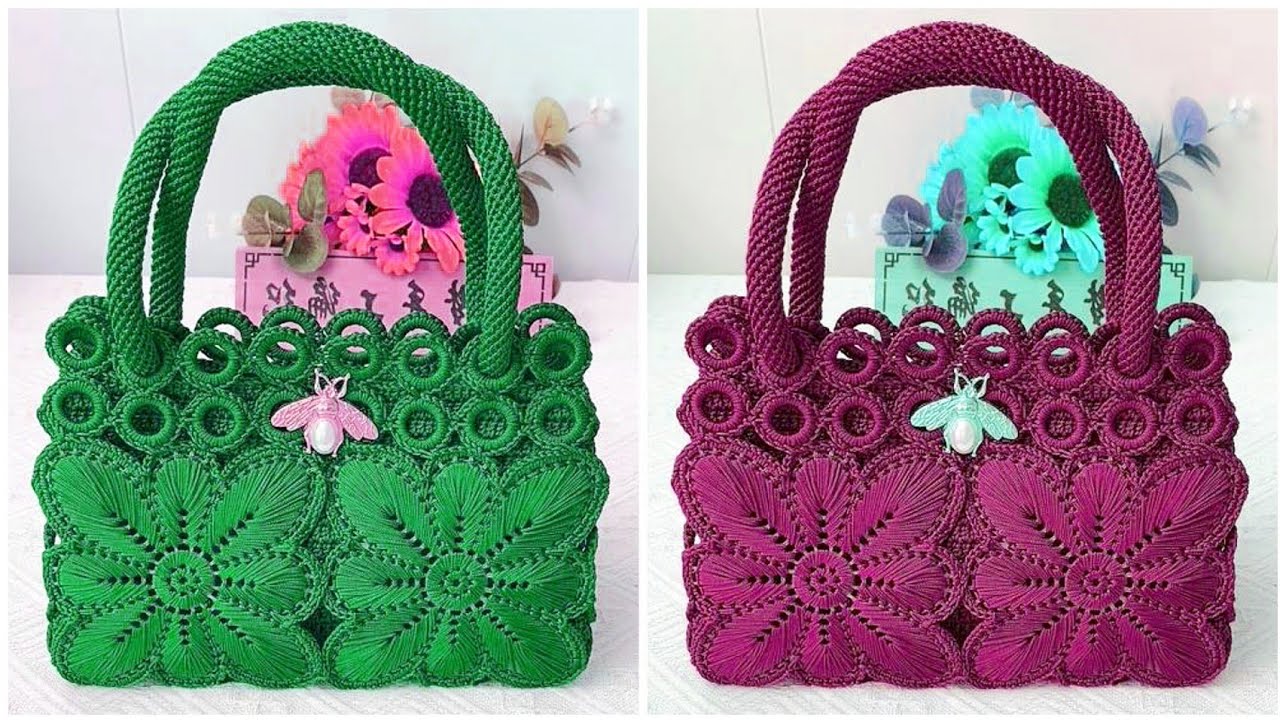
The first step in this Crochet Large Flower Bag Tutorial (with 3D Flower Motifs) is gathering quality materials. Choose a medium-weight cotton yarn for the main body, which adds structure and durability. For the 3D flowers, lighter cotton yarn or soft acrylic works best to create dimension without too much bulk.
You’ll also need a 4.0 mm crochet hook for the main bag and a smaller 3.0 mm hook for finer details of the 3D flower motifs. This difference in hook size helps the petals look more delicate and layered, enhancing the floral effect.
For the lining, cut a fabric rectangle measuring 18 inches wide by 16 inches tall (approximately 46 cm x 40 cm). This lining adds support and helps maintain the bag’s shape, especially when you fill it with daily essentials.
The handles can be crocheted or made from leather straps. If crocheting, measure and cut two strips of 22 inches (56 cm) each before starting. This length provides comfortable over-the-shoulder carrying.
To give your Crochet Large Flower Bag Tutorial (with 3D Flower Motifs) a neat finish, consider adding a magnetic clasp or a button closure at the top. This small detail keeps the bag secure while complementing the floral design.
Finally, prepare some stitch markers, a yarn needle for sewing in ends, and scissors. Keeping these tools at hand makes the process smooth and keeps your workspace organized.
Begin the flower motifs by crocheting a magic ring and working 12 double crochets into the ring. Pull tight to close, slip stitch to join, and chain two. This forms the flower center and sets the stage for layered petals.
For the first layer, crochet five double crochet stitches in the next stitch, slip stitch into the following stitch, and repeat around. You should end up with six petals. Each petal will naturally curve, giving a soft 3D effect.
To build the second layer, work from behind the first. Chain three, then slip stitch into the base of the next petal, repeating around. Into each chain-3 space, crochet seven double crochets. Slip stitch to complete the round, creating a second layer of fuller petals.
For extra texture, add a third petal layer by chaining three again behind the second layer. Work seven double crochets into each chain space, finishing with a slip stitch. This gives your Crochet Large Flower Bag Tutorial (with 3D Flower Motifs) its signature dimension.
Repeat this motif until you have at least 10–12 flowers, depending on how full you’d like your design. For a balanced look, arrange the flowers symmetrically across the front and back panels of your bag.
Secure each flower onto the bag base by sewing around the center and some outer petals. This method keeps them in place while letting the petals remain fluffy and raised.
Don’t forget to weave in any loose ends neatly, as this keeps your Crochet Large Flower Bag Tutorial (with 3D Flower Motifs) tidy and long-lasting.
Crochet two identical panels measuring approximately 18 inches wide by 16 inches tall (46 cm x 40 cm) using half double crochet stitches. This stitch creates a sturdy but flexible texture, perfect for the bag’s structure.
Once you have both panels, join them together by crocheting along the sides and bottom with single crochet stitches. This technique keeps the edges neat and provides extra strength to hold the 3D flower motifs.
For the lining, take your pre-cut fabric piece (18″ x 16″) and fold it in half. Sew along the sides, leaving the top open. Turn it inside out so the seams are hidden.
Insert the lining into the crocheted bag and fold the raw edge of the fabric over by half an inch (1.25 cm). Hand-sew or machine stitch the folded edge to the inside top edge of the bag. This keeps the lining secure without visible seams.
Next, attach the handles. If you crocheted handles, sew them to the inside top corners using whip stitches for durability. For leather straps, use rivets or strong sewing thread to attach them securely.
Finally, add your chosen closure—a magnetic clasp or button—to complete the functional part of your Crochet Large Flower Bag Tutorial (with 3D Flower Motifs). Ensure it sits evenly so the bag closes neatly.
Check all seams and flower attachments to ensure nothing feels loose. This step is key for making your Crochet Large Flower Bag Tutorial (with 3D Flower Motifs) look polished and stand up to daily use.
Steam block your bag gently to smooth out any curling edges, being careful not to flatten the 3D flowers. This keeps the petals puffy while helping the bag shape hold firm.
Consider adding a fabric or crochet pocket inside the lining for extra organization. Cut a fabric square measuring 6 inches by 6 inches (15 cm x 15 cm), fold, and sew it inside.
For a custom look, you can experiment with different color combinations for the flowers, like matching them to seasonal trends or your wardrobe favorites.
If gifting, wrap your finished bag in tissue paper and place it inside a box. Adding a handwritten care note makes the gift extra special and shows you put love into every stitch.
Lastly, don’t forget to share your finished Crochet Large Flower Bag Tutorial (with 3D Flower Motifs) on social media or crochet communities. Your unique creation might inspire someone else to start crocheting too!
This Crochet Large Flower Bag Tutorial (with 3D Flower Motifs) brings together function and beauty in a truly creative way. From textured petals to a roomy and practical design, it’s perfect for anyone who loves adding a handmade touch to their style.
By following the step-by-step instructions—choosing quality yarn, creating layered flower motifs, assembling sturdy panels, and adding finishing details—you’ll craft a bag that’s as special as it is useful.
With its vibrant flowers and 3D effect, your finished bag will surely turn heads and spark compliments wherever you go. Plus, the joy of knowing you made it yourself is priceless.
We hope this detailed Crochet Large Flower Bag Tutorial (with 3D Flower Motifs) helps you create something truly beautiful. Feel free to experiment, adjust colors, and add your personal flair.
If you enjoyed this tutorial, share it with your fellow crocheters and spread the creative spirit. We’d also love to hear your thoughts—drop a comment or question below!
Happy crocheting, and may your handmade Crochet Large Flower Bag Tutorial (with 3D Flower Motifs) become your new favorite accessory!


