
Easter Bunny Basket - Crochet Pattern
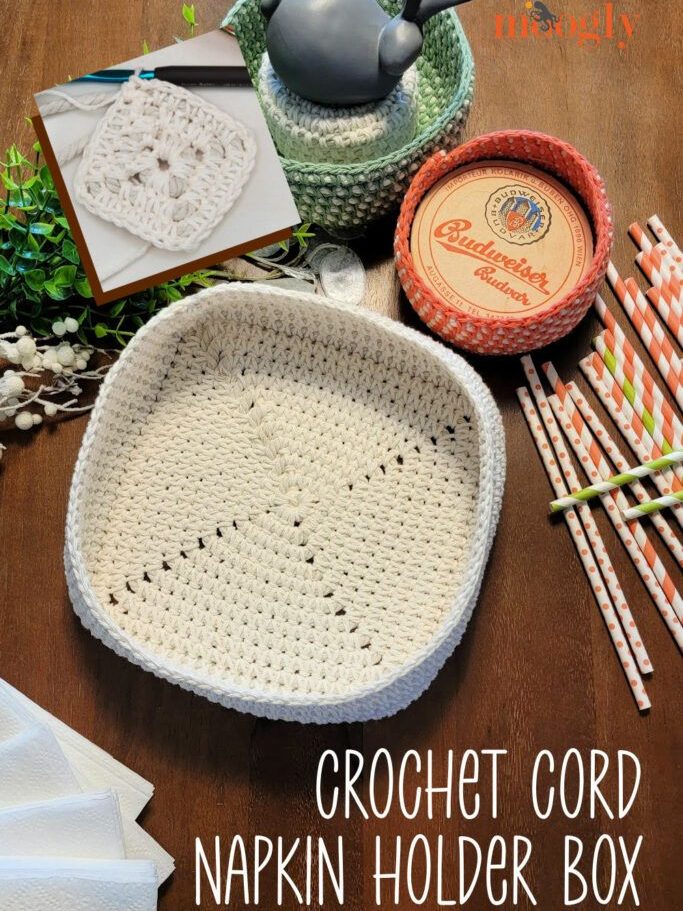
Discovering how to create a Crochet napkin holder step by step is a delightful way to blend creativity and functionality in your dining decor. This charming project not only keeps your napkins organized but also adds a warm, handmade touch to your table. Whether you’re new to crochet or already experienced, this guide will walk you through every detail.
By learning the Crochet napkin holder step by step, you can design something truly unique, adapting colors, patterns, and sizes to suit your style. It’s a relaxing project that can be completed in an afternoon but looks like it took days. Plus, handmade napkin holders make thoughtful gifts for friends and family.
In this post, we’ll break down each part of the Crochet napkin holder step by step, covering everything from choosing yarn and hook sizes, to stitching, shaping, and adding final decorative touches. We’ll also share exact measurements and fabric cuts you’ll need to prepare. Let’s dive into this creative journey!
When starting the Crochet napkin holder step by step, the first thing you need is the right choice of yarn. Cotton yarn is highly recommended because it provides a sturdy structure and is easy to wash, which is perfect for dining use. Choose colors that complement your table setting or go for neutral tones for versatility.
For this project, you’ll need about 50 grams of medium-weight cotton yarn. Make sure to keep the yarn smooth, without fuzz, to highlight the stitches neatly. A crochet hook size of 3.5 mm (US size E) is ideal to create firm, uniform stitches.
You’ll also need a small piece of fabric to use as the inner lining to help your Crochet napkin holder step by step hold its shape. Cut two rectangles measuring 7 inches by 5 inches each. This fabric will be sewn or crocheted into the sides to reinforce the holder.
Prepare an additional strip of fabric measuring 20 inches by 2 inches. This strip will go around the top edge, adding a decorative border and more structure. For extra charm, you can choose printed fabric that matches your yarn color.
Don’t forget about the decorative elements! You might add small crocheted flowers, buttons, or beads to embellish your Crochet napkin holder step by step. Set these aside until the final assembly stage.
Finally, gather basic tools: a yarn needle for weaving in ends, scissors, pins for holding fabric in place, and optionally a sewing needle and thread if you plan to hand-stitch the lining instead of crocheting it directly.
To start the Crochet napkin holder step by step, begin by making the base. Chain 26 stitches, which will form the foundation for a napkin holder roughly 7 inches long. Work in single crochet across the row to keep the base dense and firm.
Continue working in rows of single crochet until the base measures about 5 inches in width. This rectangle becomes the bottom panel of your holder. Use tight stitches to avoid sagging and make sure your edges remain straight.
Next, create the sides of the holder. From the last row of the base, chain one and turn your work. Crochet 12 rows upward in single crochet to form the first side panel. Repeat this on the opposite edge of the base to create the other side.
For the front and back panels, attach your yarn to one of the shorter sides of the base. Crochet across, then work upward for 12 rows as well. Repeat this step for the remaining short edge. By now, your piece should resemble an open box.
Join the corners neatly using slip stitches or whip stitch with a yarn needle, keeping the Crochet napkin holder step by step clean and even. If your stitches are too loose, redo them to ensure the holder stands upright without collapsing.
At this stage, check your measurements against the fabric cuts you prepared earlier. The fabric rectangles should fit snugly against the inner sides. Adjust your crochet rows if needed to match the size exactly.
Now it’s time to add lining to your Crochet napkin holder step by step. This lining helps keep the holder firm and ensures it maintains its shape after repeated use. Place the fabric rectangles inside the holder against the longer side panels.
Using a yarn needle and the same color yarn (or contrasting for a decorative effect), sew the fabric pieces to the inner crochet panels. Keep your stitches small and hidden to avoid bulky edges. Repeat for both sides.
Attach the fabric strip (20 inches by 2 inches) around the top opening of the holder. Fold it over the edge and stitch it down securely. This step adds a clean finish and reinforces the holder’s rim, preventing it from stretching over time.
For decoration, crochet a row of scallops or picot edging around the top. To make a simple scallop, work five double crochets into the same stitch, skip two stitches, and slip stitch into the next stitch. Repeat around the top edge.
Feel free to add small crocheted flowers, bows, or beads to your Crochet napkin holder step by step. Place them at the corners or center of each side panel for extra charm. Secure them well so they don’t come off during use.
If you like, finish by gently blocking your napkin holder. Pin it to shape on a flat surface and lightly steam it, which will help the edges stay crisp and the holder look professionally made.
Congratulations, your Crochet napkin holder step by step is almost complete! Before using it, check all seams and stitches to ensure they’re secure. Reinforce any loose areas with a few extra stitches if needed.
When washing your holder, hand wash gently in cold water and reshape while drying. Avoid wringing it out, as this can stretch the crochet. Blocking it after washing helps it keep its shape over time.
Experiment with color combinations. Make seasonal holders in festive shades for holidays or soft pastels for spring gatherings. The basic Crochet napkin holder step by step pattern is very adaptable, letting you explore your creativity.
You can also adjust the size easily: chain more stitches at the base for a longer holder or fewer for a smaller one. Just remember to adjust the fabric cuts accordingly to match your crochet dimensions.
If you’re giving the holder as a gift, consider adding matching crocheted napkin rings. This creates a lovely handmade set that’s sure to impress and shows off your attention to detail.
Finally, share your finished Crochet napkin holder step by step projects online or with fellow crafters. It’s rewarding to inspire others and exchange ideas on new ways to decorate and personalize your creations.
Creating a Crochet napkin holder step by step is a rewarding craft that blends beauty and utility. By following this guide, from choosing materials and preparing fabric cuts, to crocheting the base and sides, adding lining, and finishing touches, you’ll make a unique item perfect for your table.
This project is suitable for beginners and experienced crocheters alike. With clear steps, careful measurements, and a bit of creativity, your napkin holder will look professional and last for years. Plus, it makes a charming handmade gift!
Don’t be afraid to experiment with colors, textures, and decorations to make your Crochet napkin holder step by step truly one-of-a-kind. We hope this tutorial inspires you to pick up your hook and yarn today.
What do you think about this Crochet napkin holder step by step? Share your thoughts, questions, or ideas below. We’d love to hear how your project turns out and what personal touches you add!


