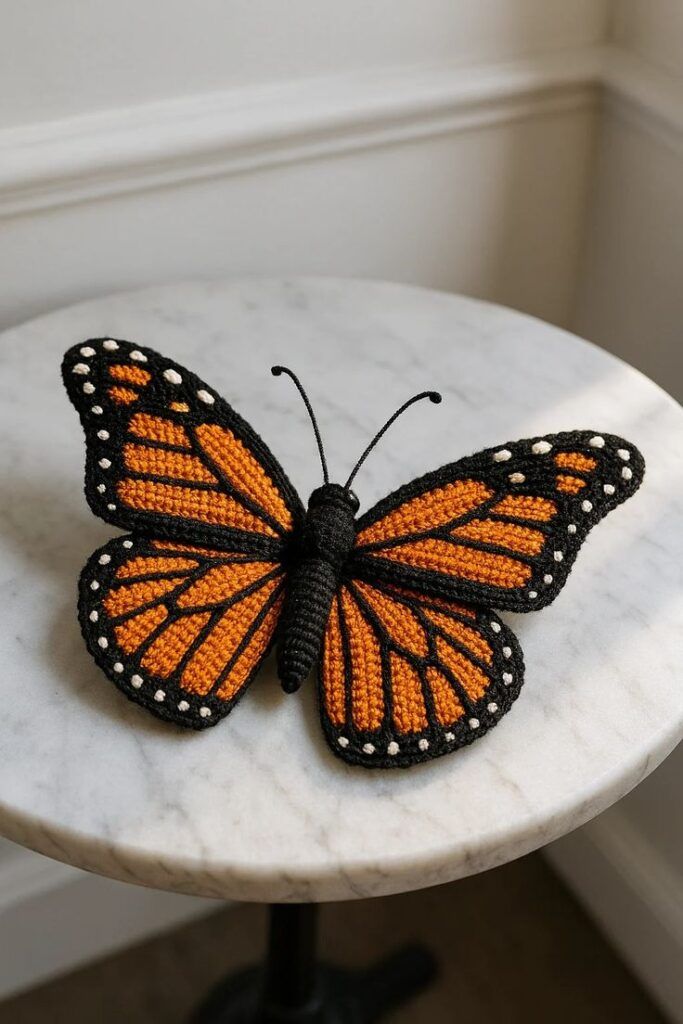
How to Make a Monarch Butterfly Crochet Pattern
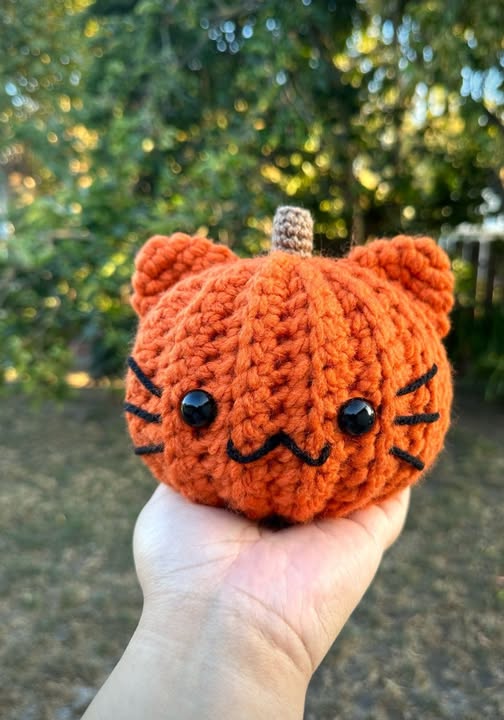
Crochet Pumpkin Cat Pattern is the perfect fall-themed project that combines the cozy charm of pumpkins with the playful cuteness of cats. Whether you’re an experienced crocheter or a beginner looking for a creative seasonal project, this design will bring a smile to your face. The project is fun, quick, and highly customizable—ideal for Halloween decorations, gift ideas, or simply to add a festive touch to your home. Using simple stitches and a bit of creativity, you can craft your own adorable Crochet Pumpkin Face Cat that captures both the spirit of autumn and the whimsy of feline friends.
This pattern allows you to explore textures, colors, and shapes while improving your crochet skills. You’ll work with basic stitches like single crochet, double crochet, and slip stitch to form the pumpkin body, while small details transform it into a charming cat. From cute triangular ears to expressive eyes and whiskers, every element contributes to a delightful handmade piece that’s full of personality. It’s an excellent way to use up leftover yarns and experiment with orange, black, and cream tones for a classic Halloween vibe.
Creating your own Crochet Pumpkin Cat Pattern not only brings joy during crafting but also gives a unique handmade decoration you can display every fall season. It can be used as an ornament, a plush toy, or even a cute addition to your Halloween table setup. Plus, it’s a sustainable alternative to store-bought decorations. With this tutorial, you’ll learn step-by-step how to make your pumpkin cat come to life, along with helpful tips to ensure a polished, professional result.
Before you begin your Crochet Pumpkin Face Cat, it’s essential to gather the right materials. Having everything prepared will make the process smoother and more enjoyable. The good news is that this pattern requires only common crochet supplies that many crafters already have at home.
You’ll need worsted weight yarn in orange for the pumpkin body, black or gray for the cat features, and green or brown for the stem. You can also add white or cream yarn for details on the face if you like a more playful touch. A 3.5 mm to 4 mm crochet hook works well for this project, giving your pumpkin a neat and compact texture.
A yarn needle is important for sewing parts together, and stitch markers will help you keep track of rounds—especially when shaping the pumpkin body. Don’t forget polyester stuffing to give your cat a soft, plushy look. Small safety eyes or black embroidery thread can be used for the facial details. Finally, a pair of scissors will be necessary for trimming loose ends neatly.
The combination of these materials ensures that your finished Crochet Pumpkin Cat Pattern will hold its shape and stay durable. Feel free to use cotton yarn if you prefer a more structured result, or acrylic yarn for a lightweight and soft texture.
Choosing the right yarn colors can make your project stand out. Traditional pumpkin orange paired with black gives a Halloween-inspired feel, but pastel tones or even white pumpkins with silver-gray cats can look just as beautiful. This flexibility allows you to match your seasonal décor perfectly.
With your materials ready, you’re all set to start crocheting. The following steps will guide you through the process to create your own cozy and adorable Crochet Pumpkin Face Cat.
To begin your Crochet Pumpkin Cat Pattern, start by making the pumpkin base. Work in continuous rounds using orange yarn. Begin with a magic ring and crochet six single crochets into it. From there, increase each round evenly until your pumpkin reaches your desired width. The typical size is around 10 to 12 centimeters in diameter, but you can make it smaller for ornaments or larger for plush toys.
Once the base width is complete, continue crocheting without increases to form the height. This will create the round pumpkin shape. Remember to stuff as you go to give the pumpkin a firm, plush texture. When the pumpkin is tall enough, start decreasing evenly until the top closes. Fasten off and weave in the ends neatly.
Next, create the cat’s ears. Using black or dark gray yarn, chain five and work single crochets back and forth to form small triangles. Make two of these and sew them onto the top of the pumpkin, positioning them slightly tilted outward for a natural feline look.
For the face, you can use safety eyes or embroider them using black thread. Add a small triangle nose in the center and two curved lines for the mouth. You can also embroider whiskers for an extra cute touch. These details are what transform the pumpkin into a true Crochet Pumpkin Face Cat masterpiece.
Crochet a small green stem for the top by making a few chains and working single crochets around them. Attach the stem between the ears to complete the pumpkin appearance. You can even add a small leaf next to it for more texture and realism.
Finally, shape your cat gently with your hands and adjust the stuffing if needed. This will help define the pumpkin ridges and ensure a smooth, rounded look.
The beauty of the Crochet Pumpkin Cat Pattern is that it offers endless creative possibilities. Once you master the basic version, you can personalize your design to match your own style or home décor theme.
One popular variation is to create a set of mini pumpkin cats in different colors. For example, make an orange pumpkin with black cat features, a white pumpkin with gray details, and a black pumpkin with orange accents. Displaying them together makes a charming centerpiece for autumn.
Another idea is to add accessories to your Crochet Pumpkin Face Cat, such as a tiny bow tie, scarf, or witch hat. These small additions give your project a touch of personality and make it a fun gift for friends or family.
You can also experiment with textures. Using fuzzy or velvet yarn creates a luxurious, plush feel that children love. Alternatively, cotton yarn offers a crisp, clean look that’s perfect for minimalistic décor.
If you want to hang your pumpkin cat as an ornament, simply attach a loop of yarn at the top before finishing off the stem. You can then use it as a keychain, car charm, or tree ornament during Halloween or Thanksgiving.
Crocheting a Crochet Pumpkin Cat Pattern can also be turned into a family activity. Children can help choose colors, add stuffing, or draw face designs that you later embroider. It’s a wonderful way to bond while creating something unique together.
Even though this project is beginner-friendly, following a few helpful tips can ensure that your Crochet Pumpkin Face Cat turns out beautifully every time.
First, make sure to maintain even tension throughout your work. Uneven stitches can cause the pumpkin to lose its shape or create lumps. If you’re new to crocheting in rounds, use a stitch marker at the start of each round to stay organized.
When stuffing, add the fiberfill gradually and evenly. Overstuffing may stretch the stitches, while too little stuffing can make your pumpkin sag. The goal is a plump yet firm texture that holds its shape.
If you’re using embroidery for the face, use a sharp needle and work slowly to ensure symmetry. You can lightly mark the placement of eyes and mouth with pins before stitching. This step helps to achieve a cute and balanced Crochet Pumpkin Face Cat expression.
Blocking is another useful step, especially if your yarn tends to curl. A gentle steam block can help smooth the surface and enhance the overall look of your finished piece.
Lastly, always weave in your ends securely. Since this project involves several color changes, neat finishing will make your pumpkin cat look professional and long-lasting.
If you plan to gift or sell your handmade Crochet Pumpkin Cat Pattern, consider adding a small tag or ribbon to make it extra special. Handmade items with thoughtful presentation are always cherished.
1. Is the Crochet Pumpkin Cat Pattern suitable for beginners?
Yes! This project is perfect for beginners. It uses basic stitches and simple shaping, making it a great way to practice crocheting in rounds while creating something adorable.
2. How long does it take to make a Crochet Pumpkin Face Cat?
Depending on your speed and experience, it can take anywhere from two to four hours to complete one pumpkin cat. Mini versions take even less time.
3. What type of yarn works best for this pattern?
Worsted weight acrylic or cotton yarn works perfectly. Acrylic gives a soft finish, while cotton provides more structure and crisp stitch definition.
4. Can I make the pumpkin cat larger or smaller?
Absolutely. To make a larger version, use thicker yarn and a bigger hook. For mini pumpkin cats, use finer yarn and a smaller hook.
5. How do I clean my Crochet Pumpkin Cat?
Gently hand wash your crochet piece in cold water and let it air dry. Avoid wringing or machine washing to maintain the shape.
6. Can I sell items made from this pattern?
Yes, you may sell finished pieces as long as you credit the original pattern source when possible. Handmade pumpkin cats are popular gifts and seasonal craft fair items.
Creating your own Crochet Pumpkin Cat Pattern is a delightful way to celebrate the cozy charm of fall and the fun of Halloween. With just a few materials and some creativity, you can craft a unique decoration that showcases your crochet skills and love for handmade art. From shaping the pumpkin base to designing the cute Crochet Pumpkin Face Cat, every step brings joy and satisfaction.
We hope this guide has inspired you to try this adorable project and experiment with your own color combinations and details. If you make your own version, we’d love to hear about it! Share your honest opinion and suggestions—your feedback helps inspire more creative crochet ideas for the future.
