
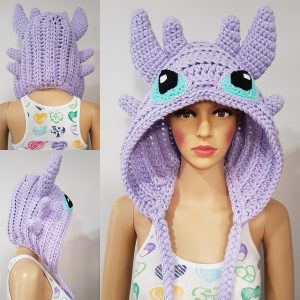
Easter Bunny Basket - Crochet Pattern
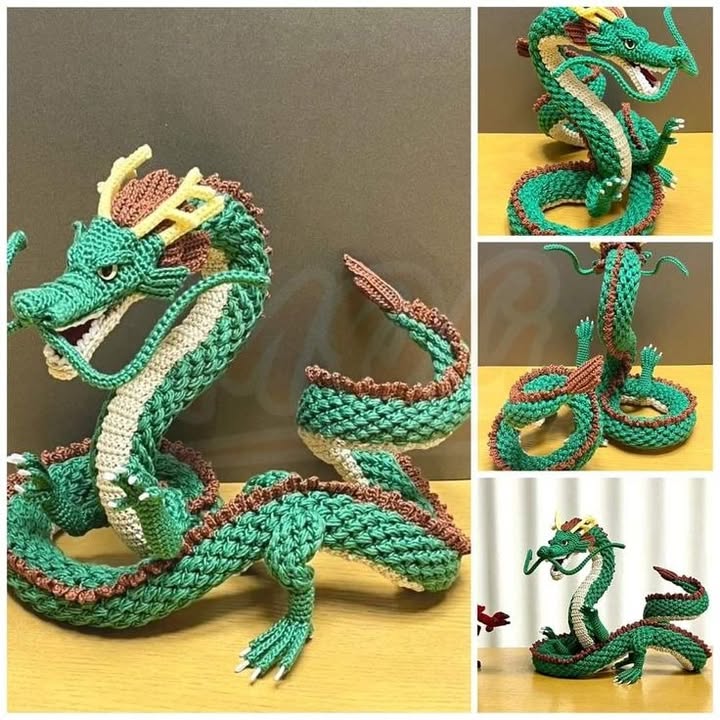
If you’re a crochet enthusiast looking to bring mythical magic into your crafting projects, this Eastern Dragon Crochet Tutorial is perfect for you. With detailed steps and tips, you’ll learn how to create an intricate and beautiful Eastern dragon using basic to intermediate crochet techniques. This pattern blends artistry and tradition, offering an exciting challenge and a rewarding result.
This project is great for anyone who loves fantasy, storytelling, and the rich cultural symbolism of Eastern dragons. These dragons are known for their long, serpentine bodies, flowing manes, and wise, benevolent nature. Crocheting one not only improves your skills but also results in a stunning handmade figure that can be displayed, gifted, or cherished.
In this comprehensive guide, we’ll walk you through all the essential steps of the Eastern Dragon Crochet Tutorial — from selecting your yarn and hook to stitching each body part. You’ll also find exact fabric cut sizes and measurements to help structure your dragon, making this a reliable resource for your next masterpiece.
Before diving into the actual crocheting process, let’s go over everything you’ll need for this Eastern Dragon Crochet Tutorial. Preparation is the key to success, especially with a pattern as detailed as this one.
Start by gathering your yarn. You’ll need:
You will also need:
Before you begin, cut felt or stiff fabric for internal structure support:
This Eastern Dragon Crochet Tutorial requires careful attention to detail and consistent tension, so take your time and enjoy the process as you bring your mythical dragon to life.
The foundation of the Eastern Dragon Crochet Tutorial is the elongated, winding body — symbolic of grace and power. This part sets the base for your entire dragon and defines its serpentine silhouette.
Start with the main body color and create a magic ring:
To shape the curves of the body, insert floral wire into the stuffing as you go. This lets you pose the dragon and make it look alive. Stuff the body firmly but evenly, and mark where the legs will later be attached.
Switch to belly color and work a flat oval panel:
Sew the belly panel along the underside of the body. Make sure it’s centered and well-aligned. This is a critical step in the Eastern Dragon Crochet Tutorial that gives the dragon its traditional dual-tone appearance.
For the tail, taper the rounds:
Positioning the tail with a slight curve adds flow and character, enhancing the lifelike motion of the piece.
The most expressive part of any dragon is its face. In the Eastern Dragon Crochet Tutorial, we’ll shape a wise and detailed dragon head complete with eyes, horns, and whiskers.
Start by crocheting the head base:
Stuff the head as you go, shaping gently with your fingers. Insert the safety eyes or embroider them on for a classic look. Add a ridge along the brow using surface crochet or a row of back post stitches.
Create the horns:
Next, make the dragon’s iconic whiskers:
For the mane:
Each of these facial features adds character and brings out the Eastern dragon’s symbolic wisdom and elegance. These intricate details are what make this Eastern Dragon Crochet Tutorial a standout project.
Now that your dragon’s head and body are complete, it’s time to add the limbs — giving it structure, strength, and that animated feel. The final stages of the Eastern Dragon Crochet Tutorial focus on legs, claws, and finishing touches.
Start with the front and back legs:
Make 4 identical limbs and stuff lightly. Use pipe cleaner inside each one to allow light posing. Attach the legs to the body, evenly spaced to create the illusion of movement.
For the claws:
Now position the limbs:
This gives your dragon a coiled, ready-to-move posture — a key detail in this Eastern Dragon Crochet Tutorial that brings the creature to life.
Once all parts are attached, go over your piece and adjust shape and curves using the internal wire. Comb out the mane and whiskers, trim fuzz, and reinforce any loose ends.
Use a steamer lightly to set the shape (optional), and your Eastern dragon is ready for display or gifting.
What skill level is required for this pattern?
The Eastern Dragon Crochet Tutorial is best for intermediate crocheters due to shaping, color changes, and structural assembly.
Can I use different yarn types?
Yes, just ensure you adjust hook size accordingly. Lighter yarn gives more delicate results, while chunky yarn will create a larger dragon.
How long does it take to complete?
Depending on your speed and experience, expect 8–12 hours total.
Is this pattern safe for kids?
As long as safety eyes are replaced with embroidery and wires are excluded, it can be made child-friendly.
Can I customize the colors?
Absolutely! Try traditional red and gold, or go bold with purples, greens, or black for a gothic flair.
Where can I use this finished dragon?
It makes a great home decor piece, fantasy gift, cosplay prop, or lucky charm.
Creating your own mythical creature with this Eastern Dragon Crochet Tutorial is both challenging and incredibly satisfying. Each stitch contributes to a stunning piece of textile art that reflects patience, creativity, and cultural appreciation. With the step-by-step guidance in this tutorial, even intricate details become manageable and enjoyable.
Whether you’re crocheting for yourself or making a gift, this dragon pattern will surely become a centerpiece in your collection. If you loved working through this tutorial or have suggestions, leave a comment — your feedback helps the crafting community grow!
Ready to bring your dragon to life? Grab your hook, yarn, and let the magic begin.


