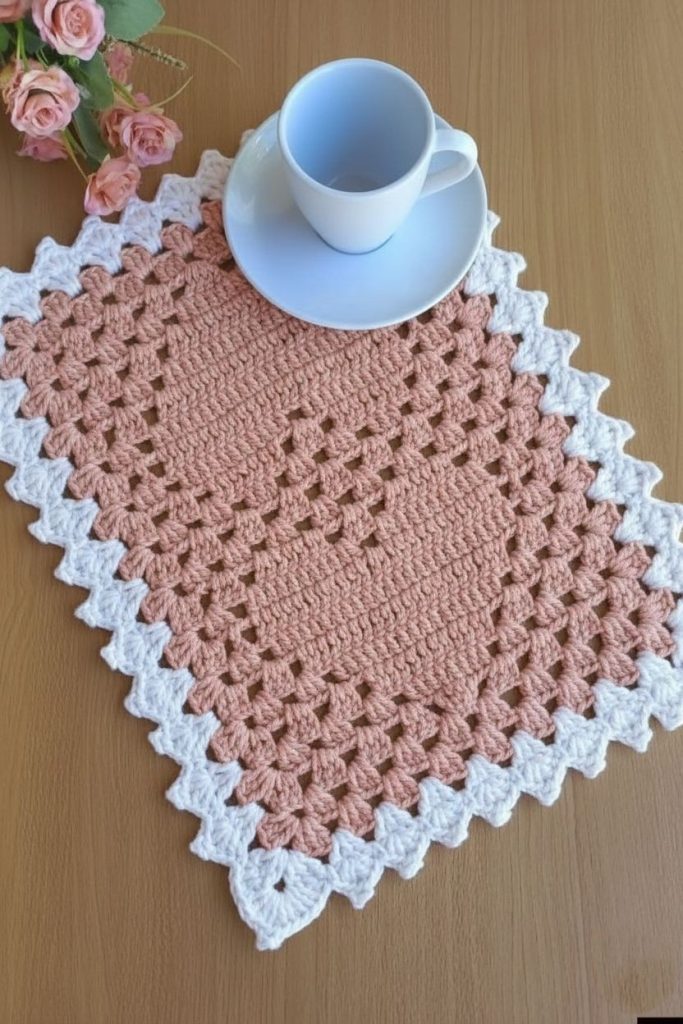
Crochet placemat rectangular placemat with hearts Pattern
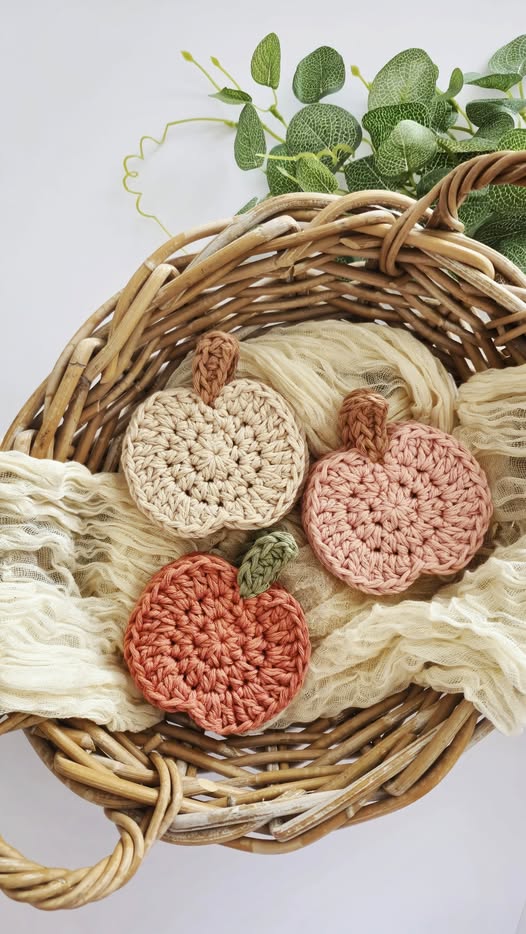
The Fall Pumpkin Coasters – Crochet Pattern is the perfect seasonal project for adding warmth and charm to your home décor. As autumn leaves begin to fall and cooler days set in, many crafters turn to cozy and festive crochet patterns to celebrate the season. These handmade pumpkin-shaped coasters are not only functional but also a delightful way to bring a touch of fall into your living space. With their vibrant colors and soft textures, they make a thoughtful gift or a lovely addition to your own table setting.
Creating these Fall Pumpkin Coasters allows you to enjoy a relaxing crochet session while crafting something practical and beautiful. Whether you are an experienced crocheter or a beginner eager to learn, this pattern is approachable and adaptable to your skill level. Using basic stitches, you can shape each coaster into a charming pumpkin that reflects the essence of fall. Choosing warm hues like orange, rust, and mustard will capture the season’s palette perfectly.
One of the best things about working on a Fall Pumpkin Coasters – Crochet Pattern is its versatility. You can make a matching set for everyday use during the autumn months or create a variety of sizes and shades to use as decoration. They can double as mug rugs, small trivets, or even part of a festive table centerpiece. Plus, crocheting them is a great way to use up leftover yarn from other projects, making it an eco-friendly and budget-friendly craft.
When starting the Fall Pumpkin Coasters – Crochet Pattern, gathering the right materials is essential. A medium-weight yarn in autumn colors works best for creating a sturdy yet soft coaster. Cotton yarn is highly recommended because it is durable, easy to clean, and heat-resistant, which is ideal for protecting your surfaces from warm mugs and dishes. You might also consider using acrylic yarn if you prefer a lighter texture or want a wider variety of color options.
In addition to yarn, you will need a crochet hook that complements your chosen yarn’s thickness. Most patterns for pumpkin coasters recommend a hook size between 4.0 mm and 5.0 mm, but you can adjust depending on your tension and desired coaster size. Stitch markers can also be useful for keeping track of your rounds, especially if you are working in continuous spirals.
A tapestry needle is essential for weaving in ends neatly once your coaster is complete. This small detail ensures your Fall Pumpkin Coasters look polished and professional. You may also want to have a pair of sharp scissors handy for trimming yarn tails. Some crocheters like to block their finished pieces using a blocking board and pins, which helps maintain the shape and smooth out stitches.
When selecting colors, think beyond the traditional orange pumpkin. Deep reds, golden yellows, and even cream tones can create a beautiful and varied set of coasters. This allows your Fall Pumpkin Coasters – Crochet Pattern to match different décor styles while still evoking the warmth of autumn.
If you are making these as a gift, consider tying the set together with a rustic ribbon or placing them in a small decorative box. Handmade items carry a personal touch that store-bought items cannot match, and this project is no exception. The combination of color, texture, and craftsmanship makes these coasters truly special.
By investing a little time in gathering quality materials, you set yourself up for success. A well-chosen yarn, the right hook size, and neat finishing techniques will ensure your coasters last for many seasons to come.
To start your Fall Pumpkin Coasters – Crochet Pattern, create a magic ring or chain two and work the first round into the second chain from the hook. This will form the pumpkin’s center. Most patterns begin with a series of double crochet stitches to create a flat, circular base. The number of stitches you start with will determine the coaster’s initial size, so follow the pattern closely for consistency.
As you build the coaster, you will increase stitches evenly in each round to maintain a flat shape. The key to achieving the pumpkin look is to slightly vary the stitch height and create subtle curves, mimicking the pumpkin’s natural ridges. This can be done by alternating between double and half-double crochet stitches in strategic places.
Once the main body of the pumpkin is complete, you can crochet a small stem at the top. Using a contrasting yarn, typically green or brown, chain a few stitches and slip stitch back down to attach it securely. Some crocheters also like to add a small leaf next to the stem for extra detail.
When finishing, weave in all ends with your tapestry needle. This not only makes the coaster more durable but also enhances the overall appearance. If you notice the coaster curling or losing shape, lightly block it by pinning it down and spraying with water. Allow it to dry completely before using.
The great thing about this Fall Pumpkin Coasters – Crochet Pattern is that it is easily customizable. You can adjust the coaster size by adding or removing rounds or experiment with different stitch patterns for texture. Try making a set where each coaster has a slightly different design—this adds charm and character to your collection.
With each completed coaster, you will gain more confidence in your crochet skills. This project is a perfect way to practice working in the round, managing tension, and combining colors creatively.
While the primary purpose of Fall Pumpkin Coasters is to protect your furniture, their appeal goes far beyond practicality. These coasters can be part of your seasonal table setting, adding a handmade touch to Thanksgiving dinners, Halloween gatherings, or casual autumn coffee breaks. Their festive design sparks conversation and shows off your crafting talent.
You can also use them as decorative accents around the home. Place them under small vases, candles, or seasonal figurines to create cohesive fall-themed displays. Since they are soft and lightweight, they are easy to move and store when not in use.
Another creative use for your Fall Pumpkin Coasters – Crochet Pattern is turning them into wall or window decorations. Simply attach a loop of yarn to the top and hang them for a unique, handmade garland. You could even combine them with other autumn shapes like leaves or acorns for a full seasonal display.
If you enjoy giving handmade gifts, these coasters are an excellent choice. Pair them with a mug and a packet of tea or coffee for a thoughtful and cozy present. They are suitable for friends, family members, coworkers, or anyone who appreciates handmade crafts.
Crafters with small businesses can also sell sets of these Fall Pumpkin Coasters at local craft fairs or online marketplaces. Their seasonal appeal makes them a popular item during the fall months, and their quick production time means you can make multiple sets efficiently.
Ultimately, the versatility of this crochet pattern ensures you will find many ways to enjoy your finished coasters. Whether functional, decorative, or both, they will bring warmth and joy to your space.
Achieving a polished look with the Fall Pumpkin Coasters – Crochet Pattern requires attention to detail. One of the most important tips is maintaining consistent tension throughout your work. Uneven tension can cause the coaster to warp or ripple, so check your stitches regularly.
Blocking your finished coasters can make a significant difference in their appearance. Even if your stitches are neat, blocking helps set the shape and smooth any uneven edges. Cotton yarn, in particular, responds well to light blocking.
Experimenting with yarn types and colors can lead to exciting results. For example, using variegated yarn can create a unique, multicolored pumpkin without the need to switch colors mid-project. Metallic or sparkly yarns can add a festive touch, perfect for holiday gatherings.
Pay close attention to stitch counts, especially when increasing in the round. Missing an increase or adding an extra stitch can alter the coaster’s shape. Counting at the end of each round is a simple habit that prevents mistakes.
If you are new to crochet, practice the basic stitches—chain, slip stitch, single crochet, half-double crochet, and double crochet—before starting. This ensures you can follow the Fall Pumpkin Coasters – Crochet Pattern with confidence.
Lastly, enjoy the process. Crocheting is as much about relaxation and creativity as it is about the final product. Take your time, savor each stitch, and watch your pumpkins come to life.
1. What skill level is needed for the Fall Pumpkin Coasters – Crochet Pattern?
This pattern is beginner-friendly, using basic stitches and simple increases.
2. What type of yarn works best?
Cotton yarn is recommended for durability and heat resistance, but acrylic can also be used.
3. Can I make the coasters in different sizes?
Yes, adjust the number of rounds to create smaller or larger pumpkins.
4. How long does it take to make one coaster?
Most crocheters can complete one in under an hour, depending on skill level.
5. Do I need to block the coasters?
Blocking is optional but helps achieve a neat, flat finish.
6. Can I sell the coasters I make?
Yes, handmade coasters are popular items at craft fairs and online shops.
7. Are these coasters washable?
If made with cotton yarn, they can be gently hand or machine washed on a delicate cycle.
8. Can I use leftover yarn for this project?
Absolutely—this is a great way to use yarn scraps creatively.
9. How many coasters should I make for a set?
Typically, a set of four or six makes a nice gift or personal collection.
10. Can I add embellishments?
Yes, small leaves, buttons, or embroidery can add extra detail and charm.
The Fall Pumpkin Coasters – Crochet Pattern is a delightful, practical, and creative project that captures the essence of autumn. With just a few materials and some basic crochet skills, you can craft beautiful, seasonal coasters that bring warmth to any home. Whether you keep them for yourself, give them as gifts, or sell them at local markets, their charm is undeniable. We hope this guide has inspired you to pick up your hook and yarn to create your own set. Share your honest opinion and suggestions—we would love to hear how your pumpkin coasters turn out!


