
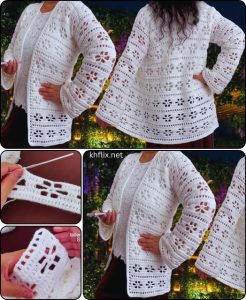
Easter Bunny Basket - Crochet Pattern
If you love creating beautiful crochet projects, then the FLOWER PUFF CROCHET pattern is a must-try. This stunning design combines texture, elegance, and simplicity, making it perfect for beginners and experienced crocheters alike. Whether you want to make blankets, pillow covers, bags, or decorative items, the FLOWER PUFF CROCHET adds a charming floral touch to your handmade creations.
The beauty of the FLOWER PUFF CROCHET lies in its puffy texture that mimics delicate flowers. The 3D effect of the puff stitches brings life and dimension to your crochet work. Plus, this pattern works up quickly, making it ideal for gifts or quick projects.
In this step-by-step guide, you will learn how to make the FLOWER PUFF CROCHET from start to finish. We’ll cover all the materials you need, the stitch techniques, the fabric cuts, and the exact measurements. Follow along to create your own stunning flower puff masterpiece.

When starting your FLOWER PUFF CROCHET project, having the right materials is essential for the best results. Choosing quality yarn and the right hook size will make your flowers look fluffy and perfect.
For this project, choose medium-weight cotton yarn or acrylic yarn. These yarn types hold the puff shape beautifully and offer a soft yet structured finish. You can use multiple colors to create a vibrant floral effect or stick to one color for a minimalist design.
The recommended crochet hook size for FLOWER PUFF CROCHET is 4.0 mm (G-6) or 4.5 mm (7). The hook size affects the puffiness of your stitches, so if you prefer extra fluffy flowers, opt for a slightly larger hook.
You will also need scissors, a tapestry needle for weaving in ends, and a stitch marker if you want to keep track of rounds. These basic tools are essential for any crochet project, including the FLOWER PUFF CROCHET pattern.
When it comes to fabric cuts and measurements, if you are attaching your crochet flowers to fabric (like a pillow or bag), cut square pieces of fabric measuring 18 inches by 18 inches (45.7 cm x 45.7 cm) for a standard pillow. For a tote bag, use two rectangles measuring 16 inches by 14 inches (40.6 cm x 35.5 cm).
If you are making a blanket using the FLOWER PUFF CROCHET, decide the size based on how many flower motifs you plan to create. Each completed flower motif measures approximately 4 inches (10 cm) in diameter, so plan your cuts and layout accordingly.
Remember that quality fabric backing enhances the overall appearance and durability of your crochet projects, especially when combining crochet with sewing.
Making the FLOWER PUFF CROCHET involves simple stitches, but the puff stitch gives it a rich texture that stands out. Follow this step-by-step guide to create the perfect crochet flower.
Start by making a magic ring or chain 4 and join with a slip stitch to form a ring. This will be the center of your FLOWER PUFF CROCHET flower. A magic ring gives a tighter center, but both methods work well.
Round 1: Chain 2 (counts as the first puff). Yarn over, insert the hook into the ring, yarn over, pull up a loop. Repeat this step 3 more times (you have 9 loops on the hook). Yarn over and pull through all loops. Chain 2 to close the puff. Repeat this step 5 more times for a total of 6 puff stitches around the ring. Join with a slip stitch.
Round 2: Chain 2. In each chain space between puffs, make 1 puff stitch (4 yarn overs) + chain 2. Repeat in each space around. You will have 6 puffs in this round as well. Join with a slip stitch.
Round 3 (optional for a larger flower): Repeat the same steps by making puff stitches in each chain space, adding chain 2 between each puff. The flower grows with each additional round.
Fasten off and weave in the ends using the tapestry needle. Your FLOWER PUFF CROCHET flower is now ready to be used in any project. The puff stitches create a beautiful 3D floral effect that stands out.
If you want to join multiple flowers together for a blanket or larger piece, crochet a border around each flower using single crochet or slip stitch, then join them together with your preferred method (slip stitch join, whip stitch, or join-as-you-go).
Experiment with different color combinations for the petals and centers to personalize your FLOWER PUFF CROCHET design.
The FLOWER PUFF CROCHET pattern is not only beautiful but also versatile. You can use it to create a wide variety of handmade items that are both functional and decorative.
One popular idea is making a stunning throw blanket. Join multiple FLOWER PUFF CROCHET motifs together using a neutral-colored yarn to let the flowers stand out. The result is a cozy and visually striking blanket.
Another creative option is designing pillow covers. Crochet several flower motifs and attach them to a fabric backing. For a standard pillow, use two fabric cuts measuring 18×18 inches and sew the motifs on the front side for a decorative touch.
The FLOWER PUFF CROCHET pattern also works wonderfully for handbags or tote bags. Use a base fabric measuring 16×14 inches and stitch your crochet flowers onto the front panel. Combine with canvas or denim for extra durability.
Home decor is another great use. Create wall hangings by joining flower motifs in geometric arrangements. Mount them on wooden frames or hang them directly with a wooden dowel for a boho-chic look.
Clothing accessories are also possible. Add a few FLOWER PUFF CROCHET flowers to hats, scarves, or headbands. These small accents instantly upgrade any handmade or store-bought accessory.
If you enjoy making gifts, this pattern is ideal. Handmade coasters, placemats, or even brooches featuring the FLOWER PUFF CROCHET are thoughtful, beautiful, and quick to complete.
To achieve the best results with your FLOWER PUFF CROCHET, there are a few tips and tricks that can make a big difference in your final project.
Always maintain even tension. Puff stitches can look uneven if your yarn tension changes. Practice a few puffs on a scrap piece before starting your actual project.
Use a larger hook size if your stitches feel too tight. The puff stitch requires multiple yarn overs, so a slightly larger hook can make it easier to pull through all the loops.
When changing colors, fasten off securely and weave in ends neatly. The FLOWER PUFF CROCHET looks best when the color changes are clean and the backs are tidy.
Block your motifs after finishing. Wet blocking or steam blocking helps the puff stitches settle nicely and gives your flower a more polished appearance.
If attaching to fabric, use a strong sewing thread and secure the flowers with small, nearly invisible stitches around the edges of each puff stitch. This keeps them firmly attached without being noticeable.
Don’t be afraid to experiment. The FLOWER PUFF CROCHET pattern is highly adaptable. You can modify the number of puffs per round, add a border, or combine it with other crochet motifs to create unique designs.
The FLOWER PUFF CROCHET pattern is a delightful project for crafters of all skill levels. Its beautiful texture, simple construction, and versatility make it a favorite among crochet enthusiasts worldwide. Whether you’re creating a cozy blanket, a stylish bag, or elegant home decor, this pattern adds a charming floral touch that never goes out of style.
With just a few materials—yarn, hook, scissors, and fabric cuts—you can transform simple stitches into stunning works of art. The step-by-step guide provided here ensures that even beginners can achieve perfect results.
Ready to start your own FLOWER PUFF CROCHET masterpiece? Grab your hook, pick your favorite colors, and let your creativity bloom. If you enjoyed this tutorial, feel free to share your thoughts, ask questions, or suggest other patterns you’d love to see. Happy crocheting!


