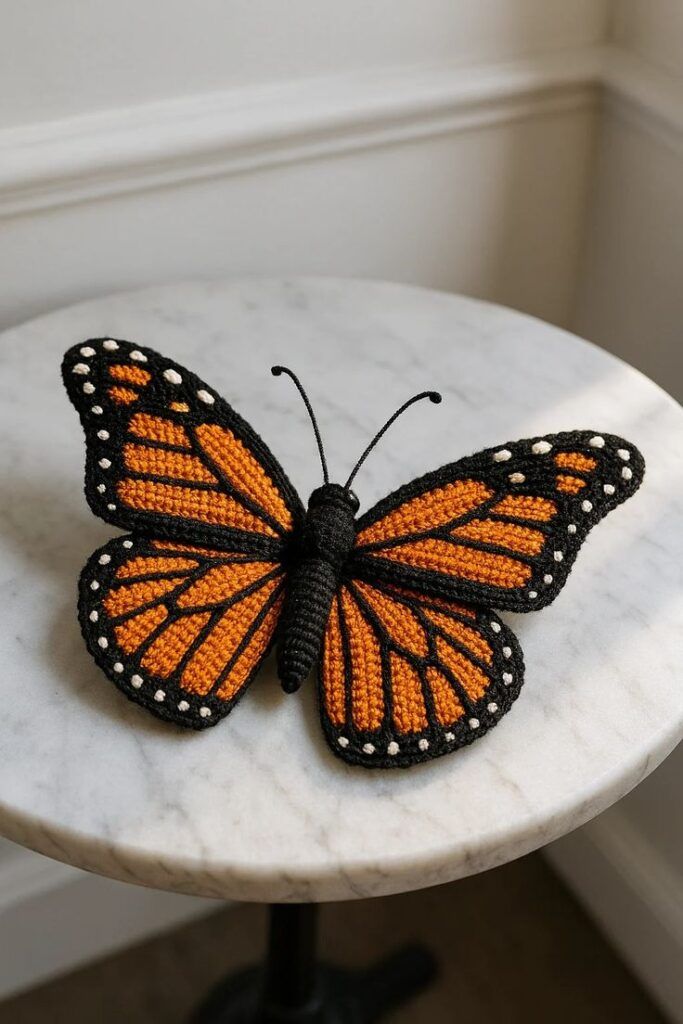
How to Make a Monarch Butterfly Crochet Pattern
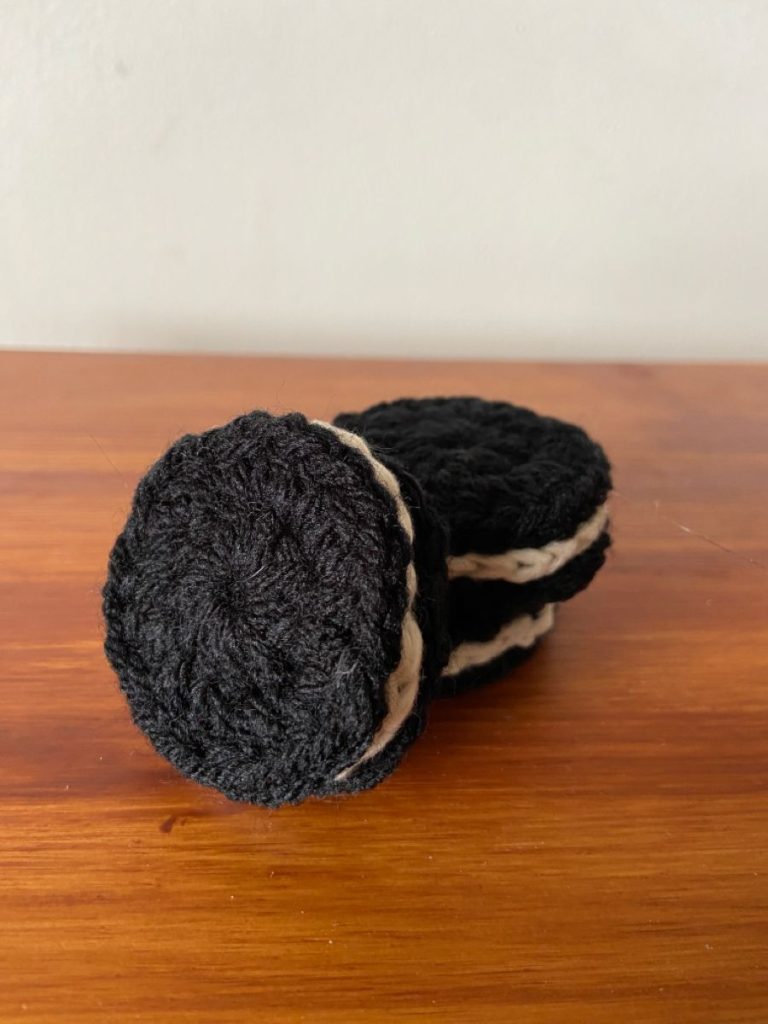
The Oreo Cookie – Crochet Pattern is a fun and creative project for anyone who loves both crocheting and the playful look of sweet treats. Imagine making a crochet version of the world’s favorite cookie, with its distinctive cream-filled center and round chocolate-inspired edges. This pattern is not only beginner-friendly but also versatile, allowing you to use it as a keychain, coaster, toy, or even a part of larger crochet projects like blankets and pillows. The unique design makes it an enjoyable experience for crocheters who want to try something new while still keeping the steps simple and approachable.
When working on an Oreo Cookie – Crochet Pattern, you’ll notice how the stitches perfectly mimic the texture of the cookie layers. With careful use of colors such as black, brown, and white yarn, you can create a project that looks nearly realistic yet soft and charming. This is one of those crochet patterns that can be used to personalize gifts, decorate your home, or even sell as part of handmade crafts. It’s the type of crochet idea that blends creativity with practicality, which is why it has gained so much popularity among crafters.
Another reason crafters love this design is that the Oreo Cookie – Crochet Pattern can be easily adapted to different skill levels. If you’re a beginner, you can follow a step-by-step version using only basic stitches like single crochet and slip stitch. For more advanced crocheters, you can experiment with textures, embroidery, or different yarn types to give the cookie extra detail. This flexibility makes it a timeless project that continues to attract crocheters from all over the world. Now let’s dive deeper into the process and creative possibilities of this crochet treat.
To begin your Oreo Cookie – Crochet Pattern, it’s important to gather all the necessary materials. Having the right supplies will ensure that your project looks neat, durable, and appealing. The good news is that you don’t need complicated tools or expensive items, making it accessible for beginners and experienced crocheters alike.
The first essential is yarn. Most crafters prefer using medium-weight acrylic or cotton yarn. You’ll need black or dark brown yarn for the cookie part and white yarn for the cream filling. Choosing yarn with a soft texture will help your Oreo look plush and smooth, while also making it easier to work with.
Next, you’ll need a crochet hook. Typically, a 3.5 mm to 4.0 mm hook works best for this type of project, depending on your yarn weight. Using the right hook size is important because it ensures your stitches are tight enough to hold the shape but not so tight that the piece becomes stiff.
Don’t forget additional supplies like a yarn needle for weaving in ends and scissors for trimming excess yarn. If you want to turn your crochet cookie into a keychain or decorative item, you might also want to add a metal ring or a small clasp. These extra accessories give your project more functionality and personality.
Some crocheters like to stuff their Oreo cookie with a bit of fiberfill to make it more three-dimensional. This isn’t required, but it adds a fun plush look and gives the cookie a more realistic shape. Beginners might prefer skipping this step, but it’s a great option for anyone wanting a little extra flair.
Lastly, it’s always helpful to have a stitch marker on hand. Since the pattern involves crocheting in the round, a marker will help you keep track of your stitches and prevent confusion as you work through each layer. By preparing these materials in advance, you’ll be ready to bring your Oreo Cookie – Crochet Pattern to life.
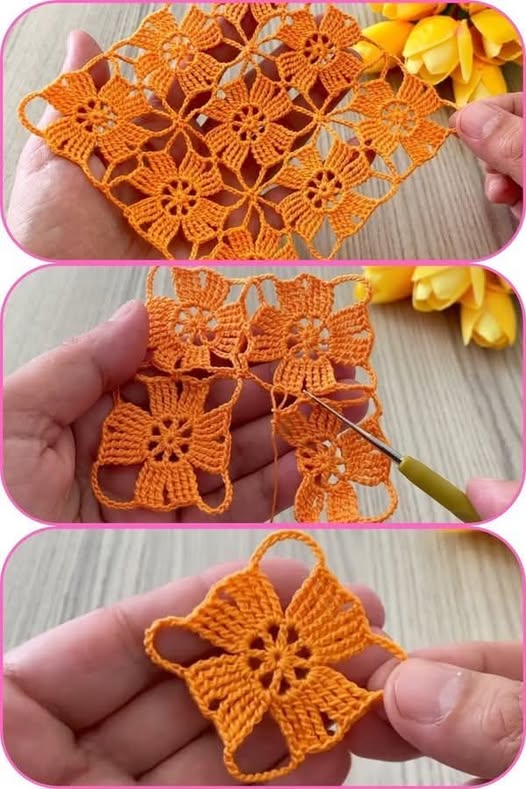
Creating your Oreo Cookie – Crochet Pattern begins with crocheting the two cookie halves. Each side is typically made using black or dark brown yarn to represent the cookie part. You’ll start with a magic ring, followed by rounds of single crochet stitches to form a flat circle. As you increase stitches evenly in each round, the circle will expand, creating the perfect cookie base.
Once the cookie halves are completed, the next step is to make the cream filling. This part is done with white yarn, and the method is quite similar. You’ll crochet another flat circle, but this one is usually smaller and thinner than the cookie parts. Keeping the cream a bit smaller ensures it sits nicely inside without showing too much from the edges.
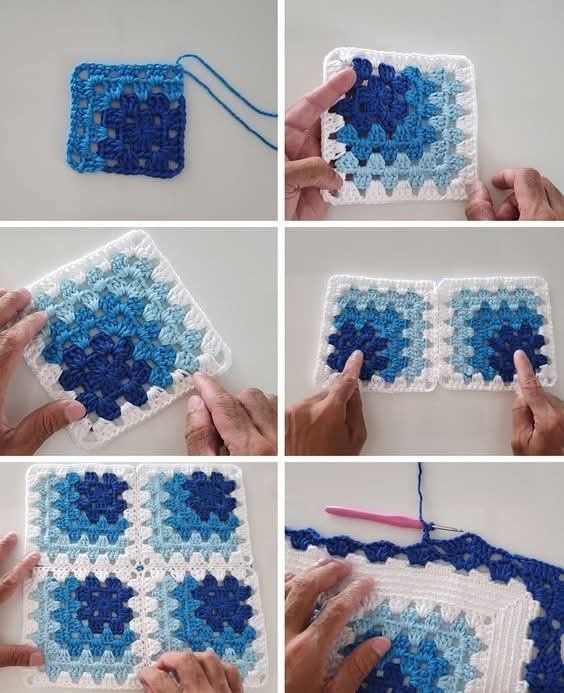
After you have all three pieces — two cookie halves and one cream filling — it’s time to assemble them. Place the cream filling between the two cookie halves and use slip stitches or sewing techniques to join the edges together. If you want the cookie to stay plush, you can insert a small amount of fiberfill before fully closing it. This makes the Oreo look fuller and more realistic.
Beginners may wonder if the assembly process is complicated, but it’s actually straightforward. The key is to work slowly and ensure all edges are aligned before joining them. If the pieces are uneven, you can adjust with a few extra stitches until everything fits neatly.
You can also customize your Oreo by adding embroidery or textured stitches on the cookie surface. For example, using surface slip stitches to create lines or patterns gives the cookie more character, mimicking the embossed design of real cookies. This is an optional step, but it adds charm and detail.
With patience and creativity, your Oreo Cookie – Crochet Pattern will be ready to display, gift, or use in countless fun ways. The process is simple enough for beginners but has enough room for creativity to keep advanced crocheters engaged.
One of the best parts of making the Oreo Cookie – Crochet Pattern is the wide range of ways you can use the finished piece. Since it’s small, lightweight, and versatile, it can be adapted into numerous creative projects.
A popular idea is to use your crochet Oreo as a coaster. The round shape and flat design make it perfect for holding cups or mugs, adding a fun and cozy touch to your kitchen or dining room. By making a set of six or more, you can have a charming handmade collection for your home.
Another creative use is turning it into a keychain. By simply attaching a metal ring or clasp to the edge, you’ll have a unique accessory that stands out. This makes for a cute handmade gift that friends and family will love, especially those with a sweet tooth.
Some crocheters prefer to make plush versions by stuffing the Oreo with fiberfill. These can be used as small toys for children, decorative items for a shelf, or even stress-relief fidgets for adults. The soft texture and playful design make them irresistible to squeeze.
The Oreo cookie design can also be incorporated into larger crochet projects. Imagine adding several Oreo cookies to a blanket, pillow, or wall hanging. They can be appliquéd onto bigger works, creating themed designs that bring joy to any space.
Lastly, you can use the Oreo cookie as part of holiday decorations or party favors. For example, they make great ornaments for a Christmas tree or fun handmade giveaways for a birthday or baby shower. The versatility of this Oreo Cookie – Crochet Pattern is truly endless, making it a must-try for crafters.
When making the Oreo Cookie – Crochet Pattern, a few helpful tips can ensure your project comes out looking polished and professional. These tricks are especially useful for beginners who may feel unsure about their technique.
First, always check your tension. Keeping stitches consistent will help your cookie look even and neat. If your stitches are too loose, the piece may lose its shape, while overly tight stitches can make it stiff and difficult to work with.
Second, use high-quality yarn. While this pattern doesn’t require much yarn, the texture and durability of your materials can greatly affect the final outcome. Cotton yarn is a great choice because it holds shape well and provides a smooth finish.
Third, don’t rush the assembly process. Carefully aligning the cookie halves and cream filling will make the difference between a lopsided project and one that looks professional. If necessary, pin the pieces together temporarily before sewing them in place.
Another tip is to experiment with size. By adjusting your yarn weight and hook size, you can create Oreos of different dimensions. Larger cookies can be used as coasters or toys, while smaller ones are perfect for keychains or jewelry.
Also, keep in mind that practice makes perfect. The first Oreo you crochet might not be flawless, but with each attempt, your technique will improve. Many crocheters find this project addictive and enjoy making multiple Oreos in a variety of styles.
Finally, don’t be afraid to add your personal touch. Whether it’s embroidery, beads, or even colorful variations, your Oreo Cookie – Crochet Pattern can be as creative as you want it to be. This is what makes crochet so rewarding — the chance to put your personality into every project.
1. Is the Oreo Cookie – Crochet Pattern beginner-friendly?
Yes, this pattern is great for beginners. It uses basic stitches like single crochet, slip stitch, and increases, which are easy to learn and follow.
2. How long does it take to make one Oreo cookie?
On average, it takes about 1–2 hours to complete one cookie, depending on your skill level and whether you add details or stuffing.
3. What yarn works best for this pattern?
Medium-weight cotton or acrylic yarn is recommended. Cotton yarn gives a firmer structure, while acrylic provides a softer finish.
4. Can I make the Oreo cookie in different colors?
Absolutely! While traditional black and white are popular, you can get creative with colorful variations for a playful twist.
5. Do I need to stuff the Oreo cookie?
Stuffing is optional. Adding fiberfill makes the cookie plush and three-dimensional, but leaving it unstuffed works well for coasters or flat decorations.
6. Can this crochet Oreo be washed?
Yes, if you use washable yarn. Hand-washing is usually best to maintain the shape and details of your crochet cookie.
The Oreo Cookie – Crochet Pattern is a charming and versatile project that brings together simplicity, creativity, and fun. From making coasters and keychains to plush toys and decorations, this crochet pattern offers endless possibilities. With just a few materials and basic stitches, you can create a handmade item that is both practical and delightful.
If you’re looking for a new crochet idea that combines cuteness with versatility, this pattern is a perfect choice. Try it out, enjoy the process, and share your creations with others. I’d love to hear your honest opinions and suggestions about this project — what did you think of the Oreo Cookie – Crochet Pattern, and how would you personalize yours?

