
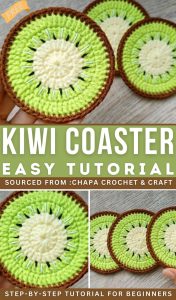
Easter Bunny Basket - Crochet Pattern
The Pink Panther amigurumi is a fun and adorable crochet project that brings to life one of the most iconic animated characters of all time. Whether you’re a long-time fan of the Pink Panther or just love crafting charming handmade toys, this amigurumi project is perfect for beginners and experienced crocheters alike. With a few basic materials and a bit of time, you can create your own cuddly version of this mischievous feline.
In this blog post, we’ll walk you through a detailed and beginner-friendly guide to making your own Pink Panther amigurumi. From gathering materials to the final stitch, you’ll learn every step of the process. We’ll also provide measurements and tips to help you get the perfect proportions so your finished piece looks just like the famous pink cat.
If you’ve been searching for a creative and rewarding crochet project, look no further. This complete guide will teach you how to crochet your own Pink Panther amigurumi while ensuring your pattern is optimized for both quality and presentation. Let’s dive into this playful journey!

To begin your Pink Panther amigurumi, the first step is gathering the correct materials and understanding the measurements needed for each piece. Having everything ready will make the entire crocheting process smoother and more enjoyable.
You will need:
The finished Pink Panther amigurumi should stand approximately 10 inches (25 cm) tall when using the recommended materials. You can adjust the size by changing the yarn weight and hook size, but be consistent throughout to maintain proportions.
Each piece of the Pink Panther amigurumi will be crocheted separately and then sewn together. This includes the head, body, arms, legs, tail, ears, eyes, and snout. Carefully following the measurements for each section is important to keep the look of the Pink Panther accurate and cohesive.
Use tight stitches so that the stuffing does not show through the yarn. This will also help your Pink Panther amigurumi hold its shape. For beginners, practicing magic rings and basic increases or decreases can be helpful before starting the full project.
Remember to use stitch markers to keep track of your rounds, especially when working in continuous spirals. This will make counting easier and ensure each part of your Pink Panther amigurumi comes out evenly.
Let’s start crocheting your Pink Panther amigurumi piece by piece. Follow the instructions below to assemble the toy in a logical order, ensuring a symmetrical and polished final result.
Head:
Using light pink yarn, make a magic ring.
Round 1: 6 sc into ring (6)
Round 2: inc in each st (12)
Round 3: (1 sc, inc) around (18)
Continue increasing until you reach 48 stitches. Then, work even for 10 rounds. Begin decreasing in reverse pattern until the head closes. Stuff firmly before sealing.
Body:
Start with light pink yarn.
Round 1: 6 sc in magic ring (6)
Round 2: inc in each st (12)
Continue increasing until 36 stitches. Work even for 15 rounds. Decrease gradually, stuff, and close.
Arms and Legs (make 2 of each):
Using light pink yarn, start with 6 sc in magic ring.
Increase to 12 stitches, then work even for 15 rounds. Stuff lightly.
For feet and hands, increase size to 18 stitches and work 5 extra rounds to make the ends rounded.
Tail:
With light pink yarn, make a long tube:
6 sc in magic ring, work even for 25-30 rounds.
No stuffing needed—keep the tail flexible.
Ears (make 2):
Use light and dark pink yarn.
Round 1: 6 sc in magic ring with darker pink
Round 2: (1 sc, inc) around (9)
Switch to light pink, and increase to 12 st. Flatten and sew to the top of the head.
Snout and Eyes:
White yarn for eyes: 6 sc in ring, increase to 12, then flatten.
Snout in pink: 6 sc in ring, increase to 18, and work 3 rounds.
Sew safety eyes into the whites before attaching to the head. Embroider the black pupils and nostrils with black thread.
Once you’ve completed crocheting all the parts of your Pink Panther amigurumi, it’s time to assemble them. This step is crucial to make your amigurumi resemble the actual Pink Panther character.
Start by sewing the head onto the body using a tapestry needle. Use firm, even stitches and ensure the head is centered. The neck should not wobble, so add extra reinforcement if needed with yarn or thread.
Attach the arms evenly on either side of the body. Make sure they are level with each other and slightly downward angled for a relaxed look. Light stuffing in the arms helps them stay in shape without being too stiff.
Sew the legs to the bottom of the body, with the wider part facing outward. The legs should support the body when the Pink Panther amigurumi sits upright. Balance is important, so check alignment before final stitching.
Place the tail at the back of the lower body. The tail can curve or be straight depending on your preference. Sew securely to prevent detachment, especially if the toy will be handled often.
Sew the ears on the top of the head, slightly angled outward. Next, attach the snout and eyes to the face. Use pins to test placement before sewing to ensure facial symmetry.
Finish by embroidering the eyebrows, smile, and whisker dots with black thread. These little facial details are what bring your Pink Panther amigurumi to life, so take your time with them.
Once your Pink Panther amigurumi is finished, you might want to add personal touches or make more versions with slight variations. This section will help you get creative while also maintaining the toy’s durability and charm.
To personalize the Pink Panther amigurumi, try using different shades of pink or alternate yarn textures. Some crocheters even add accessories like a bow tie, scarf, or small clothing pieces to make their panther unique.
Another fun idea is to make mini or giant versions of the Pink Panther amigurumi by adjusting the yarn weight and hook size. Bulky yarn will produce a huggable pillow-sized panther, while thread and a small hook make great keychains or bag charms.
If giving the toy to a child, consider using embroidered eyes instead of safety eyes to eliminate any choking hazards. Use hypoallergenic stuffing for extra safety and comfort.
Cleaning your amigurumi is simple. Hand wash in lukewarm water with a mild detergent. Squeeze gently and lay flat to dry. Avoid wringing or putting it in the washing machine to prevent deforming the shape.
Store your Pink Panther amigurumi in a cool, dry place away from direct sunlight to preserve the yarn color. Keep away from pets to avoid damage, especially from chewing or scratching.
And finally, share your creation! Post photos of your finished Pink Panther amigurumi on social media or crafting forums. It’s a great way to connect with other crochet enthusiasts and inspire others to try the pattern too.
Q: Is the Pink Panther amigurumi pattern suitable for beginners?
A: Yes! While it may look detailed, the stitches used are basic and suitable for beginners with patience.
Q: How long does it take to complete one Pink Panther amigurumi?
A: On average, 6–10 hours depending on your skill level and speed.
Q: Can I sell the Pink Panther amigurumi I make from this pattern?
A: Yes, as long as you credit the pattern source and it’s for handmade, small-scale use.
Q: What type of yarn is best for this amigurumi?
A: Cotton yarn is ideal for a firm structure, but acrylic works well too for a softer finish.
Q: What if I don’t have safety eyes?
A: You can embroider the eyes with black and white thread for a safe and soft alternative.
Q: Can I resize the pattern?
A: Absolutely. Use smaller hooks and lighter yarns for tiny versions, or larger ones for big plushies.
Creating your own Pink Panther amigurumi is a delightful project that lets you blend creativity, nostalgia, and craft. With the right materials and a step-by-step guide, you’ll have a charming handmade toy that stands out in any collection. Whether you’re a crochet newbie or an experienced artisan, this pattern offers satisfaction and joy from the first stitch to the final smile.
Now it’s your turn—grab your hook and yarn, and bring the iconic Pink Panther amigurumi to life! And don’t forget to share your results, ask questions, or leave suggestions in the comments. We’d love to hear about your experience!


