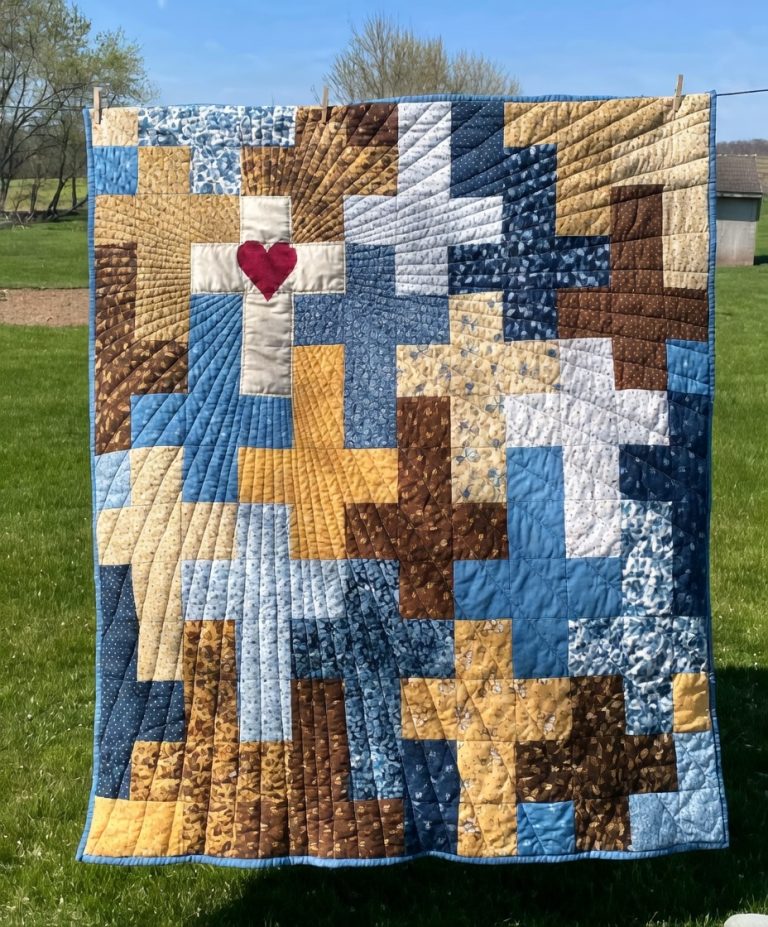
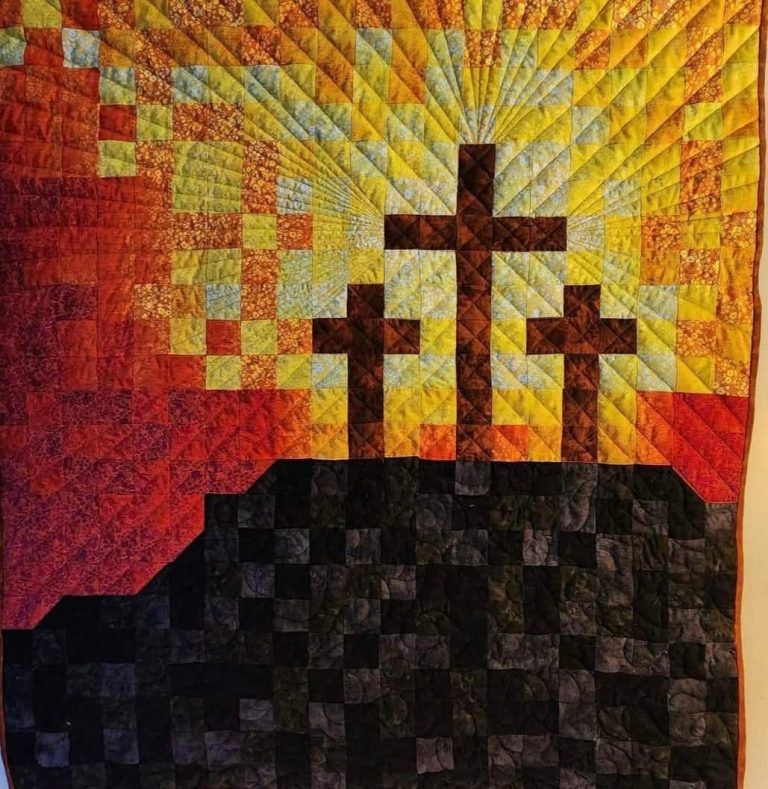
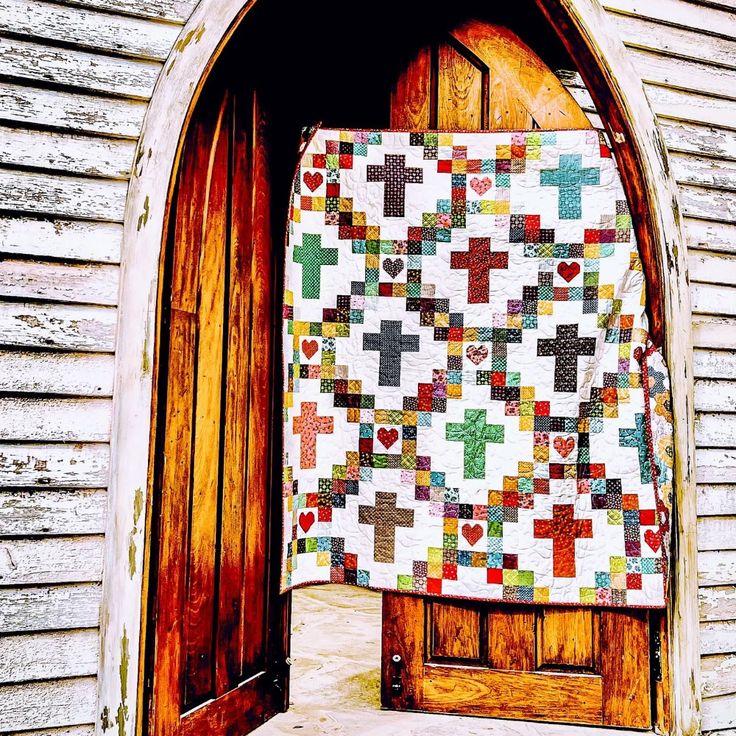
Camo Crosses Quilt Pattern
The Cascadia Mystery quilt is more than just fabric and thread — it is an experience of discovery, creativity, and community. From its stunning geometric layout to the delight of revealing the mystery block by block, this quilt captivates beginners and experienced quilters alike. In this article, you’ll explore how to create your own Cascadia Mystery quilt, learn about essential fabric cuts and measurements, and understand why this pattern has become such a beloved project in the quilting world.
Whether you’ve been quilting for years or you’re starting your very first quilt, the Cascadia Mystery quilt offers an inviting blend of structure and surprise. The mystery element keeps quilters engaged, while clear instructions ensure that each block fits beautifully into the final design. This project is perfect for anyone looking to deepen their skills while enjoying the thrill of watching a pattern unfold.
In the next sections, we’ll guide you through a complete step-by-step process to make your Cascadia Mystery quilt, covering fabric choices, cutting instructions, block assembly, and finishing touches. Let’s begin this creative journey together.

When starting your Cascadia Mystery quilt, selecting fabrics is one of the most exciting and important steps. Aim for three to five complementary fabrics in contrasting tones — often including a light background, medium, and dark fabrics. This helps highlight the beautiful geometric patterns that emerge as the quilt progresses.
Begin by preparing your fabrics. Pre-wash your quilting cottons to reduce shrinkage later, and press them to remove any wrinkles. Choose high-quality cotton for durability and crisp piecing. Remember, the mystery quilt format means you won’t see the final design until blocks are assembled, so balance your colors carefully to avoid sections that blend too closely.
Cutting your fabric precisely is essential. For the Cascadia Mystery quilt, you’ll need the following basic cuts:
Label your cut pieces with sticky notes or clips to keep them organized. This will save time and prevent confusion later, especially as the mystery pattern takes shape.
Prepare your sewing area next. A clean, well-lit workspace helps maintain accuracy. Have your rotary cutter, ruler, and ironing station ready. With fabrics chosen, cut, and labeled, you’re ready to bring your Cascadia Mystery quilt to life.
The heart of the Cascadia Mystery quilt lies in its block construction. While the exact design stays hidden until the final reveal, these steps guide you through creating the core units. The magic is in trusting the process and seeing the quilt’s story appear.
Start by sewing your small squares into pairs. For example, combine dark and medium 2½” squares into two-patch units. Sew with a ¼” seam allowance, and press seams toward the darker fabric. Repeat until you have 20 two-patch units.
Next, assemble your four-patch units. Combine two two-patch units together, nesting seams to keep points sharp. Sew across, press flat, and trim to measure 4½” x 4½”. You should have 10 four-patch units ready.
Now create rectangular units: take the 2½” x 4½” rectangles of background and medium fabric. Sew them together along the long edge. Press toward the darker fabric. Repeat to make 15 units measuring 4½” x 4½”.
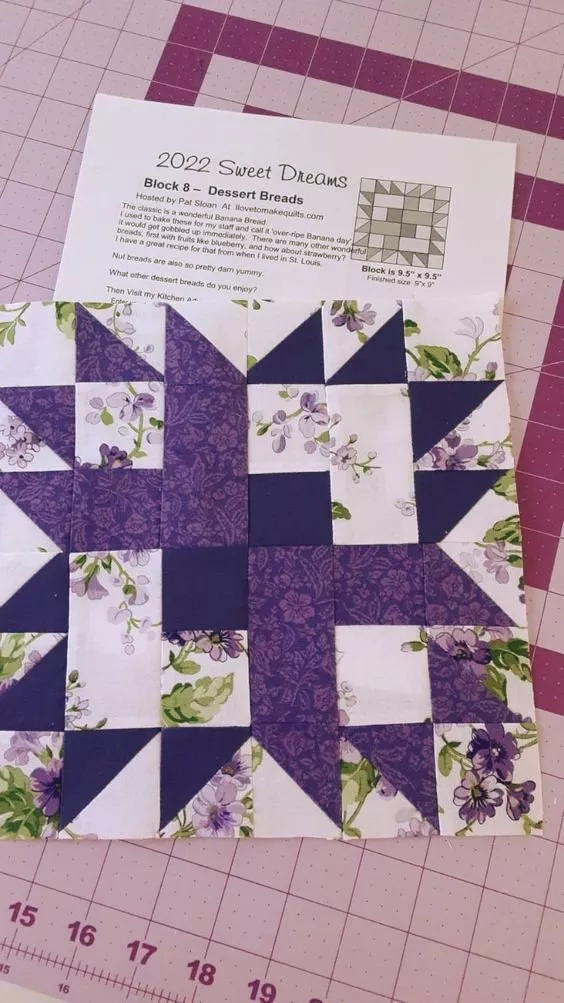
Finally, combine the four-patch units, rectangular units, and 4½” squares to form larger blocks. Arrange them according to the mystery pattern instructions, which often include diagrams. Pay attention to color placement; this preserves the design’s symmetry and visual balance.
Use pins generously when joining units to keep seams aligned. After piecing, square up blocks to ensure they all measure the same — typically 8½” x 8½” unfinished. This keeps the final quilt top flat and professional.
By the end of this step, your quilt top starts to take shape, and the beauty of the Cascadia Mystery quilt becomes visible. Enjoy the moment when your mystery design finally emerges!
With your blocks complete, it’s time to assemble the Cascadia Mystery quilt top. Lay out your blocks on a design wall or floor, adjusting their placement until the colors flow evenly and the pattern feels balanced.
Join blocks into rows first. Sew them with a consistent ¼” seam allowance, pressing seams in alternating directions for each row. This helps seams nest together neatly when sewing rows to each other. Double-check alignment to keep points crisp.
Next, sew rows together to complete the quilt center. Use long pins or clips to keep rows in place. Press the quilt top carefully, avoiding distortion.
Adding borders frames your Cascadia Mystery quilt beautifully. Measure the length of the quilt top and cut your border strips slightly longer, trimming to fit after sewing. Typical borders might be:
Sew the side borders first, then top and bottom. Press seams outward. Borders add visual weight and make the quilt larger, often finishing around 60″ x 72″, depending on block count and chosen border widths.
Inspect your quilt top for loose threads or wavy seams, making small adjustments if needed. At this stage, your mystery project feels complete, and the excitement shifts to quilting and finishing.
The final stage of the Cascadia Mystery quilt is quilting and binding. These steps secure your layers and add texture that brings the design to life.
Layer your quilt top, batting, and backing. Use safety pins or basting spray to hold layers together. Choose a quilting pattern — simple straight lines emphasize modern geometry, while swirling designs add movement. Quilt using a walking foot or free-motion quilting, keeping stitches even.
Trim excess batting and backing to match the quilt top. Prepare your binding by cutting strips 2½” wide from your accent fabric. Sew them end to end at a diagonal to reduce bulk, then fold in half lengthwise and press.
Attach binding by sewing it to the quilt front with a ¼” seam. Fold it over to the back and hand-stitch or machine-stitch in place. Binding frames the quilt, adding a polished edge.
Finish by adding a quilt label with your name, date, and quilt name: Cascadia Mystery quilt. Wash and dry the quilt gently to soften the fibers and achieve the classic crinkled texture.
Celebrate your finished quilt! Share it on social media or in quilting groups — many people love seeing different color interpretations of the Cascadia Mystery quilt. It’s a testament to your creativity and patience.
The Cascadia Mystery quilt is loved by quilters around the world for its mix of surprise and tradition. The thrill of not knowing the final design until blocks come together adds joy to each step. Meanwhile, the clear cutting instructions and structured assembly guide quilters confidently from start to finish.
Beyond technique, this quilt is a story in fabric. Each color choice, seam, and border reflects the maker’s personality. Even with the same pattern, no two Cascadia Mystery quilts look exactly alike — and that’s what makes them special.
Whether you’re quilting alone or joining an online mystery quilt group, this project builds community and sparks inspiration. At the end, you don’t just have a quilt; you have a handmade memory, stitched with curiosity and creativity.
Ready to begin your own Cascadia Mystery quilt? Gather your fabrics, follow the steps, and enjoy the process. The final reveal is always worth the wait — and your quilt will become a treasured piece for years to come.


