
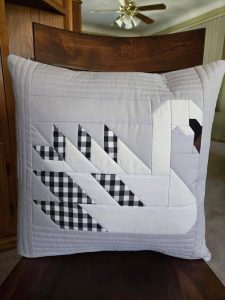
Bird Quilt Block Pattern
The chained star quilt tutorial is a delightful journey into the world of patchwork, combining traditional star motifs with charming interlinked chains. This timeless design offers both visual complexity and stitching satisfaction, making it a favorite among beginner and experienced quilters alike. Whether you’re looking to add a modern twist to a classic block or simply wish to try something new, the chained star quilt tutorial offers just the right mix of creativity and structure.
Quilting is more than a craft—it’s a celebration of precision, patience, and passion. The chained star quilt tutorial brings all of these elements together in a design that is both bold and elegant. It’s perfect for wall hangings, baby quilts, lap throws, or even full-size bedspreads. Each block forms a beautiful star pattern interconnected by subtle chain links, giving the finished quilt a sense of harmony and movement.
In this blog post, you’ll learn how to cut, piece, and assemble your own chained star quilt with detailed instructions and measurements. You’ll also find tips for selecting fabrics, sewing precise points, and finishing your quilt to perfection. So, gather your tools and fabric stash—let’s dive into the chained star quilt tutorial and bring your next masterpiece to life.

To begin your chained star quilt tutorial, it’s essential to gather all necessary materials and plan your cutting layout. This ensures accuracy and helps reduce fabric waste.
Start by selecting three main fabrics: a background color (usually white or cream), a star fabric (which forms the prominent star shapes), and a chain fabric (used for the linking chain design). Consider using contrasting fabrics so each design element stands out.
For a single 12″ finished block, you’ll need:
If you’re making a throw-size quilt (48″ x 60″), plan for 20 blocks. Multiply the block requirements accordingly, and don’t forget additional fabric for sashing, borders, backing, and binding.
Once your fabric is chosen and cut, organize the pieces by type and color. Keeping things sorted will streamline the assembly process and help avoid errors. With all the cutting done, you’re now ready to move into block construction in this chained star quilt tutorial.
The heart of the chained star quilt tutorial lies in constructing the beautiful star blocks that give the pattern its name. Precision is key to ensuring the star points are sharp and aligned.
Begin with the center of the star by taking one 4.5” star fabric square and placing it in the middle. Surround this with four 2.5” x 4.5” star fabric rectangles on each side to create a frame effect. Sew them together using a quarter-inch seam allowance and press the seams outward.
Next, form the star points. Use the four 2.5” background squares and pair each with a 2.5” star fabric square. Draw a diagonal line on the wrong side of the background squares. Place each background square over a star square, right sides together, and sew along the drawn line. Trim a quarter-inch away from the seam and press open. You’ll now have four flying geese units.
Position the flying geese units around the center square. These will become the top and bottom rows of your block. Add the side rectangles between them to complete the outer ring. When assembled correctly, you’ll see a stunning eight-point star shape emerging in the block.
Press all seams carefully to reduce bulk and improve alignment. Accurate pressing can make a huge difference in how your final block lays flat. Repeat this process for each block needed for your chained star quilt tutorial project.
The chain segments give the chained star quilt tutorial its signature interconnected design. These units run diagonally across the quilt, linking the star blocks in a continuous motion.
To construct a chain unit, begin with the 2.5” chain fabric squares. Pair each one with a 2.5” background square to create simple four-patch units. Sew two squares together, press the seam to one side, and then sew two sets together to form a mini block. These small squares are used to connect the corners of each star block.
Next, create the chain rectangles using the 2.5” x 4.5” chain fabric pieces and sew them together with background rectangles. Place the chain rectangle between two background pieces to form a chain strip. Press seams toward the darker fabric to maintain consistency.
Add these chain strips to the sides of your star block in an alternating fashion. For one block, you’ll attach horizontal chain units; for the next, vertical units. This alternating layout allows the chain design to flow seamlessly across the quilt top.
Careful planning of the block orientation is crucial. Lay out your blocks on a design wall or floor before final assembly. This ensures the chain paths are properly aligned and enhances the overall visual flow of the chained star quilt tutorial project.
Once all chain units are prepared and attached, give each completed block a final press. Check that all blocks are the same size and square them up if necessary. This sets the stage for smooth and accurate quilt top assembly.
Now that all your blocks are complete, the next step in this chained star quilt tutorial is assembling the quilt top. Take your time to layout your blocks in rows, ensuring that the chain units line up and create a flowing pattern.
Sew the blocks into rows, taking care to match seams where the chains meet. Press each row in alternating directions to make nesting seams easier when joining rows together. This technique reduces bulk and creates a cleaner finish.
Once your quilt top is assembled, you can add borders. A simple border using the background fabric will make the design pop, or you can choose a bold print to frame the entire quilt. A 2.5” to 4.5” border width is typical, depending on your quilt size and preference.
Prepare your quilt sandwich with the backing, batting, and quilt top. Baste using your preferred method—pins, spray, or thread basting. Choose a quilting design that complements the star and chain motifs. Echo quilting around the stars or a gentle all-over meander can enhance the visual texture.
After quilting, trim the excess batting and backing. Attach your binding using your favorite method, whether by hand or machine. Double-fold binding in a matching or contrasting color works well to complete the polished look.
Your chained star quilt tutorial is now a finished masterpiece, ready to be admired or gifted. Be sure to label your quilt with your name and the date—a thoughtful way to honor the time and care you put into your creation.
What size quilt can I make with this chained star quilt tutorial?
You can make any size, but a throw quilt (48” x 60”) using 20 blocks is a great beginner-friendly size.
Can I use pre-cuts for this pattern?
Yes! Fat quarters and 2.5” strips work well, especially for the star and chain elements.
How long does it take to complete this quilt?
Depending on your skill level and schedule, expect to spend a few weekends completing the project from start to finish.
What skill level is needed for this chained star quilt tutorial?
This is a confident beginner-friendly pattern. If you can sew accurate 1/4” seams and press well, you can make this quilt.
Can I customize the colors?
Absolutely! Try using ombré fabrics, batiks, or high-contrast prints for different effects.
How should I quilt the finished top?
Simple echo quilting or free-motion quilting can highlight the stars and chains beautifully. Keep it balanced across the whole quilt.
The chained star quilt tutorial offers a timeless pattern that blends visual elegance with practical sewing techniques. From cutting precise fabric pieces to assembling each block with care, this project rewards you with a stunning quilt that feels both modern and heirloom-worthy. Whether you’re quilting for a special occasion or simply to enjoy the creative process, the chained star quilt tutorial is a perfect pattern to add to your repertoire.
Have you tried this quilt before or are planning to start? Share your thoughts, fabric choices, or finished photos in the comments—we’d love to see your interpretation of the chained star quilt tutorial and hear about your quilting journey!


