
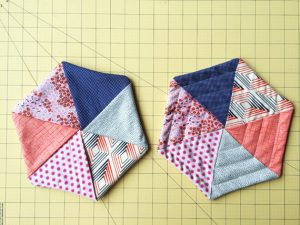
Twisted Tulips Quilt Block Pattern
The Constellation Quilt Block is a mesmerizing pattern that brings the beauty of the night sky to your quilting projects. Right from the first stitch, this design combines tradition and creativity, allowing quilters of all levels to craft something both classic and unique. If you’ve been searching for a detailed and friendly step-by-step tutorial on how to make a Constellation Quilt Block, you’re in the perfect place.
In this guide, we’ll walk through everything you need: from selecting fabrics, precise cutting measurements, to assembling each part of the block. You’ll discover how a few carefully arranged pieces can come together into a stunning Constellation Quilt Block. Whether you’re making an entire quilt or just adding a special block to a sampler, this pattern is sure to shine.
Using the Constellation Quilt Block as your next project offers a chance to experiment with color, texture, and layout. It’s not only a quilting pattern—it’s a celebration of creativity. Let’s explore every detail so you can confidently create your own constellation of stars.

Before starting the Constellation Quilt Block, choose your fabrics thoughtfully. Star designs often look stunning with high-contrast fabrics: think dark navy or deep black backgrounds paired with light or metallic prints to represent stars. Cotton quilting fabric is highly recommended because it’s easy to cut, press, and sew.
For a single Constellation Quilt Block (finished size about 12.5″ x 12.5″), gather the following fabric pieces:
You’ll need to cut:
Make sure your rotary cutter blade is sharp for precise cuts, which is especially important for the clean angles of the Constellation Quilt Block. After cutting, press your fabric pieces to remove any folds or creases. Accuracy in this step is the key to making your block look professional.
Finally, gather your sewing essentials: sewing machine with a 1/4″ foot, pins or clips, iron and ironing board, and coordinating thread. Preparing your materials properly will make the step-by-step tutorial smoother and more enjoyable.
Begin the Constellation Quilt Block by working on the star points. Pair each of the four rectangles (2.5″ x 4.5″) of the star points fabric with a matching background rectangle (2.5″ x 4.5″). Place them right sides together, sew along the long edge, and press seams toward the star fabric.
Next, take the four small background squares (2.5″ x 2.5″) and draw a diagonal line from corner to corner on the back of each. Place each small square on the end of a star point unit, right sides together, and sew directly on the marked line. Trim the excess fabric 1/4″ from the seam and press the corner open.
Repeat this process for all four star point units. You’ll now see how these diagonal seams form the angled points that give the Constellation Quilt Block its striking star shape. Consistent pressing helps keep everything neat.
Lay out the center square and your star point units around it so you can preview the finished design. Adjust if needed to ensure the points radiate evenly from the center. This visual step is helpful for catching any misplaced pieces before sewing them together.
Now, sew the top row: join one background corner square, one star point unit, and another background corner square. Repeat for the bottom row. For the middle row, join a star point unit to the left of the center square and another star point unit to the right.
Press all seams toward the center square. This helps reduce bulk and keeps the star crisp and flat.
With your three rows ready, it’s time to complete the Constellation Quilt Block. Carefully align the top row with the middle row, matching seam intersections. Pin well, then sew using a 1/4″ seam allowance. Repeat the same steps for the bottom row.
Press the block flat, making sure seams are neat. If the block is slightly larger, trim it carefully to 12.5″ x 12.5″. Remember, accurate trimming keeps your finished quilt looking sharp.
At this stage, you’ll clearly see the star formed by your careful piecing. The contrast between the star points and the dark background fabric creates the signature look of the Constellation Quilt Block. The center square becomes the star’s heart, giving the block its depth.
If desired, add a thin border around your block to frame it, especially if it will stand alone in a wall hanging or pillow cover. Choose a border fabric that complements your star fabric for harmony.
Repeat the process to create multiple blocks for a larger quilt. Each Constellation Quilt Block can look different simply by changing fabric colors, making your quilt truly unique.
Finally, press the finished block one last time and admire your work! The step-by-step tutorial makes it approachable for beginners and rewarding for experienced quilters.

While the classic Constellation Quilt Block uses a single center square and star points, don’t hesitate to experiment. Try using scraps from other projects for a scrappy star effect. This creates a lively, colorful look and makes your quilt eco-friendly.
Another variation is to replace the center square with a fussy-cut motif, like a floral print or novelty fabric. This creates a unique focal point and tells a personal story through your quilt.
You can also play with scale: make smaller blocks (e.g., 6.5″ x 6.5″) for a dense quilt of stars, or larger blocks for a bold modern look. Adjust the fabric cuts proportionally to the size you choose.
For a dramatic quilt, alternate Constellation Quilt Block patterns with plain squares of dark fabric. This layout creates negative space and makes the stars “float” against the background.
Consider using metallic thread for quilting to mimic the sparkle of real stars. Simple echo quilting around each star or free-motion swirl quilting enhances the celestial feel of the block.
Lastly, share your finished Constellation Quilt Block projects online or with quilting friends! Inspiration flows in community, and every quilter loves seeing fresh interpretations of classic patterns.
What size is a finished Constellation Quilt Block?
The block described in this tutorial finishes at about 12.5″ x 12.5″, which becomes 12″ x 12″ once sewn into a quilt.
Can beginners make a Constellation Quilt Block?
Yes! With careful cutting and attention to seam allowances, this step-by-step tutorial makes it beginner-friendly.
What fabrics work best for this block?
Cotton quilting fabric in high-contrast colors. Dark backgrounds and bright or metallic star points create striking results.
Do I have to use the exact measurements?
The measurements here ensure the block finishes correctly, but you can resize proportionally for larger or smaller blocks.
Can I add more blocks for a quilt?
Absolutely! Repeat the block, changing fabrics if desired, to build a full quilt or sampler.
How do I keep points sharp?
Careful pressing, accurate cutting, and precise 1/4″ seam allowances help keep your star points crisp and beautiful.
The Constellation Quilt Block is more than just a pattern—it’s an invitation to play with color, shape, and creativity. With this detailed step-by-step tutorial, you can create a stunning block that adds a spark of night sky magic to any quilt. Remember, quilting is about enjoying the process as much as the final piece. Try different fabrics, experiment with sizes, and most of all, have fun crafting your constellation!
Have you made a Constellation Quilt Block before? Share your tips or photos in the comments below—we’d love to see your creations!


