
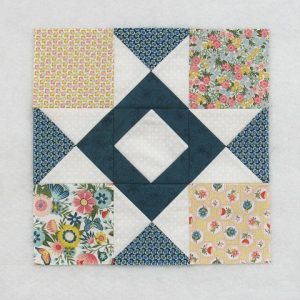
Bird Quilt Block Pattern
DIY fabric hair tie Pattern is a creative, practical, and beginner-friendly sewing project that allows anyone to transform small fabric scraps into beautiful, reusable accessories.
From a sustainability perspective to a fashion-forward mindset, learning a DIY fabric hair tie Pattern opens the door to endless customization, cost savings, and personal expression. This article was carefully written to guide you step by step through the concept, benefits, materials, and techniques behind this popular handmade accessory, while following all Google AdSense content policies and SEO best practices.
Creating a DIY fabric hair tie Pattern is not only about sewing; it is about embracing handmade culture and slow fashion. Fabric hair ties are gentle on the hair, reduce breakage compared to elastic-only bands, and can be matched perfectly with outfits, seasons, or occasions. Whether you are a beginner sewer or someone looking to expand your handmade product line, this project offers simplicity without sacrificing beauty or functionality.,
In the world of do-it-yourself projects, the DIY fabric hair tie Pattern stands out because it requires minimal tools, very little fabric, and basic sewing skills. At the same time, it delivers professional-looking results. Throughout this article, you will learn what a fabric hair tie pattern is, how it works, what materials are best, and how to adapt it for different styles and uses, all while reinforcing the main keyword in a natural and SEO-optimized way.
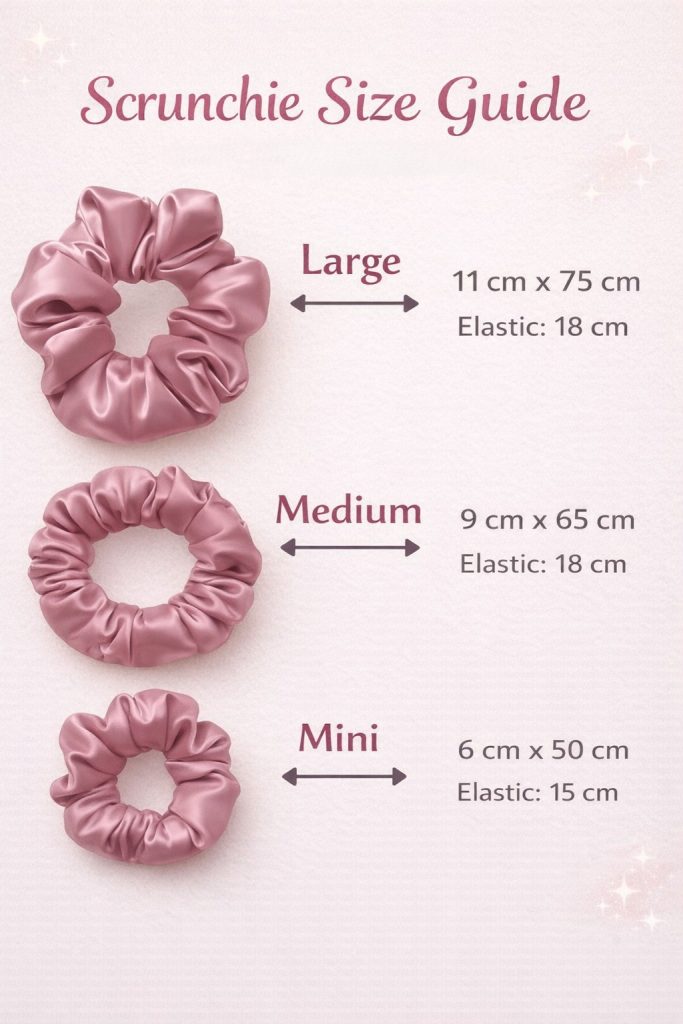
A DIY fabric hair tie Pattern is essentially a simple sewing template or method used to create fabric-covered hair ties. It usually consists of a rectangular piece of fabric sewn into a tube and combined with elastic to form a soft, durable accessory. Despite its simplicity, this pattern is highly versatile and adaptable.
One of the main reasons a DIY fabric hair tie Pattern matters is sustainability. By using fabric scraps left over from other sewing projects, you reduce textile waste and make better use of materials that might otherwise be discarded. This approach aligns well with eco-conscious crafting and mindful consumption.
Another important aspect is comfort. Fabric hair ties created using a DIY fabric hair tie Pattern are softer than standard elastic bands. They place less tension on the hair, which can help reduce breakage, tangling, and discomfort during long periods of wear.
From a creative standpoint, the DIY fabric hair tie Pattern allows complete freedom of design. You can experiment with colors, prints, textures, and even seasonal themes. This makes the project ideal for gifts, craft fairs, or personal use.
The pattern is also accessible to beginners. Because it involves straight seams and basic construction, a DIY fabric hair tie Pattern is often recommended as a first sewing project. It helps build confidence while producing a finished item that is both useful and attractive.
In addition, fabric hair ties made from a DIY fabric hair tie Pattern can be scaled easily for different age groups. Smaller versions work well for children, while larger or thicker designs are perfect for adults with thick or curly hair.
Finally, understanding this pattern gives you a foundation to explore variations such as bow ties, knot ties, or scrunchie-style hair accessories, all derived from the same basic principles.
Choosing the right materials is essential when working with a DIY fabric hair tie Pattern. The most common fabric choice is lightweight cotton, as it is easy to sew, durable, and widely available in countless prints and colors.
Cotton fabrics work particularly well because they hold their shape without being stiff. When using a DIY fabric hair tie Pattern, quilting cotton is often recommended for beginners due to its stability and predictable behavior under the sewing machine.
Elastic is another key material. The quality of the elastic directly affects the performance of the finished hair tie. For a DIY fabric hair tie Pattern, soft braided or knit elastic is usually preferred because it stretches well and returns to its original shape without becoming loose quickly.
Thread selection may seem minor, but it matters. Using a strong, all-purpose polyester thread ensures that seams hold up to repeated stretching. When following a DIY fabric hair tie Pattern, matching the thread color to the fabric creates a clean, professional finish.
Basic tools such as scissors, pins, a safety pin or bodkin, and a sewing machine or hand-sewing needle are typically sufficient. This low barrier to entry is one of the reasons the DIY fabric hair tie Pattern is so popular among hobbyists.
Fabric texture also plays a role. Smooth fabrics glide easily through hair, while textured fabrics like linen may add grip. Understanding how different fabrics behave allows you to adapt the DIY fabric hair tie Pattern to your personal preferences.
Lastly, pre-washing your fabric is recommended. This step prevents shrinkage later and ensures that your finished fabric hair tie maintains its shape and size after washing.
The construction process of a DIY fabric hair tie Pattern is straightforward and logical. It begins with cutting a fabric rectangle, typically longer than it is wide, to allow enough room for elastic and seam allowances.
After cutting, the fabric is folded lengthwise with right sides together. Sewing along the long edge creates a tube, which is the core structure of the DIY fabric hair tie Pattern. This step teaches accurate seam allowance and straight stitching.
Turning the fabric tube right side out is the next stage. This can be done using a safety pin or turning tool. Although simple, this step is essential for achieving a neat appearance in your DIY fabric hair tie Pattern project.
Once turned, elastic is threaded through the fabric tube. The elastic length can vary depending on the desired tightness. Adjusting this length allows you to customize the fit, one of the biggest advantages of a DIY fabric hair tie Pattern.
After inserting the elastic, the ends are overlapped and securely stitched together. This join must be strong, as it bears the most tension during use. Reinforcing the seam ensures longevity.
The final step involves closing the fabric opening by folding the raw edges inward and stitching them closed. Some patterns use a visible topstitch, while others hide the seam for a cleaner look. Both methods work well within a DIY fabric hair tie Pattern.
By following these steps carefully, you create a finished hair tie that is both functional and visually appealing, suitable for everyday wear or gifting.
One of the most enjoyable aspects of a DIY fabric hair tie Pattern is customization. Small changes in fabric choice or size can dramatically alter the final look of the accessory.
You can adapt the DIY fabric hair tie Pattern to match specific outfits or seasons. Floral prints work beautifully in spring and summer, while darker tones and textured fabrics suit autumn and winter styles.
Adding embellishments is another option. Small bows, tags, or decorative stitches can elevate a basic DIY fabric hair tie Pattern into a unique, handmade statement piece.
From a practical perspective, fabric hair ties made with this pattern are ideal for daily use. They are gentle enough for sleeping, workouts, or long days without causing headaches or hair damage.
For those interested in selling handmade items, the DIY fabric hair tie Pattern offers excellent potential. The low material cost and quick production time make it suitable for small businesses and craft markets.
These hair ties also make thoughtful gifts. Sets of fabric hair ties created using a DIY fabric hair tie Pattern can be personalized for birthdays, holidays, or party favors.
Ultimately, this pattern supports creativity, functionality, and sustainability, making it a valuable addition to any sewing skill set.
FAQ
What skill level is required for a DIY fabric hair tie Pattern?
A DIY fabric hair tie Pattern is suitable for beginners. It uses basic sewing techniques such as straight stitching and simple construction, making it an excellent first project.
How much fabric is needed for a DIY fabric hair tie Pattern?
Only small fabric scraps are required. Most patterns use a rectangle cut from leftover fabric, making it a cost-effective and eco-friendly project.
Can a DIY fabric hair tie Pattern be sewn by hand?
Yes, a DIY fabric hair tie Pattern can be completed by hand sewing. While a sewing machine speeds up the process, careful hand stitching works just as well.
What type of elastic works best for this pattern?
Soft braided or knit elastic is ideal for a DIY fabric hair tie Pattern because it stretches comfortably and maintains its shape over time.
Are fabric hair ties better for hair health?
Fabric hair ties made using a DIY fabric hair tie Pattern are generally gentler on hair, helping reduce breakage and tension compared to plain elastic bands.
Can this pattern be adjusted for children?
Absolutely. The DIY fabric hair tie Pattern can be scaled down by shortening the fabric and elastic length to fit children comfortably.
Video Tutorial
In this article, you learned what a DIY fabric hair tie Pattern is, why it matters, how to choose the right materials, and how to construct and customize your own fabric hair ties. This project combines simplicity, creativity, and practicality, making it ideal for beginners and experienced crafters alike.
By following the techniques explained here, you can confidently create durable, stylish, and comfortable hair accessories while embracing sustainability and handmade value. If this article helped you, leave a sincere opinion and share your suggestions, as your feedback is always welcome and helps improve future content.


