Easy Applique Patchwork Cats: A Fun and Simple Quilt Project
Advertising
If you love quilt projects and enjoy creating unique and adorable fabric designs, then Easy Applique Patchwork Cats is the perfect project for you. This beginner-friendly quilt pattern allows you to craft charming cat appliqués that add a playful touch to your quilts, pillows, or wall hangings. With just a few fabric scraps, some basic sewing skills, and a little creativity, you can bring these cute feline designs to life.
Appliqué patchwork is a fantastic way to add personality to your quilting projects. Unlike traditional patchwork, which involves piecing together geometric shapes, appliqué lets you cut and sew fabric directly onto a background, creating more organic and intricate designs. The beauty of this technique is that it works well with all skill levels, making it a great choice for both beginners and experienced quilters.
Advertising
In this guide, we’ll walk you through the entire process of making Easy Applique Patchwork Cats, from selecting fabrics and cutting pieces to assembling and stitching them onto your quilt. Whether you want to create a full quilt featuring a lineup of adorable cats or just a few accent pieces, this step-by-step tutorial will help you achieve a beautiful and professional finish.
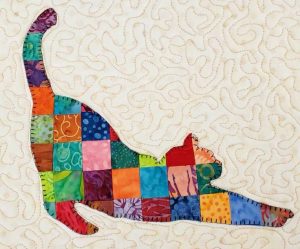
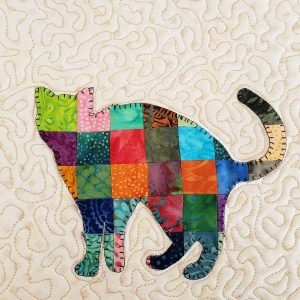
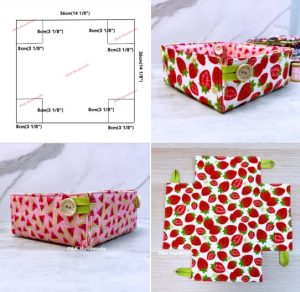
Image From Pinterest
Choosing the Right Fabrics for Your Patchwork Cats
Selecting the right fabric is crucial to making your quilt patterns stand out. Since this project involves layering different fabrics to create the cat shapes, consider using high-contrast colors and patterns to make each appliqué pop.
Start by choosing cotton fabric as your base material. Cotton is easy to work with, durable, and widely available in a variety of prints and colors.
Look for fabric with small prints or textures to add dimension to your cat appliqués without overwhelming the design.
Consider mixing solid colors with patterned fabrics for a balanced and visually appealing quilt.
Use fusible web to help stabilize your appliqué pieces, making them easier to attach to the background fabric.
Choose a neutral or lightly patterned background fabric that complements but does not overshadow your cat appliqués.
Pre-wash your fabrics to prevent shrinkage and ensure that colors won’t bleed after quilting.
Cutting and Preparing the Fabric Pieces
Advertising
Once you’ve selected your fabrics, the next step is cutting your pieces to create the appliqué cats. Precision in cutting is key to achieving a polished look in your finished project.
Begin by sketching or printing a cat template onto paper. You can find free templates online or draw your own simple cat silhouette.
Transfer the design onto the fabric by tracing the outline onto the fusible web, then iron the web onto the wrong side of your chosen fabric.
Carefully cut out each cat shape using sharp fabric scissors or a rotary cutter for clean edges.
If you want to add extra details, such as eyes, whiskers, or stripes, cut smaller fabric pieces and prepare them for layering.
Cut a background square for each cat appliqué, measuring approximately 10 inches by 10 inches to allow space for stitching.
Arrange your fabric pieces on the background before fusing to ensure the composition looks balanced and visually appealing.
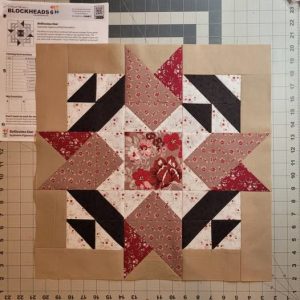
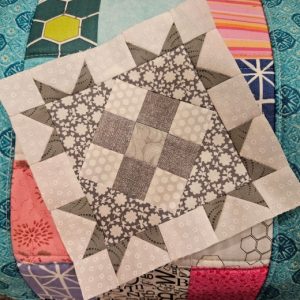
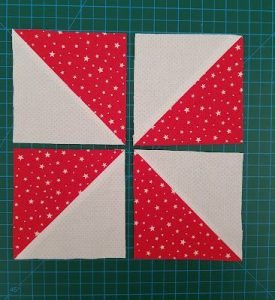
Image From Pinterest
Assembling and Stitching the Appliqué Cats
Now that you have your fabric pieces ready, it’s time to assemble and stitch them onto the quilt blocks. This step is where your appliqué cat design truly comes to life.
Peel the backing off the fusible web and carefully position each fabric cat onto the background square.
Press the appliqué onto the fabric with a hot iron to temporarily secure it in place before stitching.
Use a zigzag stitch or a blanket stitch to sew around the edges of the appliqué, ensuring it is firmly attached to the background.
If adding additional details like eyes, noses, or tails, use contrasting thread colors for an artistic touch.
Consider using decorative embroidery stitches for added texture and personality in your design.
Once all your appliqué pieces are stitched in place, press the fabric to set the stitches and ensure a smooth finish.
Assembling Your Patchwork Quilt
After completing your appliqué cats, the final step is assembling your quilt blocks into a finished quilt pattern. This process involves arranging the blocks, adding borders, and quilting everything together.
Lay out your appliqué blocks in a visually pleasing arrangement, considering color balance and spacing between different fabric patterns.
Sew the blocks together using a quarter-inch seam allowance, pressing the seams open to reduce bulk.
Add sashing strips (measuring 2 inches wide) between blocks to create a structured layout and enhance the overall design.
Choose a coordinating quilt backing and batting, then baste all the layers together using quilting pins or basting spray.
Quilt the layers together using stitch-in-the-ditch or free-motion quilting techniques, ensuring that your appliqué cats remain secure.
Finish by binding the edges of your quilt with a 2.5-inch fabric strip, folding it over and stitching it down for a clean and polished look.
Creating an Easy Applique Patchwork Cats quilt is a fun and rewarding project that allows you to express your creativity while honing your quilting skills. Whether making a full quilt, a wall hanging, or a decorative pillow, these adorable cat designs will add a whimsical and personal touch to your sewing projects. Happy quilting!


