
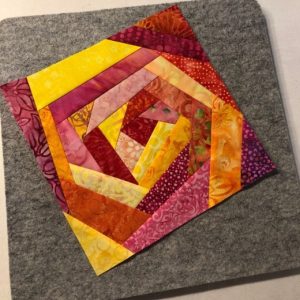
Bird Quilt Block Pattern
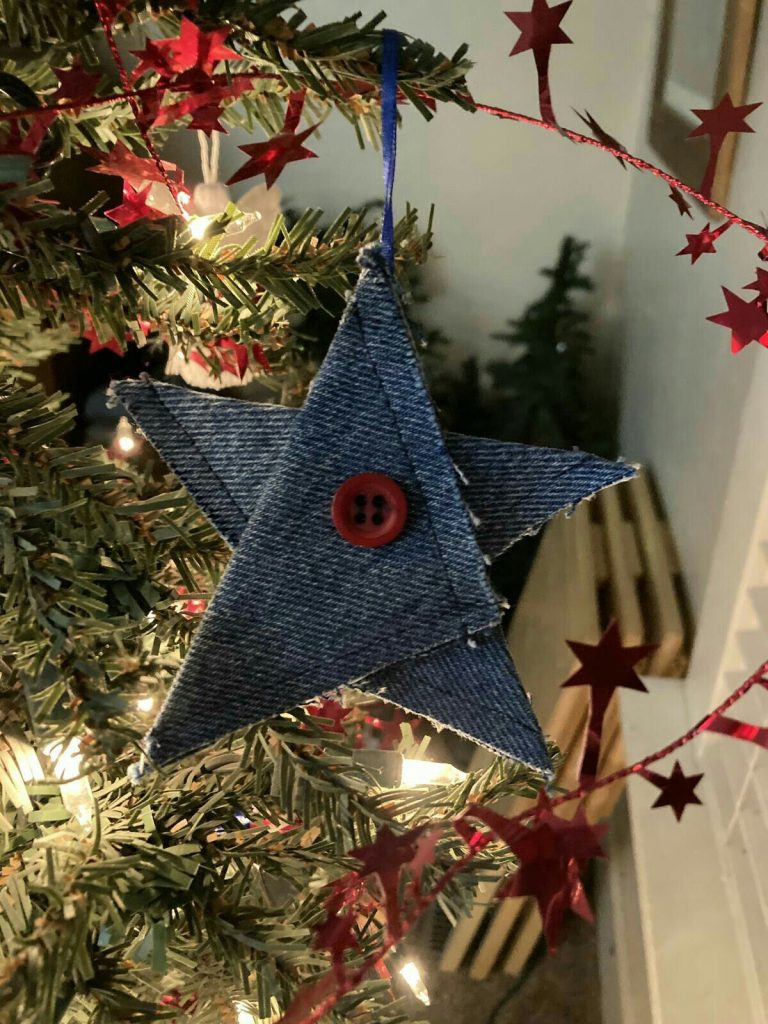
Creating a Folded Fabric Star Ornament Pattern is one of the most satisfying and creative sewing projects you can do, especially during the holiday season. This handmade fabric ornament adds warmth, charm, and a touch of personality to your decorations. Whether you’re a beginner or an experienced quilter, learning how to fold, layer, and assemble this star design is a joyful and rewarding experience. With simple fabric cuts and a few precise folds, you can create a stunning star that looks intricate but is surprisingly easy to make.
The Folded Fabric Star Ornament Pattern is not only beautiful but also a great way to use leftover fabric scraps from other quilting or sewing projects. You can mix different fabric prints, play with textures, and experiment with festive colors like gold, red, and green. The best part is that every star you create will be unique—no two are ever the same. It’s a perfect handmade gift for friends, family, or even as a charming addition to your Christmas tree.
Before diving into the step-by-step process, it’s essential to understand how the folding technique works. The design of the Folded Fabric Star Ornament Pattern is based on layering small folded triangles of fabric onto a base, forming a starburst effect. As you build each layer, the pattern becomes more intricate and dimensional. Once you complete your first ornament, you’ll quickly see why so many crafters love this timeless and festive project.
To begin creating your Folded Fabric Star Ornament Pattern, gather all your essential materials. You won’t need any advanced tools, just basic sewing supplies and some beautiful fabrics. Start with cotton fabrics, as they are easy to fold and hold their shape well. Choose three or four coordinating patterns for a striking layered effect.
You’ll also need a round base, often made from foam or sturdy fabric, which serves as the foundation for your star. Straight pins are crucial—they hold the folded pieces in place while you assemble each layer. If you want your star to hang as a Christmas ornament, add a ribbon loop at the top for easy display.
A rotary cutter or sharp fabric scissors will help you achieve clean, even cuts. Precision matters because consistent fabric squares ensure symmetry in your design. You’ll also need a ruler or cutting mat to measure accurately, ensuring all your pieces are the same size.
Before cutting your fabrics, press them with an iron to remove wrinkles. This makes folding much easier and results in crisp, professional-looking points. Keep your workspace organized and lay out your fabric colors in the order you want them to appear in your star.
Lastly, consider adding optional embellishments like small beads, buttons, or glitter accents. These can be placed at the center of your Folded Fabric Star Ornament Pattern to give it extra sparkle and personality.
The folding process is what gives the Folded Fabric Star Ornament Pattern its beautiful layered look. Each piece of fabric is folded into a triangle, which will be pinned onto the base to form a star point. The key is precision and consistency in your folds.
Start by cutting your fabric into equal squares—typically around 3 inches each. Fold each square in half diagonally to create a triangle, then fold again to form a smaller triangle. You should have a stack of neatly folded triangles ready to use.
Begin placing your first layer of triangles around the center of the base, arranging them so the folded edges point outward. Pin each triangle securely, making sure the spacing between points is even. This first layer forms the foundation of your star.
Next, build your second layer slightly offset from the first, so each new triangle covers the seams below. Continue layering until you have four or more layers, depending on the depth and size you want for your ornament. Each fold adds dimension, giving your star a rich, quilted appearance.
As you progress, step back occasionally to ensure your pattern looks symmetrical. Adjust pins or reposition folds as needed. Once all layers are complete, you’ll have a beautiful Folded Fabric Star Ornament Pattern ready for finishing touches.
Now that your Folded Fabric Star Ornament Pattern has taken shape, it’s time to add those final details that make it stand out. The center of your star is a perfect spot to showcase a small decorative element, such as a button, pearl, or gemstone. This not only hides the pins but also adds a polished look to your design.
Use a small piece of ribbon or lace to create a loop at the top if you plan to hang your ornament. You can attach it using hot glue or by sewing it directly into the base before adding your top layers. Make sure it’s securely attached so your star hangs straight and balanced.
If you want to make your star sparkle, consider lightly dusting the edges with glitter or metallic fabric paint. However, keep the decoration subtle to preserve the handmade aesthetic. The beauty of the Folded Fabric Star Ornament Pattern lies in its craftsmanship and color coordination.
To protect your ornament and help it hold its shape over time, you can lightly spray it with fabric starch or a clear acrylic sealer. Let it dry completely before hanging or storing. This step ensures your folds remain crisp and neat for years to come.
Store your ornaments in a box with tissue paper between them to prevent flattening or damage. When you bring them out each year, they’ll still look as fresh and beautiful as the day you made them.
Finally, display your star ornaments proudly on your Christmas tree, in a window, or as part of a festive garland. The vibrant layers and folds will catch the light beautifully, creating a warm and inviting holiday atmosphere.
Once you master the basic Folded Fabric Star Ornament Pattern, the possibilities for creativity are endless. You can experiment with different color palettes, fabrics, and even shapes to give each ornament a unique personality. Try seasonal variations, such as pastel fabrics for spring or icy blues and silvers for a winter theme.
If you enjoy quilting, consider making a larger version of the folded fabric star to use as a wall hanging or table centerpiece. The same folding technique applies; you’ll just need a larger base and more fabric squares. The result will be a stunning piece of home décor that showcases your sewing skills.
Another fun variation is to use fabric with metallic accents or patterns featuring snowflakes, holly, or stars. Mixing matte and shiny textures can add depth and visual interest. You can also alternate light and dark fabrics for a bold, contrasting effect.
For a rustic look, use linen or burlap instead of cotton, and finish your ornament with twine instead of ribbon. This gives your Folded Fabric Star Ornament Pattern a farmhouse-inspired charm perfect for country-style decorations.
Don’t be afraid to personalize your ornaments. Embroider initials, dates, or short messages onto the fabric before folding. This adds sentimental value, making each star a keepsake for years to come.
Finally, use these handmade ornaments as thoughtful gifts. They’re perfect for teachers, neighbors, or family members who appreciate handmade artistry. Each Folded Fabric Star Ornament Pattern you create carries a personal touch that store-bought decorations can’t match.
1. What type of fabric works best for a folded fabric star ornament?
Cotton is ideal because it’s easy to fold and holds its shape well. Avoid slippery or stretchy fabrics, as they can distort the pattern.
2. Do I need to sew the fabric pieces together?
No sewing is required. The folded pieces are secured with pins, making this a great no-sew project for beginners.
3. Can I make the ornament without a foam base?
Yes, you can use felt, cardboard, or other sturdy materials as a base. Just ensure it’s firm enough to hold the pins.
4. How many fabric squares do I need for one ornament?
Typically, you’ll need around 40–50 squares, depending on the size of your base and the number of layers you want.
5. Can I wash the folded fabric star ornament?
It’s not recommended to wash these ornaments since they’re held together by pins. Instead, gently dust them or use a lint roller for cleaning.
6. How can I make the star more durable?
Lightly spray it with fabric starch or acrylic sealer to maintain shape and protect from dust and humidity.
The Folded Fabric Star Ornament Pattern is a timeless and delightful project that combines creativity, precision, and beauty. With just a few simple materials and some patience, you can craft stunning ornaments that brighten up your home and carry personal meaning. Whether you make them for your own tree or as heartfelt gifts, these stars are sure to impress.
We hope this guide helped you understand the process and inspired you to start your own collection of folded fabric stars. If you’ve made one already, share your experience and leave your honest opinion and suggestions—your feedback helps keep the creative spirit shining bright!


