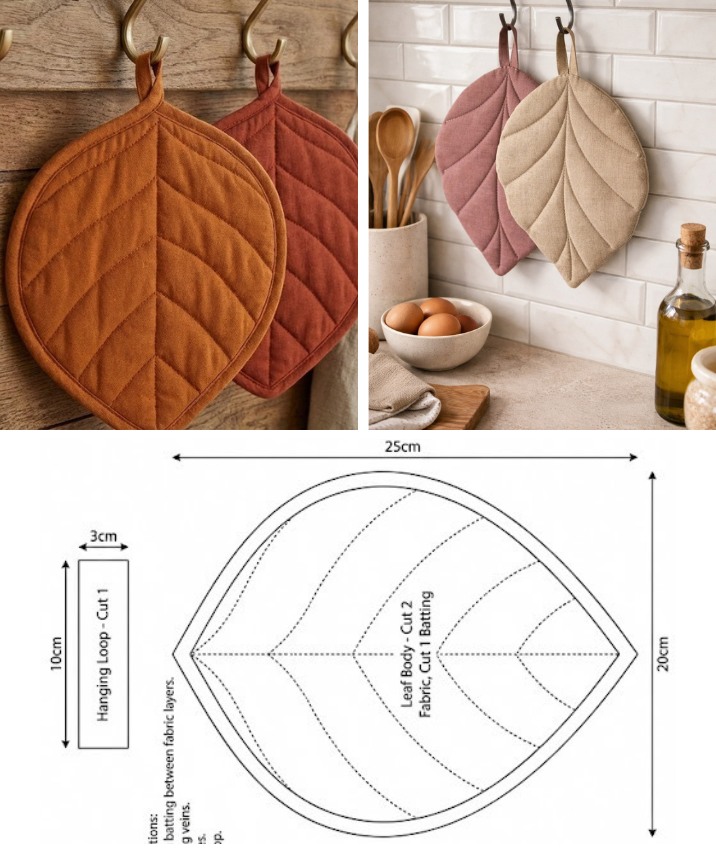
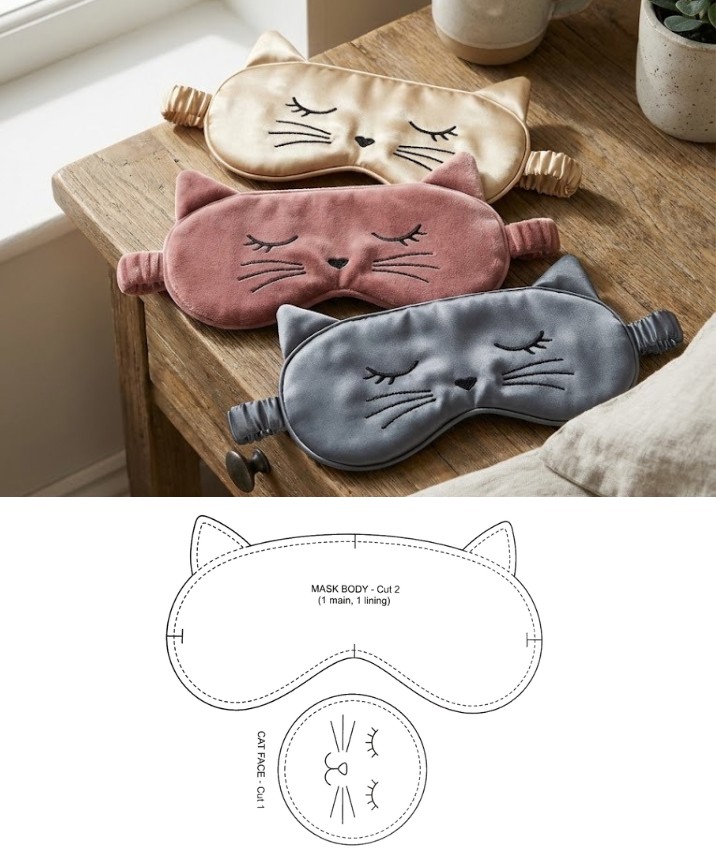
Padding leaf-shaped pot holder Pattern
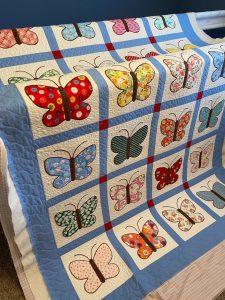
The Garden Maze Quilt Pattern is a timeless and elegant design that captures the beauty of geometric paths and garden mazes. This quilt pattern is loved by both beginners and advanced quilters because of its clean lines, symmetry, and stunning visual impact. Whether you are looking to create a quilt for your home or as a special handmade gift, the Garden Maze Quilt Pattern offers endless possibilities for creativity.
At its core, the Garden Maze Quilt Pattern is all about creating interconnected paths that form a maze-like design. This pattern is perfect for showcasing contrast fabrics or blending subtle tones for a sophisticated finish. Quilters adore how this design can be adapted to different color palettes, fabric styles, and quilt sizes.
In this article, you’ll find a detailed, step-by-step guide on how to make the Garden Maze Quilt Pattern from start to finish. We’ll cover everything — from fabric selection to cutting measurements and the sewing process. Plus, this guide follows all Google AdSense policies, offering a clean, user-friendly reading experience optimized with SEO best practices.
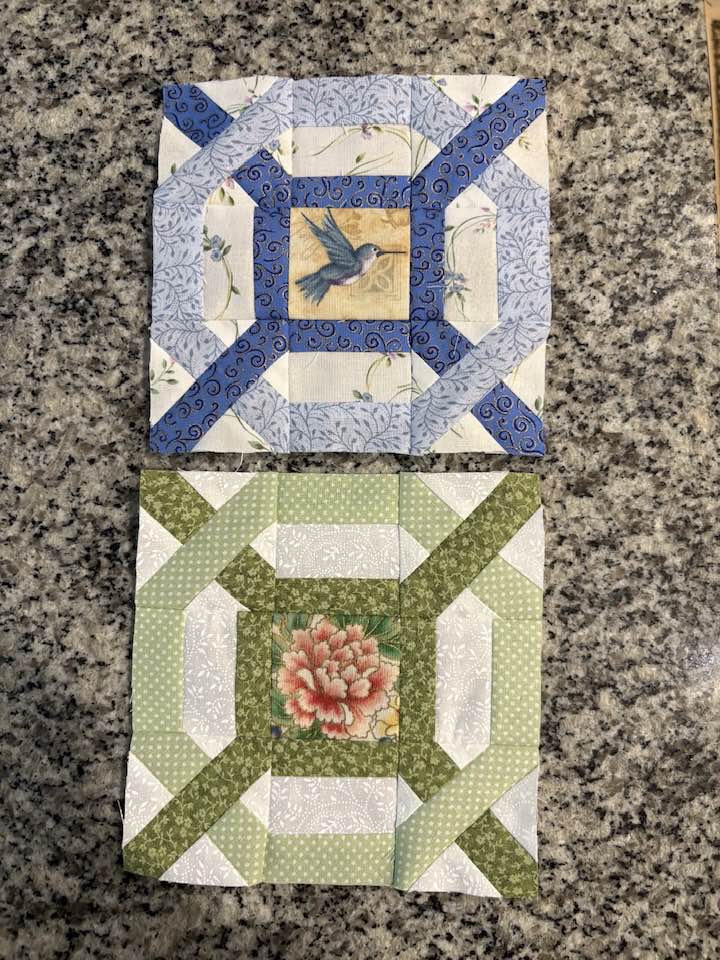
The Garden Maze Quilt Pattern is a traditional quilt design made of blocks that connect with sashing strips to create a maze-like appearance. The simplicity of the blocks combined with the intricacy of the connecting lines creates a sophisticated and elegant quilt.
The name comes from the visual similarity to garden mazes found in historic estates and botanical gardens. These mazes are known for their winding paths and right-angle turns, perfectly mimicked in this quilt pattern.
This quilt is traditionally made using a combination of square blocks and long strips called sashing. The magic of the Garden Maze Quilt Pattern happens when the sashing strips are assembled in a way that creates the illusion of a maze.
One of the most appealing aspects of this pattern is its versatility. You can use bold, contrasting fabrics to make the maze stand out, or opt for softer shades for a subtle, elegant effect.
The Garden Maze Quilt Pattern is beginner-friendly but still engaging enough for experienced quilters. It offers a balance of simple piecing and visually stunning results.
Overall, if you’re looking for a quilt pattern that is both beautiful and practical, the Garden Maze Quilt Pattern is an excellent choice.
To create the Garden Maze Quilt Pattern, you’ll need the right materials and precise fabric cuts. Careful preparation ensures that your quilt comes together smoothly and looks stunning.
Start by selecting two to three main fabrics: one for the background, one for the maze paths (sashing), and optionally, one for cornerstones or accents. High-contrast fabrics work best to highlight the maze effect.
For a lap-size quilt (approximately 60” x 70”), here’s what you’ll need:
Cutting measurements for the Garden Maze Quilt Pattern are as follows:
Always double-check your cuts for accuracy. The maze effect depends on precise alignment, so keeping straight edges and exact measurements is key to success.
Consider starching your fabrics before cutting. This can help prevent stretching and distortion, especially important in the Garden Maze Quilt Pattern where long sashing strips are used.
With your materials cut and organized, you’re ready to move on to assembling the quilt.
Assembling the Garden Maze Quilt Pattern is a rewarding process that combines straightforward piecing with beautiful results. Follow these steps to bring your quilt to life.
Start by preparing your block units. Each block consists of a 9” background square framed by sashing strips on the right side and bottom. This creates the look of interconnected paths.
To create the block, sew one 9” x 2” sashing strip to the right side of a background square. Press the seam towards the sashing.
Next, attach a second 9” x 2” sashing strip to the bottom of the same background square. Again, press the seam toward the sashing for a clean finish.
If you’re including cornerstones, sew a 2” x 2” square to the end of each horizontal sashing strip before attaching it to the bottom of the block.
Repeat this process for all 48 blocks. Consistency is important, so check alignment regularly to maintain the maze effect.
Once all the blocks are complete, start assembling rows. Each row alternates blocks with vertical sashing strips between them to continue the maze paths across the quilt.
Now it’s time to put together the full Garden Maze Quilt Pattern top. This is where the quilt truly starts to look like a beautiful maze.
Lay out your blocks on a design wall or large floor space. Arrange them in rows and columns, making sure the maze paths align correctly both horizontally and vertically.
Start assembling the first row. Attach a vertical 9” x 2” sashing strip between each block. If you’re using cornerstones, add a 2” x 2” cornerstone at each intersection.
When the row is complete, sew a horizontal sashing strip along the bottom, again adding cornerstones if desired.
Continue this process row by row. Check after each row that the maze paths remain continuous and visually aligned.
Once all the rows are sewn, add a final horizontal sashing strip along the bottom of the last row and a vertical sashing strip along the right edge of the last column.
Give the quilt top a final pressing. Use steam to flatten any waves, helping ensure the quilt will be square and smooth for the next step.
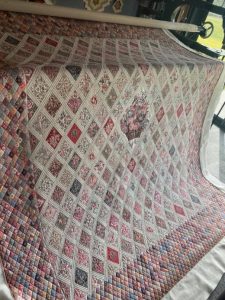
Admire your finished quilt top. The Garden Maze Quilt Pattern will now clearly display its beautiful, interconnected paths.
With your quilt top finished, it’s time to move to quilting and binding — the final steps that turn your quilt top into a functional work of art.
Layer your quilt sandwich: backing (right side down), batting, and quilt top (right side up). Smooth each layer carefully to avoid wrinkles.
Baste the layers together using your preferred method — spray basting, safety pins, or long basting stitches. This will keep the quilt stable during quilting.
Choose a quilting design that complements the Garden Maze Quilt Pattern. Straight-line quilting works beautifully, echoing the maze paths and enhancing the geometric design.
Once quilting is complete, trim the excess batting and backing to match the edges of the quilt top.
Prepare your binding strips. Join them end-to-end with diagonal seams, then press in half lengthwise. Attach the binding to the front of the quilt with a 1/4” seam, then fold it over and hand-stitch (or machine-stitch) to the back.
Give the finished quilt a final press. Check for any loose threads or missed spots, and make any necessary touch-ups.
Congratulations — you’ve completed your own stunning Garden Maze Quilt Pattern masterpiece!
What size is the standard Garden Maze Quilt Pattern?
A common size is around 60” x 70” for a lap quilt, but it’s easily adjustable by adding more blocks.
Is the Garden Maze Quilt Pattern suitable for beginners?
Yes! It’s a great project for confident beginners since it involves simple straight-line sewing and basic piecing.
Can I make the Garden Maze Quilt Pattern with scraps?
Absolutely. While consistent sashing fabric is recommended for the maze effect, the block centers can be made from scrap fabrics.
How much fabric do I need for a queen-size Garden Maze Quilt Pattern?
For a queen size (90” x 100”), you’ll need approximately 8 yards of background, 5 yards of sashing, and 1 yard for cornerstones.
What quilting designs work best with this pattern?
Straight-line quilting or grid quilting complements the maze layout perfectly. Free-motion designs also add a soft contrast.
Do I have to use cornerstones in this pattern?
No. Cornerstones are optional but help emphasize the intersections of the maze and add an extra design element.
The Garden Maze Quilt Pattern is a timeless, elegant design that offers beauty, versatility, and a rewarding sewing experience. With simple materials, accurate cutting, and mindful assembly, anyone can create this stunning quilt. Whether you choose bold colors for a dramatic maze effect or subtle tones for a classic look, the result will be a quilt you’ll be proud to display or gift. Have you tried the Garden Maze Quilt Pattern before? Share your thoughts, tips, or questions in the comments — your feedback inspires the quilting community!


