How to Bonita Bunny Quilt Block Pattern
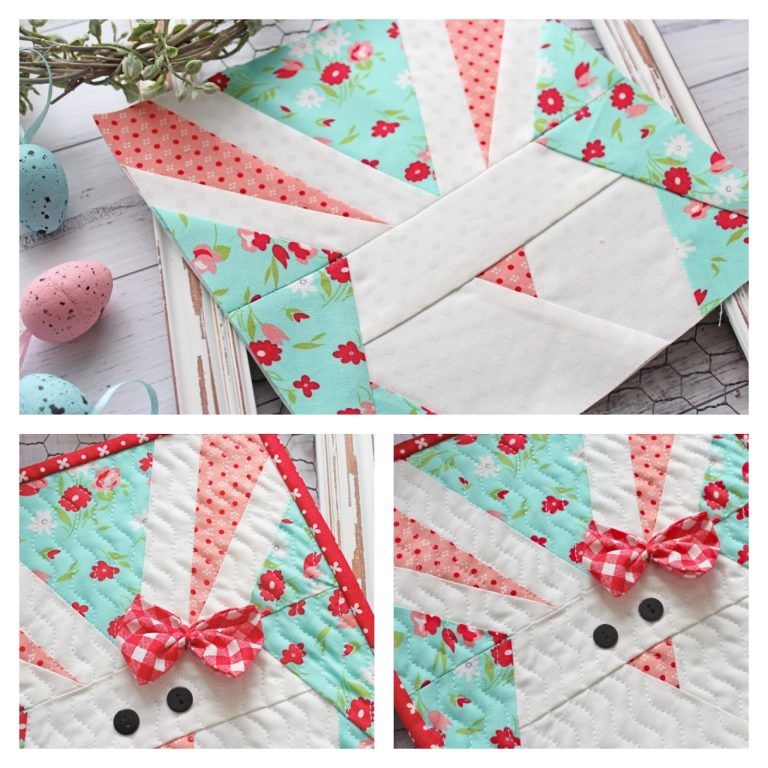
How to Bonita Bunny Quilt Block Pattern is a delightful and creative project that combines precision, charm, and the timeless beauty of quilting. If you are looking for a block that brings personality and softness to your quilt, this bunny-inspired design is the perfect choice.
Throughout this complete guide, you will learn not only the essential steps but also valuable techniques to ensure a professional finish. Whether you are a beginner or an experienced quilter, understanding the structure and details behind this pattern will elevate your results.
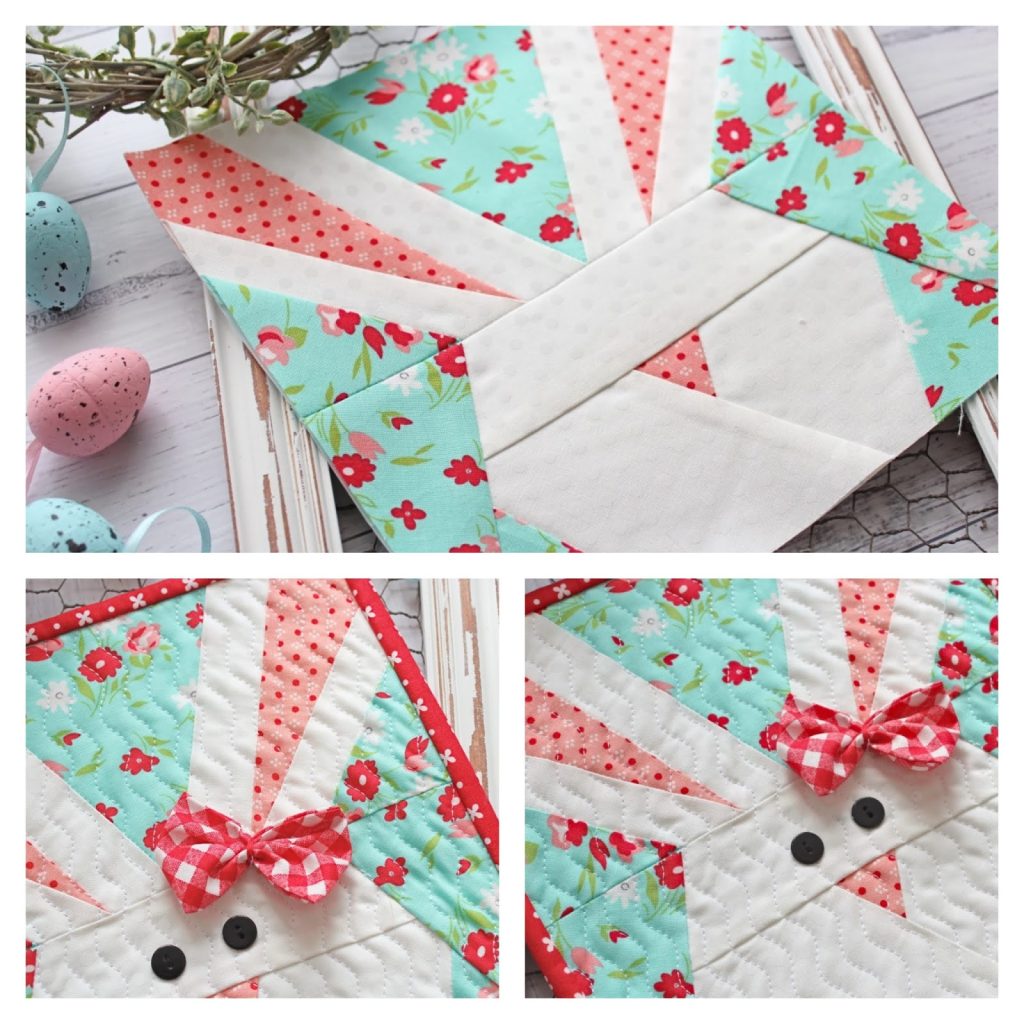
The How to Bonita Bunny Quilt Block Pattern process requires careful fabric selection, accurate cutting, and thoughtful assembly. This pattern is especially popular for spring-themed quilts, baby blankets, and decorative wall hangings. The adorable bunny shape offers endless opportunities for customization, from playful pastel fabrics to bold modern prints. By mastering this block, you will expand your quilting skills while creating something truly heartwarming.
In addition, many quilters search for guidance on How to paper piece Bonita Bunny Pattern, as paper piecing can help achieve sharp lines and perfect proportions. This method ensures precision, especially when working with small details like bunny ears and facial features. In this article, we will explore both traditional piecing and paper piecing techniques, explaining each step clearly so you can choose the approach that fits your style and comfort level.
The foundation of How to Bonita Bunny Quilt Block Pattern lies in understanding its structure. The block typically consists of geometric shapes arranged to form a recognizable bunny silhouette. Most versions use squares, rectangles, and triangles strategically positioned to define the ears, head, and background. Before cutting any fabric, carefully study the pattern layout to understand how each piece contributes to the final design.
Fabric choice plays a crucial role in defining the bunny’s personality. Soft cotton fabrics in pastel tones are commonly used, especially for baby quilts. However, modern interpretations often incorporate bold contrasts for a more contemporary aesthetic. Selecting high-quality quilting cotton ensures durability and makes piecing easier due to its stable weave.
Color contrast between the bunny and the background is essential. A clear distinction allows the bunny shape to stand out beautifully. Many quilters choose light fabric for the bunny and darker fabric for the background, but reversing this combination can create an equally stunning effect. Planning your color scheme in advance prevents visual blending and enhances the final appearance.
Accurate cutting is another critical step. Use a rotary cutter, quilting ruler, and cutting mat to achieve precise measurements. Even small cutting errors can affect alignment later. Double-check measurements before moving on to sewing, especially when working with smaller components like the ears.
Seam allowance consistency is vital for block accuracy. A standard quarter-inch seam allowance is recommended for most quilt blocks. Practicing on scrap fabric can help ensure your machine settings produce the correct seam width. Consistency at this stage guarantees that your block finishes at the intended size.
Pressing techniques should not be overlooked. Press seams gently rather than ironing back and forth, which can distort the fabric. Pressing seams open or to one side depends on your pattern instructions, but maintaining flat seams contributes to a polished result.
When beginning How to Bonita Bunny Quilt Block Pattern, start by organizing your fabric pieces according to the pattern layout. Labeling sections can help prevent confusion, especially if the design includes multiple small segments. Keeping pieces arranged in order makes the sewing process smoother and more efficient.
Begin by constructing smaller units such as the bunny ears. These often involve half-square triangles or rectangular pieces joined together. Carefully align edges before stitching, and pin if necessary to maintain accuracy. Taking your time during this stage ensures symmetrical ears and clean points.
Next, assemble the head section. This part typically forms the central focal point of the block. Make sure seams match precisely where units intersect. Nesting seams, where one seam allowance folds in the opposite direction of the adjoining piece, can help reduce bulk and improve alignment.
Once the ears and head are complete, join them together according to the layout diagram. Pay attention to orientation so that the bunny’s silhouette appears correctly. Small alignment adjustments before sewing can prevent having to rip seams later.
After assembling the bunny shape, attach the background pieces. These frame the bunny and bring the entire block to its finished size. Sew slowly and maintain even seam allowances to avoid distortion. Press carefully after each addition to keep the block flat.
Finally, measure your completed block to confirm it matches the intended dimensions. Minor trimming may be necessary, but avoid excessive cutting. A properly assembled block should require minimal adjustment. Completing this step marks a significant milestone in mastering How to Bonita Bunny Quilt Block Pattern.
Many quilters prefer How to paper piece Bonita Bunny Pattern because it offers exceptional precision. Paper piecing involves sewing fabric pieces directly onto a printed foundation template. This method is particularly helpful for intricate designs or sharp angles that may be difficult with traditional piecing.
Start by printing the pattern template at 100% scale. Verify measurements using the test square provided on the template. Accuracy at this stage ensures the final block finishes at the correct size. Using lightweight foundation paper makes stitching and tearing easier later.
Place the first fabric piece right side up on the blank side of the paper template, covering the designated area completely. Then position the second piece right side down over the first, aligning edges according to the seam line. Stitch directly on the printed line, securing the pieces to the paper foundation.
After stitching, trim the seam allowance to a quarter inch and press the fabric open. Continue adding pieces in numerical order, always sewing along the printed lines. The numbered sections guide the construction process and maintain correct alignment throughout.
One advantage of How to paper piece Bonita Bunny Pattern is the crisp definition it provides, especially for small bunny ears or detailed sections. The paper stabilizes the fabric, preventing stretching or shifting during sewing. This leads to sharp points and precise angles.
Once all sections are complete, gently tear away the foundation paper. Work slowly to avoid pulling stitches. After removing the paper, join the finished sections together as instructed. The result is a beautifully accurate bunny block that showcases the benefits of paper piecing.
After completing How to Bonita Bunny Quilt Block Pattern, consider how you want to incorporate the block into a larger project. This bunny design works beautifully in baby quilts, seasonal wall hangings, and themed table runners. Planning your layout in advance helps determine how many blocks you will need.
Sashing can enhance the visual impact of each bunny block. Adding strips of contrasting fabric between blocks creates separation and highlights the design. Borders in coordinating colors provide a polished and cohesive finish to the quilt top.
Quilting design choices also influence the final appearance. Simple straight-line quilting emphasizes a modern look, while free-motion quilting adds texture and dimension. Choose a thread color that complements both the bunny and the background fabrics.
You can personalize the bunny by adding embroidered facial features or appliqué details. Keep embellishments minimal if the quilt is intended for children, ensuring durability and safety. Subtle details can make each bunny unique without overwhelming the design.
Proper pressing and squaring up before final assembly ensures all blocks align neatly. Take time to trim edges evenly and maintain consistent block sizes. Precision during this stage simplifies the quilting and binding process.
Finally, bind your quilt using a fabric that frames the design attractively. A well-chosen binding color can either blend seamlessly or create a bold outline. With thoughtful finishing touches, your How to Bonita Bunny Quilt Block Pattern project becomes a cherished handmade piece.
FAQ About How to Bonita Bunny Quilt Block Pattern
What size is the Bonita Bunny quilt block typically finished at?
Most versions finish at 8, 10, or 12 inches square, depending on the pattern design. Always verify measurements before cutting fabric.
Is paper piecing necessary for this pattern?
No, traditional piecing works well. However, learning How to paper piece Bonita Bunny Pattern can improve precision, especially for intricate sections.
What type of fabric works best?
High-quality quilting cotton is recommended for stability and durability. Prewashing is optional but can reduce shrinkage.
Can beginners make this quilt block?
Yes, beginners can successfully complete this project by carefully following instructions and practicing accurate seam allowances.
How many bunny blocks are needed for a baby quilt?
It depends on the finished size. For a small baby quilt, 9 to 12 blocks are commonly used, arranged in a grid layout.
How do I ensure my bunny ears come out symmetrical?
Accurate cutting, careful alignment, and consistent seam allowances are key. Paper piecing can also help achieve symmetrical results.
Video Tutorial
In this complete guide on How to Bonita Bunny Quilt Block Pattern, you learned about the block structure, step-by-step assembly, the benefits of How to paper piece Bonita Bunny Pattern, and essential finishing techniques. From fabric selection and accurate cutting to precision piecing and creative customization, each stage plays an important role in achieving a professional and charming result.
By applying these techniques and maintaining attention to detail, you can confidently create a beautiful bunny quilt block suitable for a wide variety of projects. I hope this guide has inspired you to start your own bunny-themed quilt. Please leave your honest opinion and share your suggestions, as your feedback helps improve future tutorials and inspires more creative quilting ideas.


