
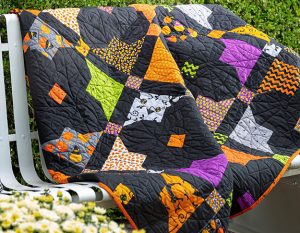
Bird Quilt Block Pattern
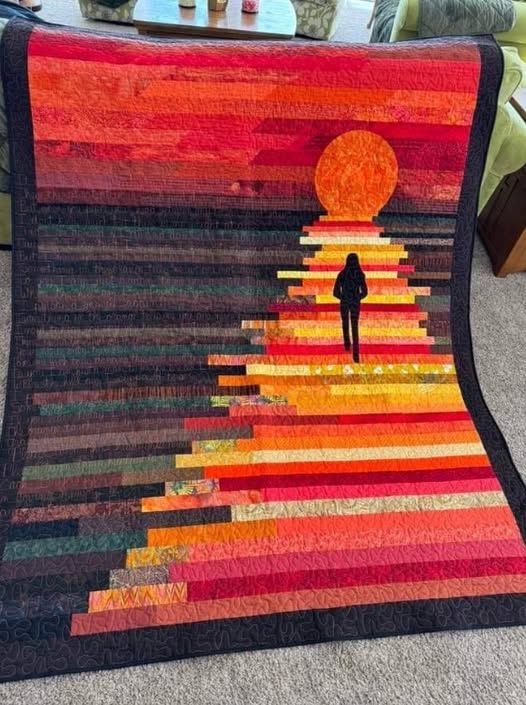
Creating a Path to the Sun quilt is a rewarding journey for quilters of all levels. This striking design captures the beauty of radiating sunbeams through vibrant fabrics and geometric quilt patterns. In this guide, we’ll walk you through everything you need to know to bring this quilt to life—from understanding the design to cutting your fabric with precision and sewing it together with care.
Whether you’re looking to try a fresh design or expand your skills, this Path to the Sun quilt project will spark creativity and offer a satisfying sewing experience. With clear measurements, material lists, and step-by-step guidance, you’ll find it easy to follow. As with all quality quilt patterns, attention to detail and fabric coordination are key.
The vibrant layout of the Path to the Sun quilt mimics rays of light stretching outward, making it perfect for a bedspread or wall hanging. It brings warmth, symmetry, and a touch of nature-inspired artistry to your home. Best of all, you can personalize it with your own color palette and fabric choices.
This article is divided into four comprehensive sections. Each section will guide you through the quilting process in digestible parts, with six short paragraphs under each subtitle. Whether you’re a beginner or experienced in making quilts, you’ll be able to follow along with confidence.
Let’s explore the techniques, materials, and layout of the Path to the Sun quilt and build something beautiful—one block at a time.
The first step in creating a Path to the Sun quilt is choosing the right fabrics. Color plays a huge role in this design, as the layout resembles the sun’s rays beaming outward. Consider using gradients of yellow, orange, red, and gold for the center, gradually moving into cooler tones like blue or violet toward the edges.
You’ll want to choose high-quality 100% cotton fabric to ensure durability and easy handling. Cotton holds its shape well and is a staple in most quilt patterns. Pre-washing your fabric is also a good idea to prevent shrinkage after the quilt is completed.
To make the most out of your fabric, plan your layout on paper or using a digital design tool. Map out the direction of the “rays” and choose contrasting background colors to make them pop. A dark navy or black background can provide beautiful contrast for a glowing sun effect.
For a throw-sized quilt, aim for a finished size of approximately 60” x 72”. You’ll need about 2 yards of background fabric, and fat quarters (18” x 22”) of 6–8 accent colors. Add a half yard of a bold center color to represent the sun.
Include coordinating colors for borders and binding. A solid color binding will frame the quilt nicely, while a border in a gradient print can extend the illusion of light. Use a color wheel to help choose complementary or analogous colors that flow well.
When planning fabric placement, consider symmetry. The radiating design of the Path to the Sun quilt relies on precise angles and alignment. Careful planning at this stage will save time and prevent fabric waste later on.
Accurate cutting is essential for any quilt, especially one with a dynamic design like the Path to the Sun quilt. Each strip and block contributes to the illusion of movement, so take your time during this step.
Start by cutting your background fabric into:
These will form the “negative space” around your sun rays and help guide the eye toward the center. Precision here will ensure clean lines in the final layout.
Next, from your accent fabrics (your sunbeam colors), cut:
Be sure to keep similar hues together if you’re creating a gradient effect. These strips are the heart of the quilt pattern, forming the iconic sunray design.
From your bold center color, cut:
Finally, for the border and binding, cut:
Label all your pieces with sticky notes or fabric-safe markers. Keeping everything organized will help you assemble your quilt efficiently and reduce confusion during piecing.
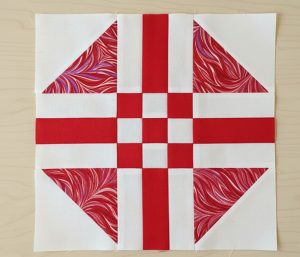
Now comes the fun part: putting your Path to the Sun quilt blocks together. The construction uses a combination of strip piecing and block rotation to create the radiating effect that defines this unique quilt pattern.
Begin by sewing one 2.5” x 12.5” accent strip to a 4.5” x 12.5” background piece, right sides together, using a 1/4” seam allowance. Press the seam toward the darker fabric. Repeat this with all long strips to form rectangular blocks.
Next, repeat the process with your 2.5” x 8.5” accent strips and 4.5” x 8.5” background rectangles. Again, press your seams neatly, keeping consistency in the direction of your seams for easy alignment.
Use the 4.5” squares (background and center color) to make corner blocks. These can be sewn together in diagonal pairs, alternating light and dark colors to maintain the sunburst effect.
Now join these blocks into four quadrants. Each quadrant will contain a mix of long and short strip blocks, along with one corner block. Rotate each quadrant so that the rays point outward from the center.
Sew the quadrants together, matching seam intersections carefully. This will form the full quilt top, with a strong visual impact thanks to the radiating layout.
Add the 3” border strips to the top and bottom, then the sides. Press all seams outward and give the quilt top a final press before layering with batting and backing.
Once your Path to the Sun quilt top is assembled, it’s time to move on to quilting and binding. These final steps bring your creation together and make it both functional and beautiful.
Choose a batting that matches the warmth and drape you want for your quilt. A lightweight cotton batting is ideal for wall hangings or summer throws. For a cozier quilt, opt for a cotton-poly blend.
Layer your quilt sandwich: backing (right side down), batting, and quilt top (right side up). Smooth out any wrinkles and baste the layers using safety pins or temporary spray adhesive.
For quilting lines, consider echo quilting around the sun rays to emphasize the radiating design. Stitching in the ditch along seams also works well and is beginner-friendly. Use a walking foot for even stitching.
If you’re more experienced, try free-motion quilting in spiral or wave patterns that mimic sunlight. These organic shapes add texture and movement to your finished quilt pattern.
Once quilting is done, trim excess batting and backing. Attach the binding strips using a 1/4” seam allowance, folding and stitching around corners carefully. Finish by hand or machine stitching the binding to the back.
Label your finished Path to the Sun quilt with your name, date, and any personal notes. It’s a beautiful piece of art and craftsmanship that you can proudly display or gift to someone special.


