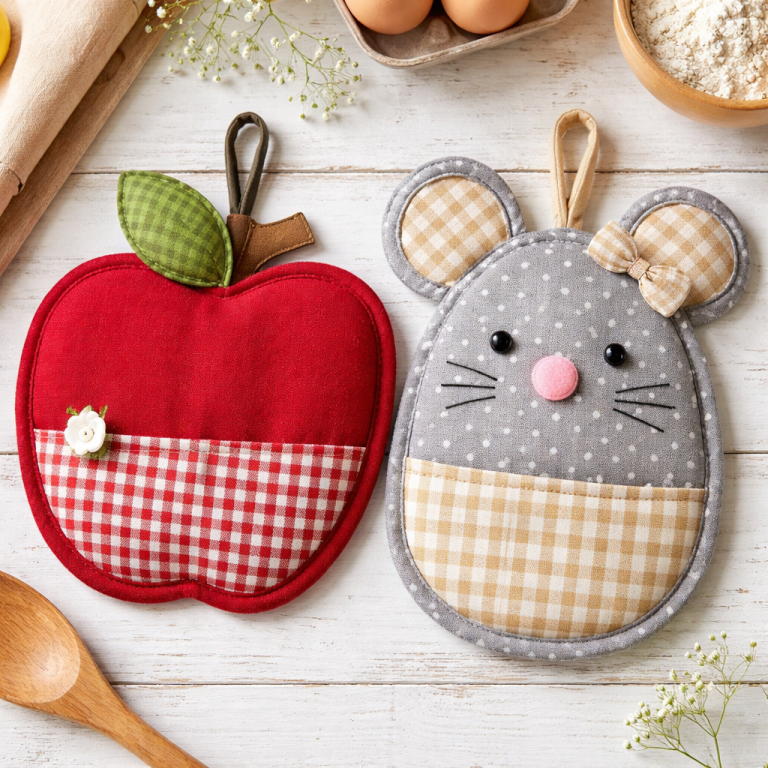
Apple and Mouse-Shaped Potholders Pattern
The Pig Oven Mitt – Quilt Pattern is a charming and practical project that combines the beauty of quilting with the functionality of kitchen essentials. For anyone who loves to sew or quilt, creating a pig-shaped oven mitt is both enjoyable and rewarding. This project allows you to transform simple fabric pieces into a playful, protective mitt that adds personality to your kitchen. Beyond being cute, it also serves as a useful handmade item that can protect your hands from hot pots and pans.
When making a Pig Oven Mitt – Quilt Pattern, you have the freedom to choose colorful fabrics, textures, and quilted stitches that bring the design to life. Quilting is not only about sewing layers of fabric; it is also about expressing creativity and craftsmanship. By learning this pattern, you will acquire skills that help you create both decorative and functional items. The mitt can be customized for children, families, or even themed kitchens, making it a versatile gift idea as well.
Quilted oven mitts like this one also have practical benefits. Because quilting involves layering fabric with batting in between, it creates insulation that helps resist heat. The Pig Oven Mitt – Quilt Pattern is not only an attractive project but also a highly useful one. Whether you are a beginner or an advanced quilter, you will find this project manageable while still offering enough detail to keep the process interesting. The end result is a durable, personalized oven mitt that will stand out in any kitchen.
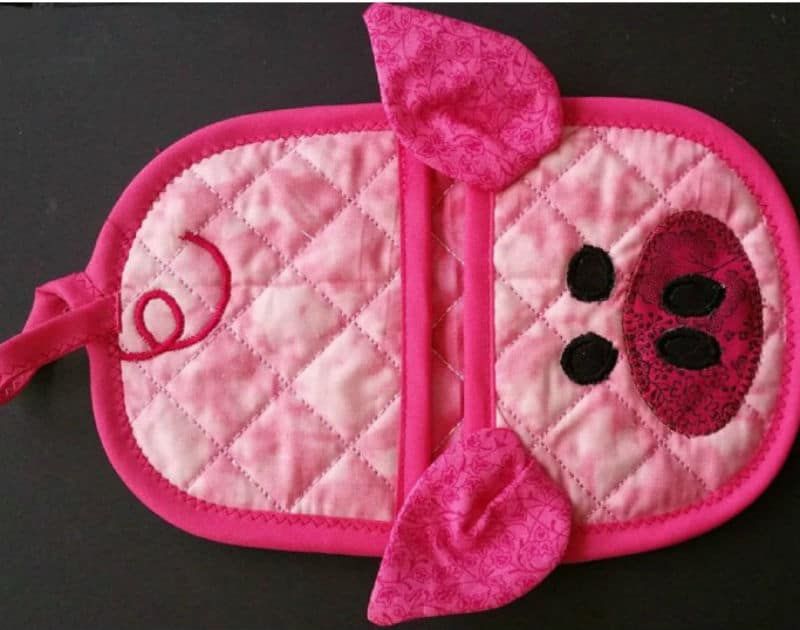
The first step in making the Pig Oven Mitt – Quilt Pattern is to understand its structure and design. A pig oven mitt is usually shaped with rounded edges and details that resemble a pig’s snout, ears, and sometimes even a little tail. The quilted layers provide a sturdy texture, while the pig-inspired details add a playful charm. Having a clear understanding of the structure makes it easier to plan fabric cuts and stitching.
Fabric selection plays a big role in this design. Many crafters choose pink cotton fabrics to represent a pig, but others prefer more creative options such as patterned fabrics, floral prints, or even bold colors. The quilt batting in the middle layer provides thickness and ensures that the mitt can withstand heat when handling cookware. Choosing the right materials is key for both safety and appearance.
Templates are often used when cutting fabric pieces for the mitt. These templates outline the body of the mitt, the thumb section, and the pig details like ears and snout. Quilters can either draw their own template or find inspiration from existing shapes. Once the pieces are cut, they can be arranged to visualize the final look before sewing begins.
Stitching is another important part of the process. Quilting stitches can be decorative, adding more charm to the design, or they can be simple straight lines that hold the layers together. For the Pig Oven Mitt – Quilt Pattern, many prefer curved stitching patterns that follow the shape of the mitt and highlight its pig-inspired details. This adds both structure and beauty to the finished piece.
Assembly comes next, where all fabric pieces are layered and stitched together. First, the pig features are sewn onto the front piece of fabric. Then, the front and back mitt shapes are stitched together with batting sandwiched in between. This layered construction is what makes the mitt heat resistant. Attention to detail during assembly ensures that the mitt will be durable and comfortable to wear.
Finally, binding the edges gives the oven mitt a polished finish. Binding can be done with coordinating fabric strips that cover the raw edges and strengthen the seams. Adding a small fabric loop allows the mitt to be hung in the kitchen for easy access. This step completes the project and makes the Pig Oven Mitt – Quilt Pattern both functional and decorative.
The process of making a Pig Oven Mitt – Quilt Pattern begins with gathering all necessary materials. You will need fabric for the outer layers, quilt batting for insulation, matching thread, scissors, sewing pins, and a sewing machine. Having all tools ready before starting makes the quilting process much smoother. Beginners are encouraged to choose cotton fabric because it is easy to sew and quilt.
Once materials are ready, you can start cutting fabric pieces. Use a mitt template to trace the front and back shapes onto your chosen fabric. Do the same for the batting layer. Remember to cut extra pieces for pig details such as ears and snout. Keeping fabric cuts precise will ensure that all pieces align perfectly during sewing. Accuracy at this stage prevents difficulties later.
The next step is attaching pig details to the front fabric piece. For example, you can sew a circular patch to represent the snout and add smaller pieces for the nostrils. Triangular shapes can be used for ears, and small fabric accents may be added for extra charm. This step is where you can get creative and personalize your Pig Oven Mitt – Quilt Pattern.
After decorating the front piece, you can move on to quilting. Place the batting between the front and back fabric layers and pin them together. Using a sewing machine, stitch through all layers with patterns of your choice. Quilting stitches should cover the surface evenly to keep the batting secure. At this stage, the oven mitt begins to take its functional form.
Now comes the assembly of the mitt. With the decorated quilted fabric facing inward, sew along the edges of the mitt shape, leaving an opening at the bottom. Once sewn, turn the mitt inside out to reveal the pig design. This step reveals the charm of the Pig Oven Mitt – Quilt Pattern and shows how small details come together into a finished product.
The final stage involves binding the edges and adding a loop. Binding hides raw seams and reinforces the structure of the mitt. Adding a small loop makes it easier to hang the mitt in your kitchen. At this point, your handmade pig oven mitt is complete, offering both charm and practicality for everyday use.
Creating a Pig Oven Mitt – Quilt Pattern is not just about making a functional kitchen item—it comes with several benefits. One of the most obvious advantages is that it is a budget-friendly project. Instead of buying mass-produced oven mitts, you can use fabric scraps from other quilting projects to make a unique, handmade mitt. This helps reduce waste and saves money.
Another benefit is that quilting is a relaxing and therapeutic activity. Working on a pig oven mitt allows crafters to focus on stitching, cutting, and assembling, which can be a calming process. Many people find sewing projects to be a form of mindfulness that reduces stress while creating something meaningful.
Personalization is also a major advantage. With the Pig Oven Mitt – Quilt Pattern, you can choose any fabric design, color scheme, or decorative detail that matches your kitchen style or personal taste. This level of customization is not available in store-bought products. Handmade mitts make excellent gifts because they reflect care and creativity.
Durability is another key benefit. A quilted oven mitt with proper stitching and binding can last for years. Unlike cheaper oven mitts, which may wear out quickly, a handmade quilted version is designed to withstand frequent use. The layers of fabric and batting provide long-lasting heat resistance, making it both safe and practical.
The project also helps develop sewing skills. Beginners can learn the basics of cutting, quilting, and assembling, while experienced quilters can refine their techniques. Every step in creating a Pig Oven Mitt – Quilt Pattern offers valuable practice for future quilting projects.
Finally, this project encourages sustainability. By reusing fabric scraps and focusing on handmade items, quilters contribute to reducing waste and promoting eco-friendly crafting. Making your own pig oven mitt not only benefits your kitchen but also supports a more mindful lifestyle.
To make the most of your Pig Oven Mitt – Quilt Pattern, there are some helpful tips that can improve both the process and the outcome. The first tip is to choose high-quality batting. A thicker, heat-resistant batting will ensure better protection when handling hot cookware, making your mitt both safe and functional.
Another tip is to prewash your fabric before cutting. Prewashing prevents shrinkage and ensures that your oven mitt maintains its shape after washing. This is especially important if you plan to gift your quilted mitt to someone else, as it guarantees a professional finish.
Pay attention to stitch length when quilting. Using shorter stitches makes the seams stronger and prevents batting from shifting. This detail can make a big difference in the durability of your Pig Oven Mitt – Quilt Pattern. Consistent stitching also adds beauty to the final design.
When sewing the mitt together, leave enough seam allowance. This ensures that the mitt has enough room inside to comfortably fit your hand. If the seam allowance is too small, the mitt may feel tight and uncomfortable. Proper measurements are key to creating a practical oven mitt.
Consider adding lining fabric inside the mitt. Lining makes the mitt smoother on the inside, which improves comfort. It also adds an extra layer of protection from heat. This optional step can enhance the overall quality of your project.
Lastly, practice patience during the binding stage. Binding can be tricky, especially around curved edges. Taking your time to carefully fold and stitch the binding will result in a clean, professional look. A well-bound edge will elevate your Pig Oven Mitt – Quilt Pattern from a simple craft to a polished, long-lasting item.
1. What materials do I need for a Pig Oven Mitt – Quilt Pattern?
You will need cotton fabric, quilt batting, thread, scissors, sewing pins, a template, and a sewing machine. Optional materials include lining fabric and decorative pieces for the pig details.
2. Is the Pig Oven Mitt – Quilt Pattern suitable for beginners?
Yes, this project is beginner-friendly. It teaches basic quilting skills such as cutting, layering, stitching, and binding, while still being simple enough to complete without advanced techniques.
3. How heat-resistant is a quilted oven mitt?
The heat resistance depends on the quality of the batting and the number of fabric layers used. High-quality batting and proper quilting stitches make the mitt safe for handling hot cookware.
4. Can I customize the Pig Oven Mitt design?
Absolutely! You can use any color or fabric pattern you like. Adding embroidery, appliqué, or unique stitching can make the mitt more personal and creative.
5. How do I clean a quilted oven mitt?
Most quilted oven mitts can be machine washed with mild detergent. It is best to air-dry them to maintain shape and prevent shrinkage. Always check the type of fabric before washing.
6. How long does it take to complete this project?
Depending on skill level, it may take between 3 to 5 hours. Beginners might need more time, while experienced quilters can complete it faster.
The Pig Oven Mitt – Quilt Pattern is a delightful quilting project that blends creativity with practicality. From fabric selection to stitching and final assembly, each step contributes to a unique and functional kitchen accessory. This project not only provides a handmade alternative to store-bought mitts but also encourages creativity, personalization, and sustainability.
Now that you have learned how to create a Pig Oven Mitt – Quilt Pattern, you can start your own project with confidence. Whether you make it for yourself, for your family, or as a thoughtful handmade gift, the process is sure to be rewarding. We hope this guide inspires you to bring personality and charm into your quilting journey. Please share your honest opinion and suggestions—we would love to hear your feedback and ideas for future projects!


