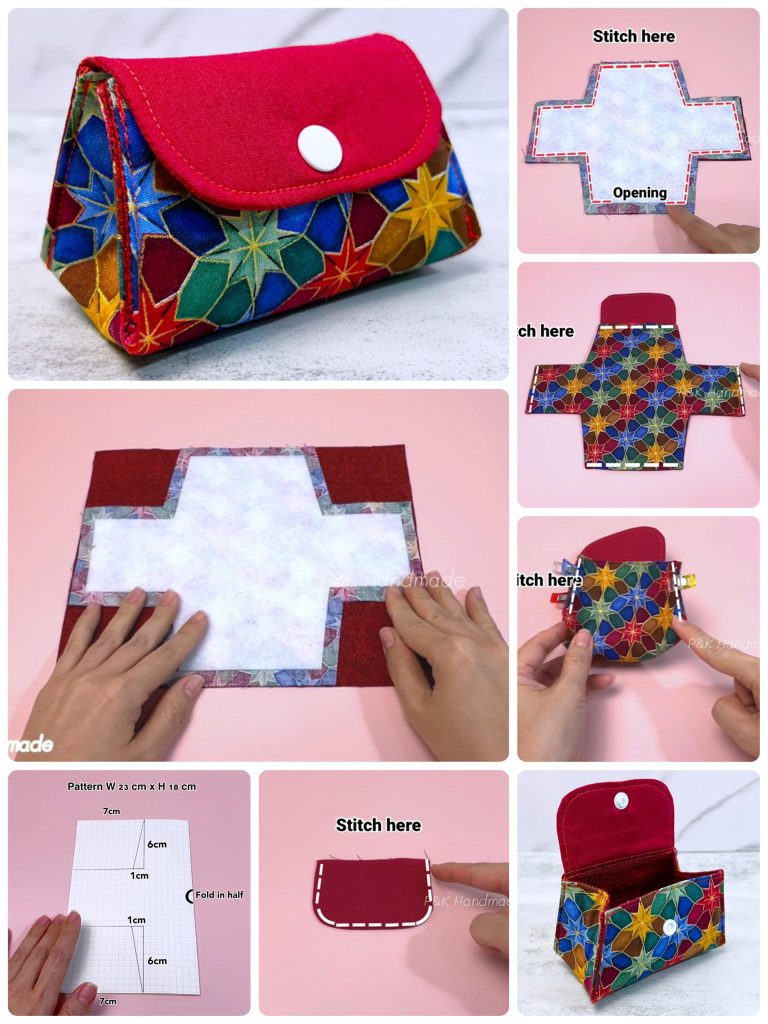
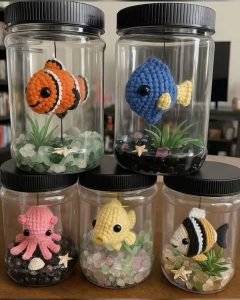
How to Make a Fabric Coin Purse Pattern
The Retro Hearts Quilt is a charming and nostalgic pattern that instantly adds warmth and personality to any room. Combining classic heart shapes with a vintage aesthetic, this quilt brings the spirit of retro design into your modern quilting projects. In this blog post, we will explore the beauty of the Retro Hearts Quilt, provide you with a detailed step-by-step guide to make your own, and share essential tips to ensure your quilt turns out perfectly.
Whether you’re an experienced quilter or a beginner eager to try something new, the Retro Hearts Quilt is a delightful project that rewards creativity and patience. Using carefully chosen fabrics and thoughtful design, you can create a quilt that feels both timeless and unique. This pattern is especially popular for gifts, cozy throws, or even as a statement wall hanging.
In the following sections, you’ll discover the exact fabric cuts and measurements you need, learn about the best fabric choices to bring out that retro feel, and receive guidance to assemble your quilt step by step. Let’s get started on this exciting quilting adventure!

Selecting the right fabrics is the first and most creative step in making your Retro Hearts Quilt. Vintage-inspired fabrics with florals, polka dots, and soft pastel colors work beautifully to highlight the retro charm of this quilt.
Consider mixing solids and prints to create visual interest. The hearts will stand out nicely if you use contrasting fabrics for the background and the hearts themselves. Soft pinks, mint greens, butter yellows, and faded blues often evoke a classic retro feel.
When planning your quilt, choose 100% cotton fabrics, which are durable and easy to work with. Cotton also presses well, ensuring your hearts keep their shape. Remember to wash and iron your fabrics before cutting to avoid shrinking after the quilt is complete.
Adding a few bolder prints can also bring depth to your Retro Hearts Quilt. For instance, vintage floral fabrics or playful geometric prints can make each heart unique. Keep the overall palette coordinated so the design feels cohesive rather than chaotic.
Don’t forget to select a background fabric that will help the hearts pop. A solid white or cream background is classic, but a soft textured print can also look stunning. For the quilt’s binding and backing, consider complementary colors to tie the entire design together.
Finally, gather your supplies: rotary cutter, cutting mat, quilting ruler, sewing machine, thread matching your fabrics, pins, and batting. With your fabrics chosen and tools ready, you’re all set to move on to the cutting stage!
To create a classic Retro Hearts Quilt measuring about 60″ x 70″, you will need the following fabric cuts. Adjust these quantities based on the final quilt size you desire.
First, for the heart blocks: cut 30 squares of heart fabric, each measuring 10″ x 10″. These will become your heart shapes. Choose different prints and colors for a playful retro look.
Next, cut 30 background squares measuring 10″ x 10″. These background squares will surround your hearts and create the visual frame for each heart block.
For the sashing (the strips between the blocks), cut strips of background fabric measuring 2.5″ x 10″. You will need about 50 strips for a quilt of this size. For the horizontal rows, cut additional strips measuring 2.5″ x the quilt width (approximately 60″).
For the border, cut strips measuring 4″ x the quilt sides and 4″ x the quilt top and bottom. These will frame the entire quilt and give it a finished look.
Finally, for the binding, cut enough strips measuring 2.5″ x width of fabric (WOF) to go around the quilt’s perimeter, typically about 7-8 strips. For the backing, choose a fabric piece that measures about 66″ x 76″, allowing extra inches for quilting.
After cutting, label your pieces to keep them organized: heart blocks, background blocks, sashing, borders, and binding. Take a moment to arrange your heart blocks on a large table or design wall to plan the quilt’s layout.
Once you’re satisfied with the arrangement, it’s time to move to the piecing stage, where the quilt starts to come to life!
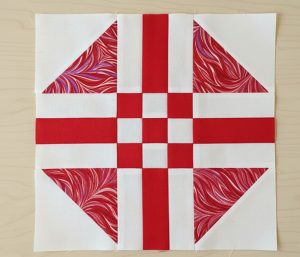
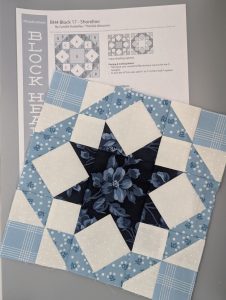
Now let’s put your Retro Hearts Quilt together block by block. Start with creating each heart block: place one heart fabric square and one background square right sides together.
Draw a heart shape (about 8″ tall and 8″ wide) on the wrong side of the background square using a fabric marker. Make sure the heart is centered. Carefully stitch along the drawn heart shape, leaving a small opening to turn it right side out.
Trim around the stitched heart, leaving about a ¼” seam allowance. Clip the curves carefully, then turn the heart right side out. Press it flat so the edges look crisp. Repeat this process for all heart blocks.
Once all hearts are prepared, topstitch around each heart to secure it to the background square. This adds a charming detail while making sure the heart stays flat.
Next, sew the sashing strips between the heart blocks. Start by joining the vertical strips (2.5″ x 10″) between each heart block in the same row. After all rows are assembled, add the longer horizontal sashing strips to connect the rows together.
Add the borders last: first the side borders, then the top and bottom borders. This frames your quilt beautifully and completes the quilt top. Your Retro Hearts Quilt is now ready for quilting!
Layer your quilt top, batting, and backing fabric, smoothing out wrinkles as you go. Pin or baste the layers together to keep them from shifting. Decide on a quilting design that suits your Retro Hearts Quilt style.
Simple diagonal quilting lines, echo quilting around the hearts, or free-motion quilting with loops and swirls all look wonderful on this design. Choose a quilting thread color that blends nicely or adds a subtle contrast.
Quilt slowly and evenly, checking that your stitches remain consistent. Quilting not only holds the layers together but also adds texture and dimension to your quilt.
Once quilting is finished, trim the excess batting and backing so the edges are even with the quilt top. Prepare your binding strips by joining them end to end and pressing them in half lengthwise.
Attach the binding to the front of the quilt using a ¼” seam allowance, then fold it over to the back and hand-stitch or machine-stitch it down for a clean finish. Take your time with this step—it gives your quilt its polished edge.
Give your finished Retro Hearts Quilt a final press, and enjoy the beautiful result of your work! Whether you use it as a throw, wall hanging, or special gift, this quilt brings vintage charm to any space.
Creating your own Retro Hearts Quilt is a joyful journey that combines creativity, patience, and love. By carefully selecting retro-inspired fabrics, following detailed cutting measurements, and piecing each block with care, you craft a quilt that feels both timeless and personal.
This pattern makes a thoughtful gift for birthdays, anniversaries, or holidays. The hearts symbolize love and warmth, making this quilt a meaningful addition to any home.
Remember to use high-quality cotton fabrics for durability and choose colors and prints that speak to your personal style. Each Retro Hearts Quilt is unique—reflecting your creativity and the spirit of retro design.
We hope this guide helps you feel confident in starting your own quilt project. Share your creations, ask questions, or tell us what retro fabrics you love most! Happy quilting!
