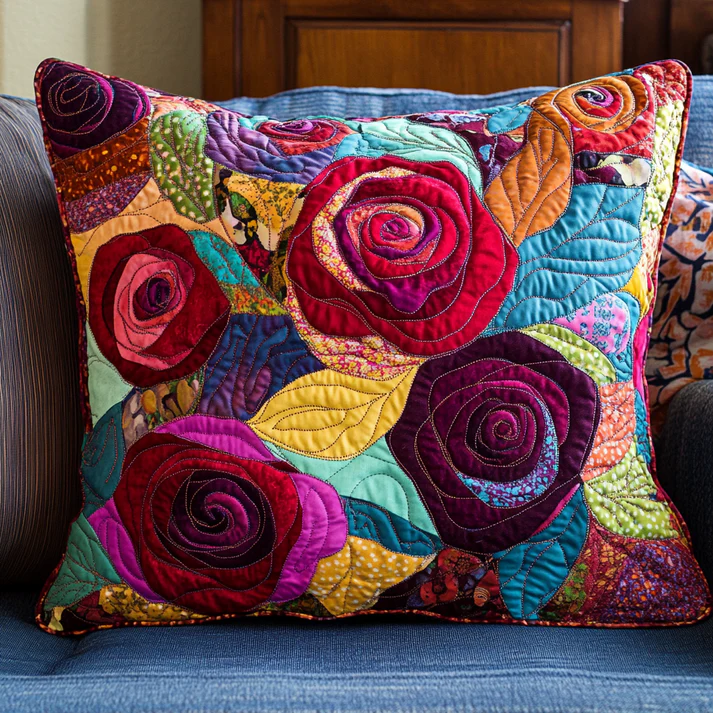
If you love quilting and want to create a beautiful and cozy decor piece, a Rose Flower Quilted Pillow Case is the perfect project for you. This elegant pillow cover not only adds a charming touch to any space but also showcases your creativity and sewing skills. Whether you’re a seasoned quilter or a beginner looking for a simple yet stunning quilt pattern, this guide will walk you through everything you need to know.
Quilting has been a beloved craft for centuries, bringing warmth and artistry into homes worldwide. A quilted pillow case featuring a rose flower design is a delightful way to personalize your living room or bedroom. By carefully selecting fabrics, following structured quilt patterns, and using basic sewing techniques, you can craft a pillow cover that looks both professional and handmade.
In this detailed guide, we’ll go over the essential materials, the best techniques for quilting, and provide a step-by-step quilt pattern for creating your own Rose Flower Quilted Pillow Case. Let’s dive in!
Materials Needed for Your Rose Flower Quilted Pillow Case
Before you begin, gathering the right materials is essential to ensure a smooth quilting process.
- Fabric Selection – Choose cotton or linen fabrics in colors that complement your home decor. You’ll need a floral print for the rose design and solid colors for contrast.
- Fabric Measurements – Cut the following fabric pieces:
- Front panel: 18” x 18”
- Back panels: 18” x 12” (two pieces for an envelope closure)
- Batting: 19” x 19”
- Binding strips: 2.5” wide (length depends on the pillowcase size)
- Thread & Needles – Use high-quality quilting thread that matches your fabric color scheme.
- Rotary Cutter & Cutting Mat – These tools ensure precise fabric cutting.
- Sewing Machine & Quilting Foot – A good machine with a walking foot attachment will make quilting easier.
- Pins & Fabric Marking Chalk – Helps keep everything in place as you sew.
Having all these materials on hand will make the quilting process much more enjoyable and efficient.
H2: How to Cut and Arrange the Quilt Pieces
Cutting and arranging your quilt pieces properly is crucial for achieving a professional look.
- Prepare Your Fabric – Iron all fabrics before cutting to ensure accurate measurements.
- Cut the Base Fabric – Use a rotary cutter to cut the front and back panels precisely.
- Create the Rose Appliqué – Cut fabric pieces into petal shapes. Use different shades of pink and red for a realistic effect.
- Arrange the Appliqué – Lay the petals on the front panel in a circular pattern to form a rose.
- Secure with Pins – Pin the pieces in place before sewing to prevent shifting.
- Sew the Appliqué – Use a zigzag stitch to attach the petals, layering them to create depth.
Following these steps ensures that your quilted pillow case has a structured and elegant look.
H2: Quilting and Assembling the Pillow Case
Once the pieces are arranged, it’s time to quilt and put everything together.
- Layer the Fabrics – Place the batting between the front panel and a backing fabric for added texture.
- Quilt the Design – Stitch along the petal edges to secure them and add decorative quilted details.
- Trim Excess Batting – Cut any extra batting to ensure clean edges.
- Sew the Back Panels – Hem one long edge of each back panel to create a neat envelope closure.
- Attach the Back Panels to the Front – Lay the back panels on top of the front panel, right sides together.
- Stitch Around the Edges – Sew around all four edges, ensuring the back panels overlap.
Your quilted pillow case is now assembled and ready for the final touches.
H2: Finishing Touches and Care Tips
To ensure your Rose Flower Quilted Pillow Case lasts for years, follow these finishing steps and care tips.
- Add the Binding – Attach the binding strips around the edges for a polished finish.
- Press the Seams – Use an iron to press all seams flat for a crisp look.
- Insert the Pillow – Place an 18” x 18” pillow insert inside your new cover.
- Machine or Hand Wash – Wash in cold water on a gentle cycle to maintain fabric integrity.
- Air Dry or Low Heat – Avoid high heat to prevent fabric shrinkage.
- Store Properly – When not in use, fold and store in a dry place to avoid dust buildup.
By following these steps, your handcrafted quilted pillow case will stay vibrant and beautiful for years to come. Happy quilting!
