
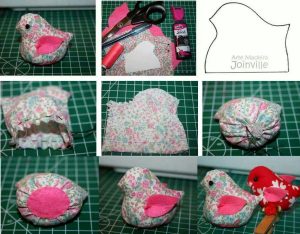
Bird Quilt Block Pattern
The Trinity Celtic Knot Quilt Pattern is an enchanting design that combines age-old symbolism with intricate quilting techniques. At first glance, its woven lines and elegant symmetry create a sense of endless movement, much like the eternal nature of Celtic knots themselves. For many quilters, creating this pattern is both an artistic and deeply satisfying journey.
In this article, we’ll walk you through everything you need to know about the Trinity Celtic Knot Quilt Pattern. From understanding its symbolism to choosing the right fabrics, and finally, a detailed step-by-step guide complete with fabric cuts and measurements. By the end, you’ll feel confident enough to craft this timeless piece yourself.
Whether you’re a beginner looking to challenge yourself or an experienced quilter seeking a captivating new project, the Trinity Celtic Knot Quilt Pattern will add both beauty and depth to your quilting repertoire.

The Trinity Celtic Knot Quilt Pattern draws inspiration from ancient Celtic art, where interlacing knots symbolized eternity and unity. The “Trinity” element adds even more meaning, often representing concepts like mind, body, and spirit, or past, present, and future.
What makes the Trinity Celtic Knot Quilt Pattern so beloved is its elegant design paired with the challenge of achieving the interwoven look using fabric. Many quilters are drawn to the way the pattern appears both structured and free-flowing, like a dance frozen in time.
Before starting, it’s essential to study the layout and understand how the bands overlap and underlap to form the complete knot. Even though it might seem complicated, breaking the process into smaller steps makes it manageable.
This pattern is perfect for wall hangings, table runners, or even full-sized quilts. The versatility of the Trinity Celtic Knot Quilt Pattern lies in its ability to look stunning in both muted tones and bright, bold fabrics.
Color choice is vital here: traditionally, rich greens and golds evoke a Celtic feel, but modern quilters often experiment with blues, reds, or even monochrome palettes. What matters most is that your chosen colors create contrast between the “woven” bands and the background.
Lastly, understanding the history behind the Trinity Celtic Knot Quilt Pattern can add a deeper appreciation as you work, turning your quilt into more than just fabric—into a meaningful piece of storytelling.
To start your Trinity Celtic Knot Quilt Pattern, you’ll need to gather specific fabrics and cut them precisely. Accuracy is crucial to ensure the knot aligns perfectly.
For the knot bands, choose a strong, contrasting color. For the background, a solid or softly textured fabric works best to let the knot stand out. Below are suggested cuts for a quilt approximately 40” x 40” (can be adjusted):
When cutting the band strips, ensure they’re perfectly straight and even, as even small differences can distort the knot shape. Press each strip after cutting to avoid folds.
Next, measure and mark the background fabric where the bands will be positioned. This helps keep everything symmetrical. Using chalk or a disappearing marker is ideal.
Lay out your cut pieces on a flat surface to preview the arrangement before sewing. This step helps visualize the knot’s final appearance.
Lastly, keep extra fabric on hand. Sometimes a band strip may need to be recut if it stretches or frays. The Trinity Celtic Knot Quilt Pattern relies on precision, so taking the time to double-check measurements pays off.
Crafting the Trinity Celtic Knot Quilt Pattern becomes easier when broken into clear steps. Let’s go through the process together.
Step 1: Marking the Design
Use your pattern template or draw the knot directly onto the background fabric using chalk. Mark where each band overlaps and underlaps. This sketch will guide your placement.
Step 2: Preparing the Bands
Fold each 2.5” band strip in half lengthwise (wrong sides together) and press, forming a double-fold strip approximately 1.25” wide. This technique keeps the bands neat with finished edges.
Step 3: Arranging the Bands
Following your marked lines, pin the bands onto the background. Start by placing horizontal and vertical bands first, then weave the diagonal bands over and under. Check that each crossing point follows the knot’s pattern.
Step 4: Securing the Bands
Use a narrow zigzag or invisible stitch along the band edges to secure them to the background fabric. Remove pins as you sew to keep the bands smooth and aligned.
Step 5: Assembling the Quilt Top
Join your marked and banded background squares and rectangles to form the complete quilt top. Press all seams flat.
Step 6: Adding Borders and Finishing
Sew the 3” border strips around the quilt top to frame your design. Layer the quilt top, batting, and backing, then quilt as desired—either echoing the knot lines or using free-motion quilting. Finish by binding the edges.
By following these steps, your Trinity Celtic Knot Quilt Pattern will come to life as a beautiful, interwoven design that looks complex but is achievable with patience and care.
Even though the Trinity Celtic Knot Quilt Pattern has a classic look, you can customize it to reflect your style. Here are some ideas.
Experiment with fabric textures: metallic fabrics for the knot bands can create a stunning, luxurious effect, while batiks add an organic, hand-dyed feel. The background can be solid or softly mottled.
Consider scale: for a larger quilt, increase the size of the background squares and band strips proportionally. For a smaller project like a pillow cover, reduce the measurements while keeping the band width balanced.
Play with color placement: using a gradient effect where bands gradually shift from dark to light can add movement and dimension to the design.
If you’re experienced with applique, you could applique the entire knot design onto a single background piece instead of piecing it. This method is especially effective for curved designs.
Adding embroidery along the band edges can enhance the woven look and add extra detail, making your Trinity Celtic Knot Quilt Pattern truly unique.
Finally, remember that quilting isn’t just about following patterns exactly—it’s about bringing your vision to life. Use the Trinity Celtic Knot Quilt Pattern as a foundation, then let your creativity guide you.
The Trinity Celtic Knot Quilt Pattern is more than just a sewing project—it’s a journey into history, symbolism, and craftsmanship. From choosing your fabrics to sewing each carefully placed band, every step builds toward a stunning finished quilt rich with meaning.
By breaking down the process and following clear steps, anyone can create this timeless pattern. And with room to personalize through colors, textures, and quilting techniques, each quilt becomes a unique reflection of its maker.
Whether you make it as a gift, a home decoration, or simply for the joy of the craft, the Trinity Celtic Knot Quilt Pattern promises to become a cherished piece in your quilting journey. Try it, enjoy every stitch, and keep the spirit of creativity alive.


