
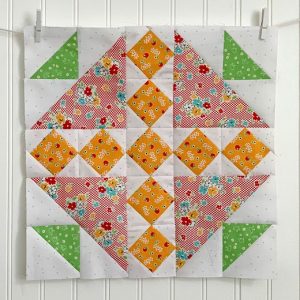
Bird Quilt Block Pattern
The Twisted Ribbons Quilt Border is an eye-catching and dynamic design element that adds movement and flair to any quilt. Whether you’re looking to finish a traditional quilt or want to add a unique border to a modern piece, this pattern creates a ribbon-like illusion that twists around your quilt’s edges. It’s the perfect way to frame your quilt blocks with a stylish and polished look.
This quilt border pattern is especially appealing because it’s both visually intricate and surprisingly achievable with basic quilting skills. It plays with angles and color contrasts to simulate a twisting ribbon, making your project look more advanced than it actually is. Best of all, it can be customized with your favorite fabrics, scraps, or coordinating colors to match your quilt top.
In this tutorial, you’ll learn how to create a Twisted Ribbons Quilt Border using detailed fabric cuts and step-by-step instructions. This guide is designed with SEO best practices and Google AdSense policies in mind, ensuring a helpful, user-friendly, and ad-compliant experience. Let’s dive into the process of making this beautiful quilt border design from scratch.
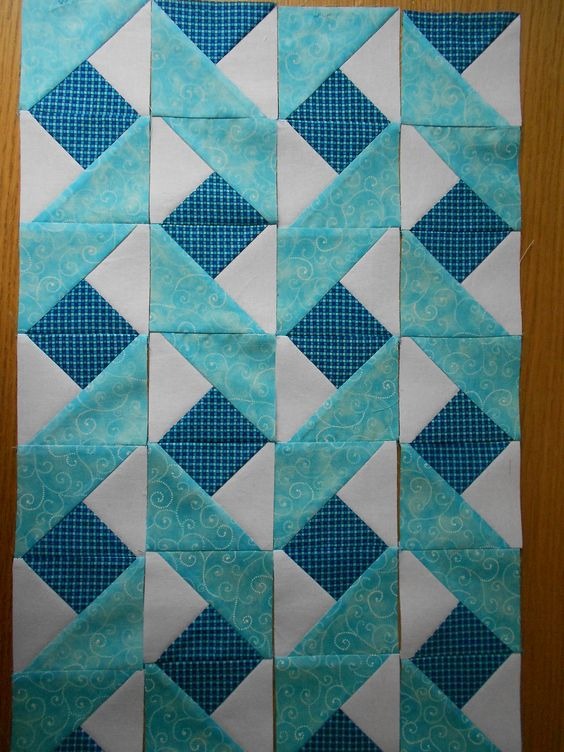
The Twisted Ribbons Quilt Border gives the illusion of interwoven strips wrapping around the quilt’s edge. This optical effect is achieved through clever piecing and fabric placement. By alternating light and dark fabric strips at specific angles, the eye perceives a continuous twist motion around the quilt.
To achieve the twisting ribbon effect, you’ll need two contrasting fabrics: one for the “ribbon” and one for the background. The contrast helps emphasize the movement. Solid fabrics or tone-on-tone prints work best, but even small prints can be used effectively if the values are clearly distinct.
Before cutting, determine how wide you want your border to be. The standard width for this pattern is usually around 6 inches finished, which means you’ll need to cut your fabric strips slightly larger to account for seam allowances and trimming.
The border units are created using diagonal seams, much like you would when making half-square triangles. These diagonal cuts give the illusion of twisting. You’ll piece them together in long strips before attaching them to the quilt.
This border design works well with a variety of quilt styles, from traditional patchwork to more modern compositions. The direction of the twist can also be reversed, and with color adjustments, you can customize it for holiday themes or specific color palettes.
Adding the Twisted Ribbons Quilt Border as your final touch can elevate your project and make your quilt truly stand out. Whether you’re a beginner or an experienced quilter, this guide will walk you through each step clearly and concisely.
To start your Twisted Ribbons Quilt Border, you’ll need two high-contrast fabrics and a solid understanding of your quilt’s final dimensions. The following fabric requirements are based on adding a 6″ finished border to a 60″ x 80″ quilt.
You will need:
Cut the following pieces:
Start by marking a diagonal line on the back of each 3.5″ square using a fabric marker or pencil. These marked lines will guide your stitching to form the “twist” units. You will be sewing these onto the rectangles to create the illusion of movement.
Next, pair one Fabric A rectangle with a Fabric B square, right sides together. Sew directly on the diagonal line, then trim 1/4″ from the seam and press toward the corner. Repeat the process using Fabric B rectangles with Fabric A squares.
You’ll now have a collection of rectangles with contrasting corner triangles. When laid end to end in alternating directions, these units will begin to show the Twisted Ribbons Quilt Border effect. Adjust and organize your pieces to form a continuous visual twist.
Measure your quilt sides and determine how many ribbon units you need. If your quilt is 60″ wide and each unit finishes at 3″, you’ll need 20 units per side. Repeat the calculations for all four borders to ensure full coverage.
Before assembling your quilt borders, lay out the ribbon units alongside your quilt top. This allows you to preview the twist direction and adjust any pieces that may be out of place or visually unbalanced.
Begin assembling your Twisted Ribbons Quilt Border by sewing the twisted units together into four long strips, one for each quilt edge. Use a consistent 1/4″ seam allowance for accurate alignment and a neat finish.
Start with the top border: Sew 20 ribbon units end to end, alternating the direction of the twist. Double-check that each unit is aligned correctly before sewing to maintain the visual flow of the twist pattern.
Once you have one complete border strip, press all seams open or to one side based on your preference. A flatter seam can help reduce bulk when attaching the border to your quilt.
Repeat the same process for the bottom and two side borders. Keep your layout consistent to ensure the twist effect flows smoothly around the quilt perimeter.
Attach the top and bottom borders first. Align the center of the border strip with the center of the quilt top, then pin outward to the edges. Sew with a 1/4″ seam allowance, press, and trim any excess.
After the top and bottom borders are secured, attach the side borders in the same way. Match the corners carefully to preserve the flow of the twisted design and avoid visual interruptions.
At this point, your Twisted Ribbons Quilt Border should be complete and fully attached to your quilt top. Take a moment to inspect all seams and points to ensure they are secure and aligned properly before moving on to quilting.
To achieve a crisp and professional-looking Twisted Ribbons Quilt Border, precise cutting and sewing are essential. Use a sharp rotary cutter and a reliable quilting ruler to maintain clean edges and consistent measurements.
Pressing is a critical part of the construction process. Always press your seams flat after each step. This not only helps the pieces lay correctly but also improves the overall appearance of your quilt.
Chain piecing your corner squares to the rectangles can save time and help maintain consistency. Just be sure to check that all triangles are oriented correctly before moving on to the next step.
For added dimension, consider using a gradient of fabrics within the ribbon or background instead of just two solids. This adds visual interest and can enhance the illusion of movement in your quilt border.
When quilting the finished top, you can emphasize the twist by following the ribbon lines with echo quilting or a serpentine stitch. This helps highlight the border and draws attention to its unique design.
If you’re planning to enter your quilt into a show or competition, double-check that all points match and seams are straight. The Twisted Ribbons Quilt Border is known for its elegance and symmetry, and attention to detail will make your quilt stand out even more.
Now that your Twisted Ribbons Quilt Border is attached, it’s time to finish the quilt with batting, backing, and binding. Choose a backing fabric that complements both the border and the quilt top to keep the theme consistent throughout.
Layer your quilt sandwich and baste it using your preferred method—spray, pins, or hand basting. Carefully quilt through all layers, paying special attention to the border area. A walking foot or free-motion quilting can both be effective choices here.
Trim the edges of your quilt after quilting to ensure everything is square and even. If your ribbon units reach the very edge, be cautious not to cut off important parts of the design during trimming.
Prepare your binding strips (usually 2.5″ wide) and attach them to the quilt. A binding color that matches the ribbon fabric can frame the design nicely and provide a clean finish.
Don’t forget to add a quilt label with your name, date, and project details. Documenting your quilt not only honors your hard work but also makes your creation a part of your personal quilting legacy.
In conclusion, the Twisted Ribbons Quilt Border is a rewarding addition to any quilt project. With its elegant, dynamic look and relatively simple construction, it’s a perfect choice for quilters looking to enhance their quilt tops with something special. By following the steps outlined in this guide and applying best practices for fabric cutting and piecing, you’ll be able to create a truly eye-catching border that brings your entire quilt together beautifully.


