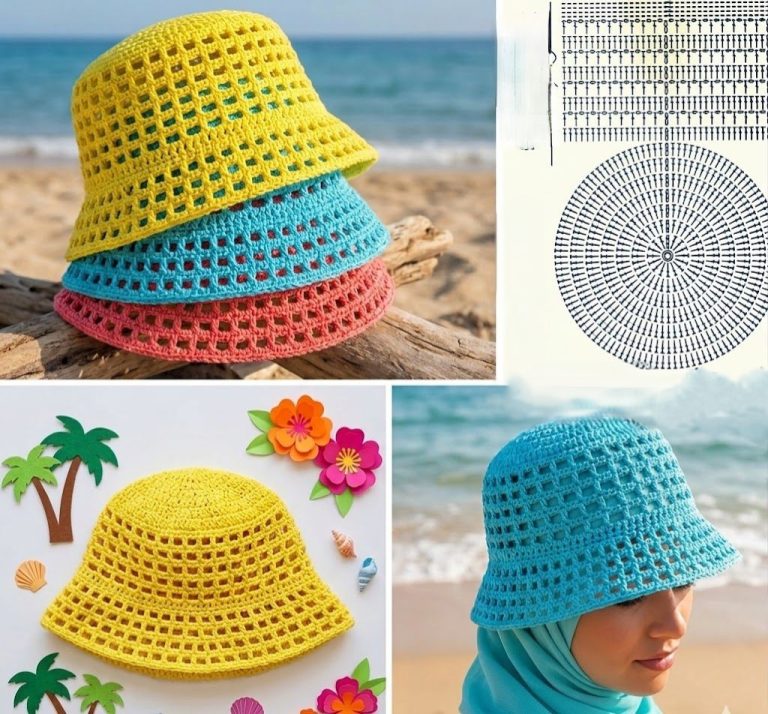
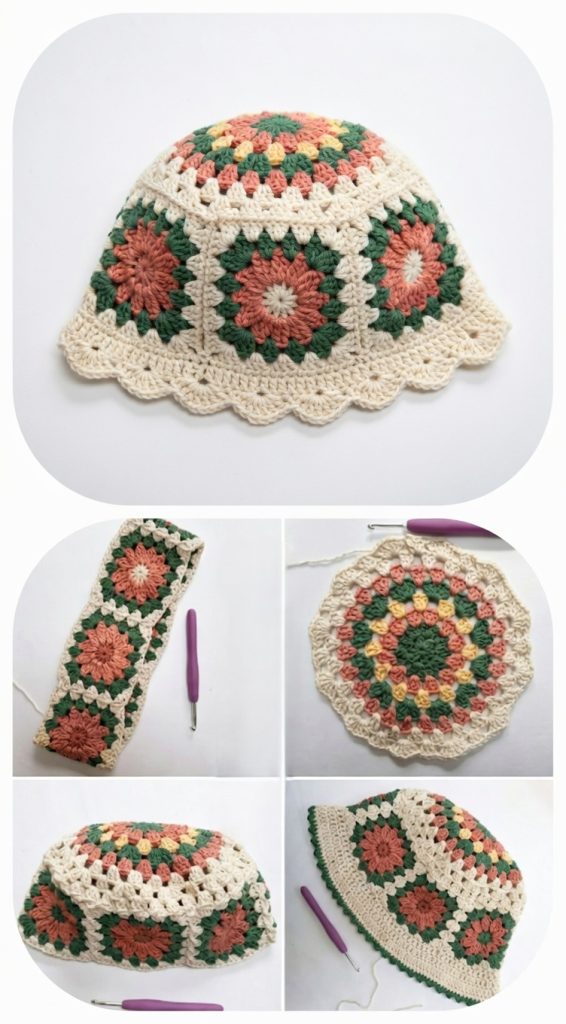
Crochet Easy Bucket Hat Pattern
The Peacock Coaster crochet pattern is a stunning and vibrant way to bring a splash of color and elegance to your home decor. Inspired by the graceful plumage of the peacock, this crochet design beautifully mimics the iconic feather shape using textured stitches and radiant hues. Whether you’re an experienced crocheter or just beginning, this project offers a fun and rewarding way to craft something functional and decorative.
One of the greatest things about the Peacock Coaster crochet is how it merges creativity with usability. These coasters are perfect for protecting your tables while also acting as conversation starters. You can use them for everyday coffee moments, festive table setups, or even gift sets for friends and family. The design is intricate yet achievable, making it an excellent project for those who love patterns that balance challenge and charm.
In this article, we’ll walk you through a step-by-step guide on how to create your own Peacock Coaster crochet pieces, from material selection to the final stitch. You’ll also find detailed measurements and tips to help make your coaster look as vibrant and dynamic as a real peacock feather. Let’s dive into the magic of crochet and feathers!.

To get started with the Peacock Coaster crochet, you’ll first need to gather the appropriate materials and prepare your fabric cuts. The correct choice of yarn and hook size will help bring the peacock feather design to life with brilliant results.
For this project, you’ll need four colors of 100% cotton yarn: emerald green, royal blue, gold, and purple. These colors closely replicate the natural palette of a peacock. Cotton yarn is preferred because it provides excellent structure and durability, especially for coasters that will be washed or used frequently.
Here’s the suggested amount of yarn per color:
Use a 3.5mm crochet hook (E-4) for this project. A smaller hook will help maintain stitch tightness, giving the coaster a sturdy, flat shape, which is ideal for table use.
You’ll also need a yarn needle for weaving in ends and a pair of scissors for trimming excess yarn. Optional but helpful tools include blocking mats and pins for shaping the final piece.
Before beginning, cut your yarn into manageable lengths (about 1.5 yards each), especially if you plan on working in color sections. This makes switching colors easier and helps avoid tangling, keeping your Peacock Coaster crochet project neat and enjoyable.
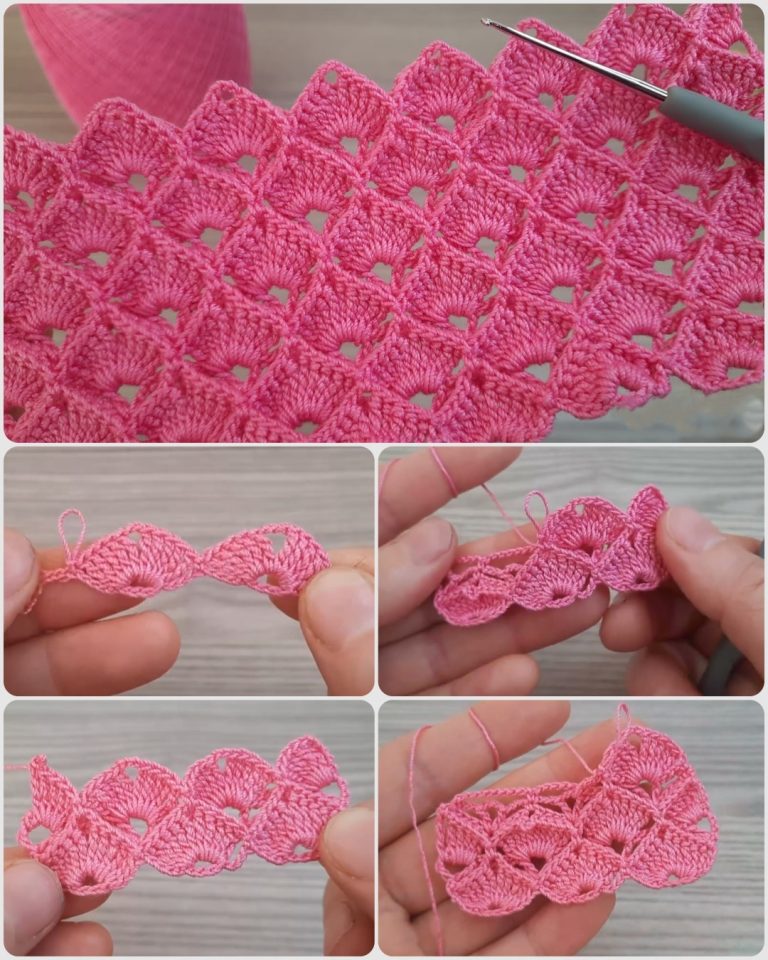
The Peacock Coaster crochet pattern is worked in the round, using a series of double crochets, chains, and fan stitches to mimic the layers and symmetry of a peacock feather. Below is a simple step-by-step breakdown of how to crochet one coaster.
Round 1:
With royal blue, create a magic ring and make 12 double crochet (dc) into the ring. Join with a slip stitch. This round forms the inner eye of the peacock feather.
Round 2:
Switch to gold. Chain 3 (counts as dc), then place 1 dc in the same stitch. Make 2 dc in each stitch around (24 dc total). Join with a slip stitch. This round highlights the golden ring found in real feathers.
Round 3:
Join purple. Chain 1, 1 single crochet (sc), chain 3, skip 1 stitch, repeat from * to * around. You should have 12 loops. Join with slip stitch. This creates the decorative arches of the feather’s mid-section.
Round 4:
Switch to emerald green. Into each ch-3 loop, work: 1 sc, 1 half double crochet (hdc), 3 dc, 1 hdc, 1 sc. Repeat in every loop. This forms the fan shapes that give the coaster its feather-like design.
Round 5 (Optional for size and texture):
With emerald green, chain 1, sc in each stitch around for a polished border. Fasten off and weave in all ends with a yarn needle.
Once complete, block the coaster by lightly dampening it, pinning it into shape on a foam board or blocking mat, and allowing it to dry overnight. This ensures your Peacock Coaster crochet lies flat and holds its shape.
One of the joys of working with the Peacock Coaster crochet pattern is how versatile it can be. You can create multiple coasters with different color variations, yarn types, or even combine the design into larger crochet projects.
Try creating a set of four or six coasters with alternating dominant colors. For example, some can feature more purple or gold, while others highlight emerald green. This makes your table setting visually dynamic and adds a luxurious, artisan feel.
You can also experiment with metallic threads. Using a strand of gold or bronze metallic yarn alongside your cotton yarn adds sparkle and gives the coasters an even more elegant appearance—perfect for festive events or gifts.
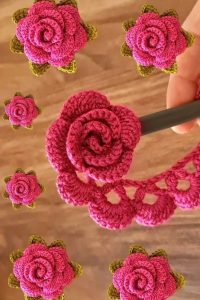
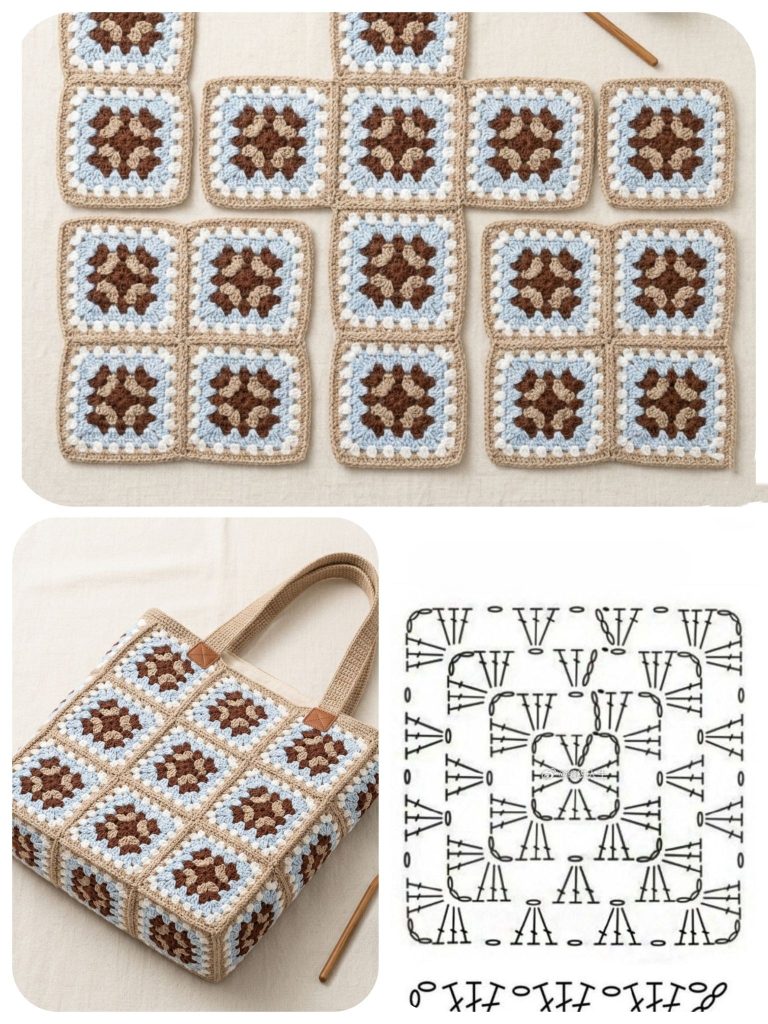
Another creative option is to use this design as an appliqué. Stitch your finished Peacock Coaster crochet onto plain tote bags, cushion covers, or even wall hangings. The feather shape translates beautifully into home decor and accessories.
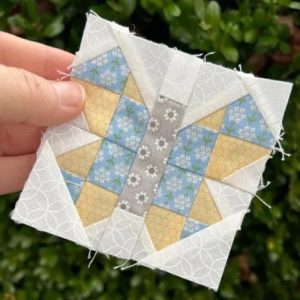
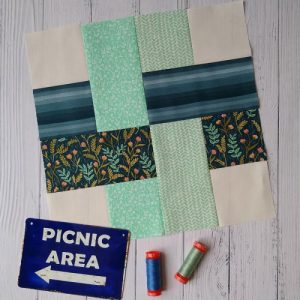
If you love quilting or patchwork, consider incorporating fabric patches between your crochet pieces. Backing your coasters with quilted cotton fabrics in matching colors gives them more structure and a mixed-media look.
You can also scale up the pattern. Using thicker yarn and a larger hook, the Peacock Coaster crochet can become a placemat or centerpiece doily for your table. This keeps the design consistent across various table elements.
Lastly, these coasters make wonderful handmade gifts. Wrap them with a ribbon or place them in a decorative box for birthdays, housewarmings, or holidays. The personal touch of handmade crochet always leaves a lasting impression.
When making a Peacock Coaster crochet, small adjustments and tips can make a big difference in the final product’s look and longevity. Paying attention to details helps ensure a neat, professional finish.
Always maintain consistent tension. Uneven tension can cause your coaster to ripple or curve, so keep your hands relaxed and work with an even pace throughout.
Take your time when changing colors. Use the “invisible join” technique to switch yarns cleanly between rounds. This prevents visible knots and gives your project a more seamless appearance.
Use blocking as a final step. Blocking not only shapes your Peacock Coaster crochet but also softens the yarn and flattens any curled edges, enhancing its usability.
Keep a stitch counter or marker handy. This helps track your place when working the fan rounds or loops and reduces errors, especially when creating multiple coasters.
Be sure to weave in all ends securely. Use a yarn needle to hide ends through the back of stitches. This prevents unraveling after washing and keeps the back of your coaster clean.
Wash your coasters gently by hand in cold water and lay flat to dry. Cotton yarn is absorbent and sturdy, but treating it with care will extend the lifespan of your handmade creation.
Q: How long does it take to make one Peacock Coaster crochet?
A: On average, one coaster takes about 45 minutes to 1 hour, depending on your skill level and speed.
Q: Can I use acrylic yarn for this project?
A: While you can use acrylic, cotton yarn is recommended for better absorption and heat resistance.
Q: Do I need to block my coasters?
A: Yes, blocking helps flatten and shape the coasters for a more polished look.
Q: Are these coasters washable?
A: Absolutely. Hand wash gently in cold water and air dry flat to maintain shape and color.
Q: Can I make a larger version of this pattern?
A: Yes! Simply use thicker yarn and a larger hook, or add extra rounds using the fan stitch pattern.
Q: Is this a beginner-friendly pattern?
A: It’s ideal for confident beginners or intermediate crocheters familiar with color changes and round motifs.
The Peacock Coaster crochet pattern is a fantastic project for anyone looking to combine beauty and function in their crochet work. Its elegant shape, vibrant color combinations, and versatility make it a standout piece in any handmade collection. With simple materials, detailed steps, and creative freedom, you can create eye-catching coasters that brighten any space.
Whether you’re making them for your own home or as thoughtful gifts, these coasters celebrate the timeless appeal of peacock feathers in a fun, approachable way. If you’ve enjoyed this pattern or tried it yourself, share your thoughts and photos—we’d love to see your creations!
Let us know in the comments if you’d like to see more patterns like the Peacock Coaster crochet, or if you have ideas for themed coaster sets. Happy crocheting!
