
Crochet Cat Hair Ties Pattern
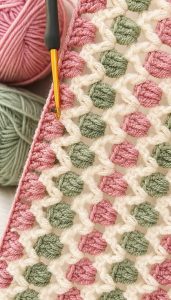
Crochet Interlaced Strips Pattern is a captivating technique that blends texture, structure, and creativity into one beautiful crochet design.
Whether you are a beginner looking to expand your skills or an experienced crocheter searching for a new challenge, this pattern offers endless possibilities for creating visually stunning projects.
The unique interwoven effect mimics a woven fabric while still being entirely crocheted, making it a favorite among crafters who appreciate both innovation and tradition.The beauty of the Crochet Interlaced Strips Pattern lies in its versatility. You can use it to create blankets, scarves, bags, home décor, and even garments. By simply changing colors, yarn types, or strip widths, you can achieve completely different looks. This adaptability makes it an excellent technique for those who want to personalize their crochet work while mastering a method that looks far more complex than it actually is.
Another reason why the Crochet Interlaced Strips Pattern is so popular is that it teaches valuable crochet fundamentals in a creative way. As you work through the pattern, you’ll develop better tension control, improve your stitch consistency, and gain confidence in assembling pieces. This pattern encourages patience and precision, but it also rewards you with a striking, professional-looking result that stands out in any handmade collection.
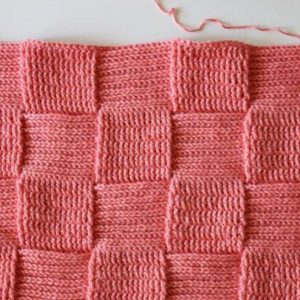
The Crochet Interlaced Strips Pattern starts with creating multiple individual strips, usually worked in rows. These strips are often made using basic stitches such as single crochet or double crochet, making the foundation accessible even for beginners. The key is consistency—keeping each strip uniform in size ensures that the final interlaced design looks neat and balanced.
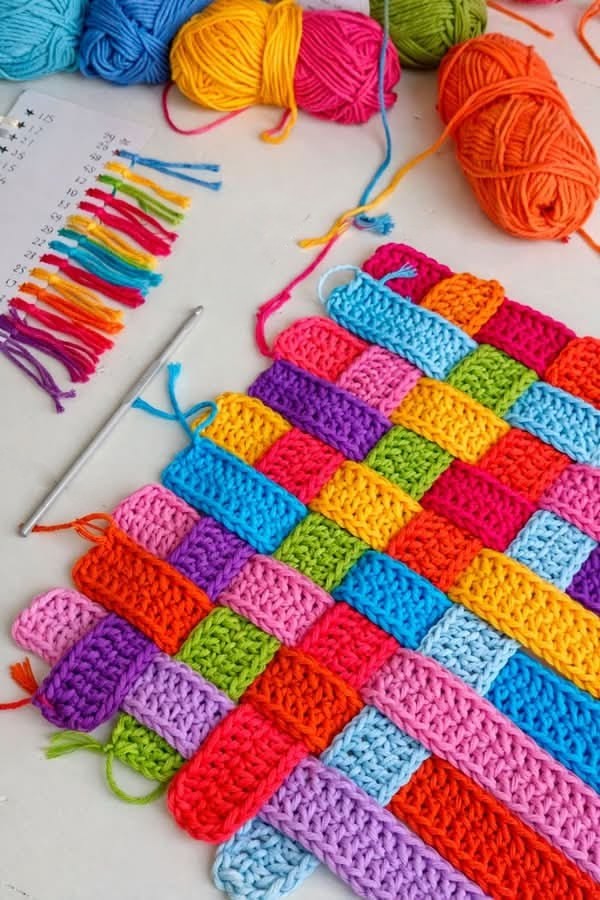
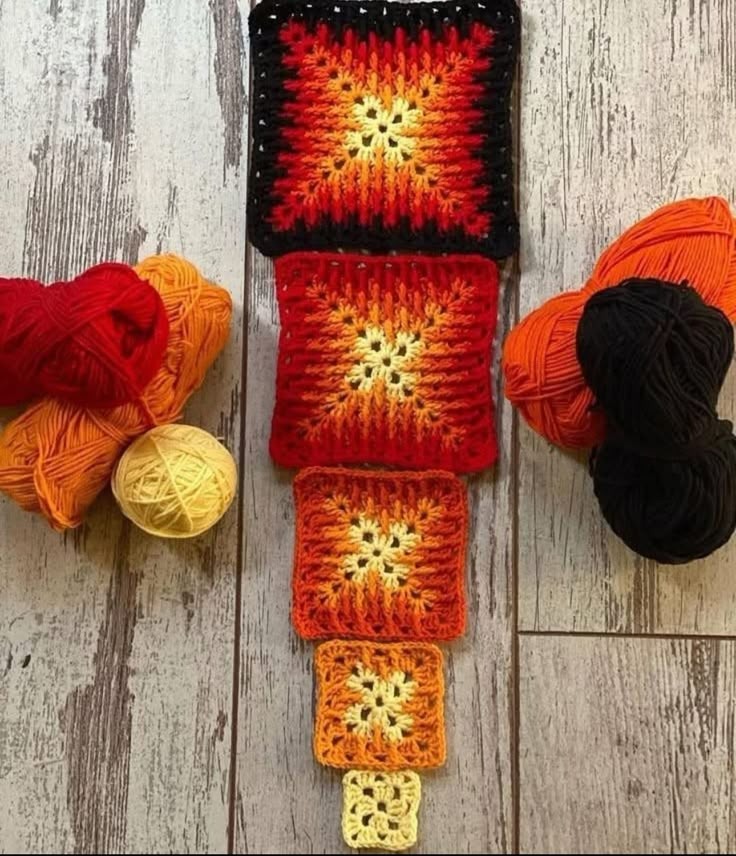
Once the strips are completed, the magic begins. The strips are woven together in an over-and-under pattern, similar to basket weaving. This step transforms simple crochet pieces into a complex-looking design. It may seem intimidating at first, but with a bit of practice, the process becomes intuitive and enjoyable.
Choosing the right yarn is crucial for success. Medium-weight yarns are often recommended because they provide enough structure without being too stiff. However, experimenting with different textures can lead to unique results. Cotton yarn creates a crisp, defined look, while acrylic or wool adds softness and flexibility.
Hook size also plays an important role. Using a hook that matches your yarn ensures proper tension and stitch clarity. If your stitches are too tight, the strips may be difficult to weave. If they’re too loose, the pattern may lack structure. Testing a small swatch before starting your project is always a good idea.
Color selection is where creativity truly shines in the Crochet Interlaced Strips Pattern. Alternating colors between strips can create bold contrasts, while using shades from the same color family produces a more subtle, elegant effect. Planning your color scheme ahead of time helps achieve a cohesive final design.
Finally, blocking your strips before weaving can make a significant difference. Blocking helps straighten edges and ensures that all strips are the same size, making the weaving process smoother and more precise.
To begin your Crochet Interlaced Strips Pattern, start by crocheting your first strip. Chain the desired length and work rows of your chosen stitch until the strip reaches the desired width. Repeat this process to create multiple identical strips.
Consistency is essential during this stage. Count your stitches regularly to ensure each strip matches the others. Even small differences can become noticeable once the strips are woven together. Taking your time here will save effort later.
After completing all strips, lay them flat on a surface. Arrange half of the strips vertically and the other half horizontally. This setup will help you visualize the weaving process before you begin interlacing them.
Start weaving by lifting alternating vertical strips and placing a horizontal strip across. Then, reverse the pattern for the next horizontal strip. This over-and-under technique creates the signature woven effect of the Crochet Interlaced Strips Pattern.
As you continue weaving, adjust the strips gently to maintain even spacing. Avoid pulling too tightly, as this can distort the pattern. The goal is to keep the structure balanced and visually appealing.
Once all strips are woven, secure the edges. You can crochet a border around the entire piece to hold everything in place. This not only stabilizes the design but also adds a polished finishing touch.
One of the most exciting aspects of the Crochet Interlaced Strips Pattern is the ability to customize it in countless ways. By altering the width of the strips, you can create different visual effects. Wider strips produce a bold, chunky look, while narrower strips result in a more intricate design.
You can also experiment with stitch variations. Instead of using a single stitch throughout, try combining different stitches within each strip. This adds texture and depth, making your project even more unique.
Color gradients are another popular option. By gradually changing colors across the strips, you can create a stunning ombré effect. This works especially well for blankets and scarves, adding a modern touch to the classic pattern.
Incorporating textured yarns can elevate your design. Bouclé, velvet, or tweed yarns introduce additional visual interest. However, keep in mind that highly textured yarns may make the weaving process slightly more challenging.
The Crochet Interlaced Strips Pattern is also perfect for scrap yarn projects. Using leftover yarn pieces in different colors can result in a vibrant, eclectic design. This approach is both eco-friendly and budget-conscious.
For those looking to create functional items, consider turning your interlaced strips into bags, pillow covers, or table runners. These projects highlight the pattern’s structure while serving a practical purpose in everyday life.
Achieving a professional finish with the Crochet Interlaced Strips Pattern requires attention to detail. One of the most important tips is to maintain consistent tension throughout your work. Uneven tension can cause strips to vary in size, making the weaving process more difficult.
Using stitch markers can help keep track of your rows and ensure accuracy. This is especially useful when working on multiple strips, as it prevents mistakes and keeps your work uniform.
Blocking is often overlooked but highly beneficial. Taking the time to block your strips before assembling them ensures that they are straight and evenly sized. This step can significantly improve the final appearance of your project.
Patience is key when weaving the strips together. Rushing this step can lead to uneven spacing or twisted strips. Work slowly and adjust as needed to achieve a clean, symmetrical design.
Adding a border is not just decorative—it also reinforces the structure of your piece. Choose a border style that complements your design, whether it’s a simple single crochet edge or a more elaborate pattern.
Finally, practice makes perfect. The more you work with the Crochet Interlaced Strips Pattern, the more comfortable and confident you will become. Don’t be afraid to experiment and make mistakes—each project is an opportunity to learn and improve.
What is the Crochet Interlaced Strips Pattern?
It is a crochet technique where individual strips are created and then woven together to form a textured, interlaced design that resembles woven fabric.
Is the Crochet Interlaced Strips Pattern suitable for beginners?
Yes, beginners can try this pattern because it uses basic stitches. The weaving step may require practice, but it becomes easier over time.
What type of yarn works best for this pattern?
Medium-weight yarn is ideal, but you can experiment with different yarn types depending on the desired texture and appearance.
How many strips do I need to create?
The number of strips depends on the size of your project. For example, a blanket will require more strips than a small accessory like a bag.
Do I need to block the strips before weaving?
Blocking is recommended because it ensures that all strips are even and easier to weave together neatly.
Can I use multiple colors in the pattern?
Absolutely. Using multiple colors is one of the best ways to enhance the visual appeal of the Crochet Interlaced Strips Pattern.
How do I secure the strips after weaving?
You can crochet a border around the edges or sew them together to keep the strips in place.
What projects can I make with this pattern?
You can create blankets, scarves, bags, pillow covers, and many other decorative or functional items.
The Crochet Interlaced Strips Pattern is a versatile and visually striking technique that combines simplicity with creativity. Throughout this article, you’ve learned how to create the strips, weave them into a beautiful design, and customize your project using colors, textures, and variations. By following these steps and tips, you can confidently explore this pattern and incorporate it into your crochet repertoire.
This technique not only enhances your skills but also opens the door to endless creative possibilities. Whether you’re making a cozy blanket or a stylish accessory, the Crochet Interlaced Strips Pattern offers a unique way to showcase your craftsmanship.
Now it’s your turn to try it out and bring your ideas to life. Feel free to share your honest opinion about this guide and leave your suggestions—your feedback helps improve and inspire even more creative content!

