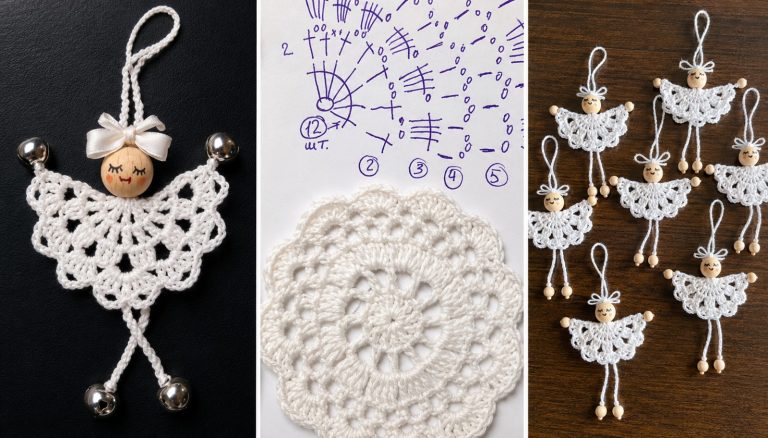
Crochet Super Easy Angel Pattern

Crochet Mosaic Square Pattern is a timeless and creative crochet project that combines texture, color, and geometric beauty into one versatile design. Whether you are creating a cozy blanket, decorative pillow, table runner, wall hanging, or a unique bag, the Crochet Mosaic Square Pattern offers endless opportunities to express your creativity.
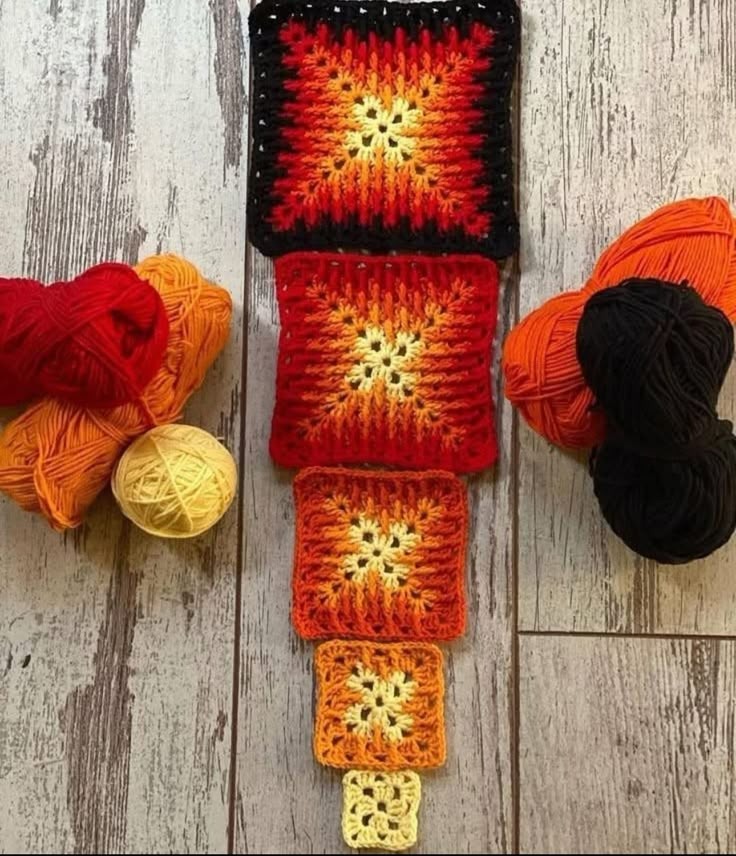
This beautiful square features eye-catching color transitions that resemble glowing mosaic tiles, making it an enjoyable project for beginners looking to improve their skills and experienced crocheters searching for an elegant motif.
One of the greatest advantages of the Crochet Mosaic Square Pattern is its flexibility. By simply changing the yarn colors, you can create completely different moods and styles. Warm shades like cream, yellow, orange, red, and black create a striking flame-inspired appearance, while cool blues, greens, or pastel tones produce a softer and more modern design. This adaptability makes the pattern suitable for every season and nearly every crochet project imaginable.
Learning this pattern also helps improve essential crochet techniques. As you work through each round, you’ll practice maintaining consistent tension, working into different stitch locations, creating textured effects, and achieving perfectly shaped corners. Throughout this guide, every step uses standard US crochet terminology, making it easy for crocheters in the United States and around the world to follow confidently. By the end of this tutorial, you’ll have all the knowledge needed to create beautiful mosaic squares that can be joined into larger masterpieces.
Before beginning the Crochet Mosaic Square Pattern, gather all your supplies. A smooth worsted weight (#4) cotton or acrylic yarn works beautifully because it allows the stitch texture to remain highly visible. Cotton creates crisp stitch definition, while acrylic offers softness and flexibility for blankets and garments.
Choose five coordinating yarn colors for the gradual mosaic effect. A sample palette includes Cream (A), Golden Yellow (B), Orange (C), Deep Red (D), and Black (E). These colors create a glowing center that gradually darkens toward the border, producing the dramatic appearance shown in the finished square.
A 5.0 mm (H-8) crochet hook is recommended for worsted weight yarn. If your stitches tend to be tight, consider using a 5.5 mm hook. If your stitches are naturally loose, a 4.5 mm hook may produce a neater fabric. Maintaining even tension throughout every round is one of the keys to achieving symmetrical squares.
Additional supplies include scissors, a yarn needle for weaving in ends, stitch markers, and a measuring tape. Stitch markers are especially useful for identifying the first corner stitch of every round until the pattern becomes familiar.
The Crochet Mosaic Square Pattern uses standard US crochet abbreviations:
Before beginning, make a small gauge swatch if your finished square needs to match other blocks precisely. Consistent stitch size helps ensure that multiple squares join together perfectly.
Begin with Color A.
Round 1
Create a magic ring.
Ch 3 (counts as dc).
Work:
2 dc, ch 2,
3 dc, ch 2,
3 dc, ch 2,
3 dc, ch 2.
Join with a sl st to the top of beginning ch-3.
Pull the magic ring tightly closed.
You now have a classic granny square foundation with four equal corners.
Fasten off Color A.
Join Color B in any corner space.
Round 2
Ch 3.
2 dc in same corner.
Ch 2.
3 dc in same corner.
Along the side:
3 dc in next space.
At each corner:
(3 dc, ch 2, 3 dc).
Repeat around.
Join with sl st.
Fasten off.
Join Color C.
Round 3
Ch 3.
Continue working standard granny groups around the square.
Work 3 dc into every side space.
Work (3 dc, ch 2, 3 dc) into every corner.
At the end of the round, join with sl st.
Fasten off.
Join Color D.
Round 4
The textured mosaic appearance begins here.
Instead of placing every stitch into chain spaces, alternate between front-post style placement and traditional granny groups.
Work:
3 dc in corner.
Ch 2.
3 dc.
Along each side:
dc,
front-post tr around stitch below,
dc,
front-post tr,
dc.
Repeat across every side.
This creates the striking elongated texture that gives the square its radiant appearance.
Fasten off.
Join Color E.
Round 5
Work the final border.
Corners:
(3 dc, ch 2, 3 dc).
Sides:
One granny group between every textured section.
Add one round of sc if a firmer edge is preferred.
Fasten off.
Weave in all yarn ends carefully using a yarn needle.
Lightly block the finished square so every corner measures equally.
The completed square should lie flat with clean edges and balanced proportions.
The beauty of the Crochet Mosaic Square Pattern comes largely from its thoughtful color placement. Working from light shades in the center toward darker shades on the outside naturally creates depth and highlights the textured stitches. Reversing this order creates a completely different visual effect, so don’t hesitate to experiment with your own favorite color combinations.
When changing colors, always finish the final yarn-over of the last stitch using the next color. This technique creates clean transitions without noticeable gaps. Secure each yarn tail immediately to prevent accidental unraveling as you continue crocheting.
Blocking is an important finishing step, especially if you plan to join several squares into a blanket. Lightly dampen the finished square, pin it to the desired measurements, and allow it to dry completely. Blocking enhances stitch definition and ensures every square is identical in size.
Joining multiple squares offers many creative possibilities. You can use the mattress stitch for an invisible seam, slip stitch joins for a textured finish, or join-as-you-go methods to reduce finishing work. Choosing a joining method that complements the square’s texture helps maintain the overall visual appeal.
If your square begins to ripple, your stitches may be too loose or too numerous along the edges. If the square curls inward, your tension may be too tight. Small adjustments to hook size often solve these issues without requiring significant changes to the pattern.
As your confidence grows, try creating larger versions by adding additional rounds while maintaining the same corner structure. The gradual expansion preserves the symmetry of the design and allows you to produce oversized decorative motifs suitable for blankets, cushions, and home décor.
Once you’ve mastered the Crochet Mosaic Square Pattern, countless project ideas become possible. The most popular option is a patchwork blanket, where multiple squares are joined together to create a colorful throw. By alternating color arrangements, you can produce a dynamic quilt-like appearance with remarkable visual depth.
Pillow covers are another excellent use for these textured squares. Four or nine motifs joined together create elegant decorative cushions that instantly brighten any living room or bedroom. Pair neutral backgrounds with vibrant center colors for a modern yet cozy aesthetic.
Crocheted tote bags also benefit from this design. Joining sturdy mosaic squares forms a durable fabric that showcases the intricate stitch texture while providing strength for everyday use. Add sturdy handles and a fabric lining for a polished finish.
Table runners, placemats, and wall hangings allow the square’s geometric beauty to become a decorative feature within your home. Seasonal color palettes make it easy to create projects for autumn, winter holidays, spring celebrations, or summer décor without changing the underlying pattern.
Garments such as cardigans, ponchos, and vests can also incorporate mosaic squares. Arranging motifs strategically across the garment creates a unique handcrafted look that combines comfort with artistic design. Matching yarn weights and maintaining consistent gauge ensure that the finished garment drapes beautifully.
Finally, these squares make thoughtful handmade gifts. Baby blankets, lap throws, tote bags, or decorative pillows made from mosaic motifs demonstrate both craftsmanship and care, making them treasured keepsakes for friends and family.
Yes. Beginners familiar with basic stitches like chain, single crochet, and double crochet can successfully complete this project with patience and careful attention to each round.
Medium-weight (#4) cotton or acrylic yarn provides excellent stitch definition and creates durable finished squares.
No. You may use two, three, four, or even many more colors depending on the style you want to achieve.
Absolutely. Continue adding rounds while maintaining the corner increases to create larger motifs.
Curling usually results from tight tension. Try using a slightly larger hook or relaxing your stitch tension.
Rippling often occurs when stitches are too loose or when extra stitches are accidentally added. Count stitches carefully after every round.
Common methods include slip stitch joins, whip stitch, mattress stitch, and join-as-you-go techniques. Each produces a different decorative effect.
Yes. Always follow the washing instructions recommended for your chosen yarn. Blocking again after washing may help maintain the square’s shape.
Blankets, cushions, tote bags, table runners, wall art, garments, baskets, scarves, and decorative home accessories are all excellent options.
Generally, handmade finished items can be sold if you create them yourself. However, always respect any copyright or licensing terms associated with the original pattern if you are following a designer’s published instructions.
Video Tutorial:
The Crochet Mosaic Square Pattern is a rewarding project that combines beautiful color transitions, textured stitches, and classic granny square construction into one elegant design. Throughout this guide, you learned how to prepare your materials, understand the essential US crochet abbreviations, build the square step by step, create the textured mosaic effect, finish the project professionally, and transform individual motifs into a wide variety of creative handmade items.
With practice, you’ll gain confidence in working with multiple colors, maintaining consistent tension, and producing perfectly shaped crochet squares that can become blankets, pillows, bags, home décor, and much more. Every finished square is an opportunity to experiment with new color palettes and express your own creative style.
I hope this tutorial has inspired you to start your own Crochet Mosaic Square Pattern project. If you enjoyed this article, please leave your honest opinion in the comments and share your suggestions or tips. Your feedback helps inspire future crochet tutorials and supports the growing community of crochet enthusiasts.