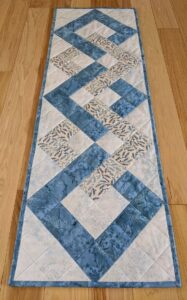
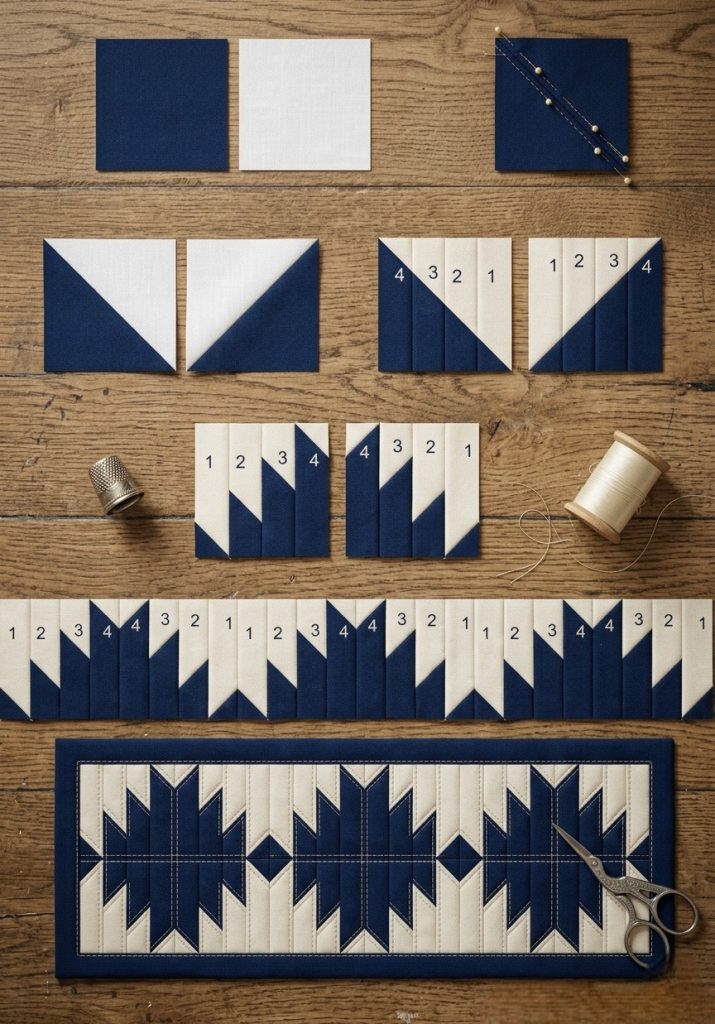
Interlocking Squares Table Runner: A Stunning Addition to Your Home Decor
Advertising
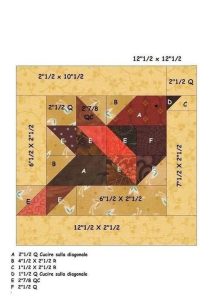
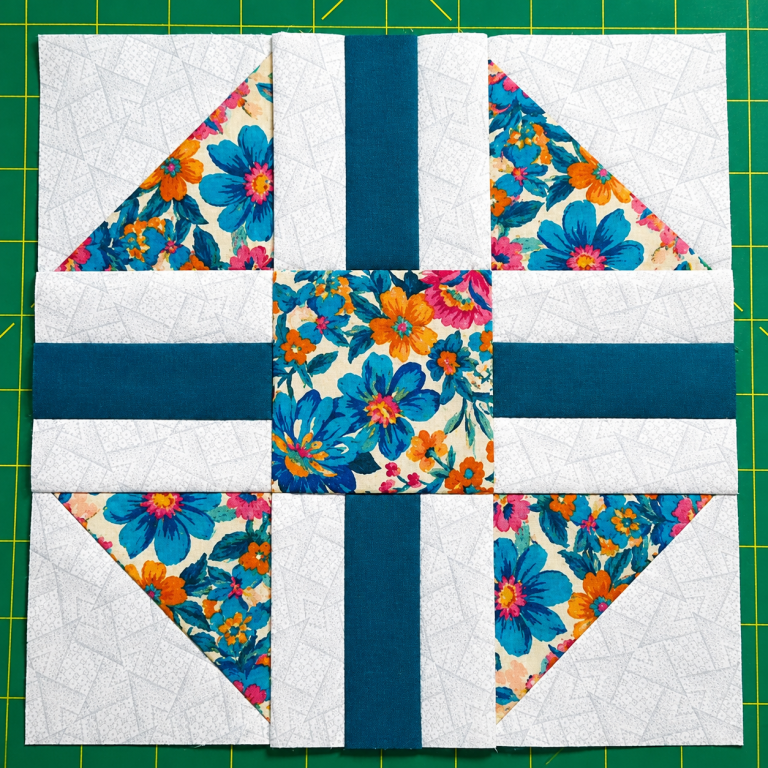
The Interlocking Squares Table Runner is an elegant quilting project that blends creativity with functionality.
Whether you are a seasoned quilter or just beginning your journey in the world of quilt patterns, this table runner is a perfect choice to enhance your skills and create a stunning centerpiece for your table.
Advertising
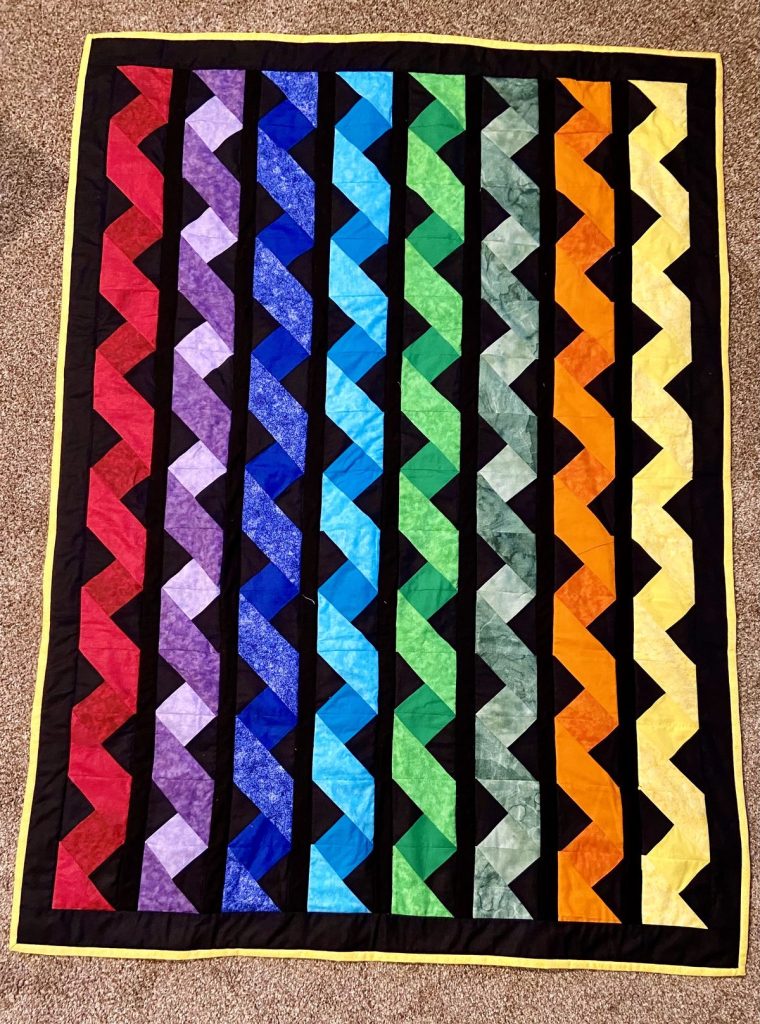
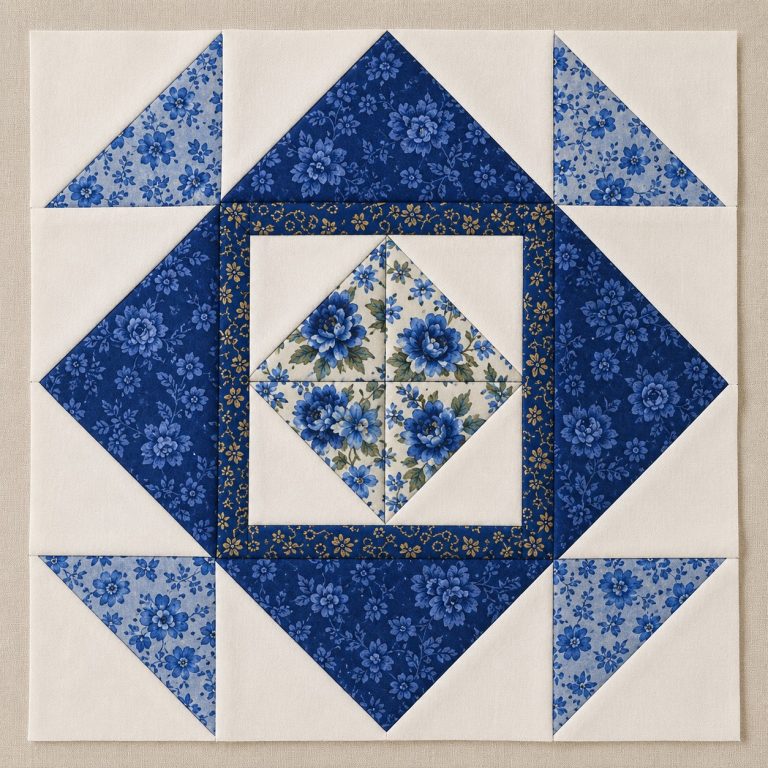
Designed to be both visually striking and practical, this pattern uses geometric shapes to create a sophisticated look that suits any occasion.Quilting is not only an enjoyable hobby but also a way to express your artistic side. The Interlocking Squares Table Runner allows you to explore the timeless beauty of squares combined in an intricate yet accessible design.This project is great for using up fabric scraps or experimenting with new color palettes, making it ideal for quilters of all levels. The result is a custom-made table runner that reflects your unique style and creativity.
Image From Google
This step-by-step guide will walk you through everything you need to know to create your own Interlocking Squares Table Runner. From fabric selection to assembling the quilt top, each step is carefully outlined to ensure success. Let’s dive into the world of quilting and discover how to bring this beautiful design to life!
The first step to creating a stunning Interlocking Squares Table Runner is selecting the right fabrics. Fabrics play a crucial role in enhancing the overall appearance of your table runner, so it’s essential to choose materials that complement your home decor and fit the theme you have in mind.
Color Coordination: Begin by selecting a color palette that works well together. For instance, you can opt for contrasting colors, like navy and white, for a bold look, or go for analogous colors, such as shades of green and blue, for a harmonious feel.
Fabric Types: Cotton fabrics are ideal for quilting because they are easy to work with and durable. Look for high-quality quilting cotton that feels soft yet sturdy.
Patterns and Prints: Mix solid fabrics with prints to add dimension to your design. Consider using floral prints, geometric patterns, or subtle textures to make your table runner visually interesting.
Accent Fabric: Choose an accent fabric to make certain squares stand out. Metallic fabrics or fabrics with a touch of shimmer can add a touch of elegance to your project.
Scrap-Friendly: If you have leftover fabric from previous projects, this table runner is a great way to use up those scraps and create a unique, personalized piece.
Pre-Cuts: To save time, you can use pre-cut fabric squares or jelly rolls. These pre-cut pieces are convenient and ensure uniformity in size.
Cutting Your Fabrics
Precise cutting is essential for achieving a polished finish on your Interlocking Squares Table Runner. Follow these steps to prepare your fabrics:
Advertising
Prepare Your Tools: Use a rotary cutter, cutting mat, and acrylic ruler for accurate measurements and cuts. Ensure your tools are sharp and in good condition.
Cut Squares: Cut your fabrics into squares measuring 5 inches by 5 inches. You will need approximately 30 squares for a standard table runner measuring 15” x 40”.
Accent Squares: For the interlocking effect, cut 10 smaller squares measuring 3 inches by 3 inches from your accent fabric.
Background Fabric: Cut strips of background fabric measuring 2.5 inches wide. These will be used to connect and frame the squares.
Seam Allowance: Always add a 1/4-inch seam allowance to your measurements to ensure proper assembly.
Label Your Pieces: Organize your fabric pieces by color and size. Labeling them will make the assembly process smoother and prevent any mix-ups.
Assembling the Quilt Top
Now that your fabrics are cut, it’s time to assemble the quilt top. The Interlocking Squares Table Runner comes together in a series of straightforward steps.
Layout Design: Arrange your squares on a flat surface to create your desired pattern. Play around with the placement of colors and prints until you’re satisfied with the layout.
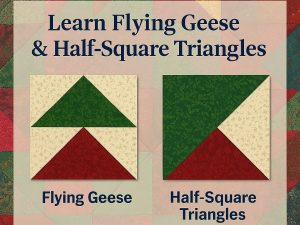
Pairing Squares: Begin by sewing two squares together along one edge. Use a 1/4-inch seam allowance and press the seams open for a flat finish.
Adding Accent Squares: Insert the smaller accent squares between larger squares to create the interlocking effect. Ensure the smaller squares are centered for a balanced look.
Sew Rows: Once all the squares are paired, sew them into rows. Press the seams of each row in alternating directions to reduce bulk.
Join Rows: Sew the rows together, aligning the seams carefully for a seamless appearance. Pinning the rows before sewing can help maintain precision.
Add Borders: Attach the background fabric strips around the edges of the quilt top. This border frames the design and gives the table runner a finished look.
Finishing Touches
The final steps bring your Interlocking Squares Table Runner to life, ensuring it is ready for display or gifting.
Create a Quilt Sandwich: Layer the quilt top, batting, and backing fabric. Smooth out any wrinkles and secure the layers with safety pins or basting spray.
Quilting: Choose a quilting pattern that complements the design. Simple straight-line quilting or free-motion quilting works well for this project. Stitch through all three layers to secure them together.
Trim the Edges: Trim any excess batting and backing fabric to align with the quilt top. This step ensures clean edges for binding.
Bind the Edges: Cut binding strips from your fabric and attach them to the edges of the quilt. Use a double-fold binding for durability and a polished appearance.
Add a Label: If gifting your table runner, consider adding a small label with your name and the date. This adds a personal touch to your project.
Press and Display: Give your table runner a final press to remove any wrinkles. Place it on your table and enjoy your handcrafted masterpiece!
By following this guide, you can create a beautiful Interlocking Squares Table Runner that showcases your quilting skills and adds a touch of elegance to your home. With careful fabric selection, precise cutting, and attention to detail, this project is both enjoyable and rewarding. Whether you keep it for yourself or give it as a thoughtful gift, this table runner is sure to impress. Happy quilting!