
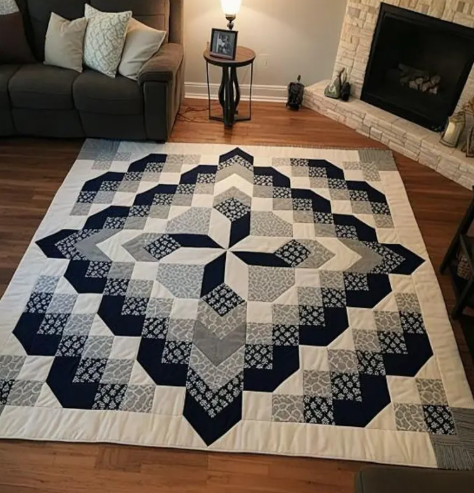
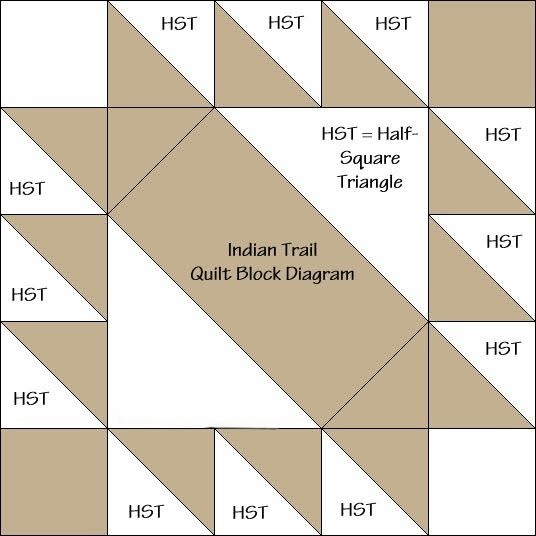
Star Oklohama Quilt Block Pattern
The Nana Flower Quilt Pattern is a charming and timeless quilting design that brings a touch of elegance and warmth to any space. This floral-inspired quilt is perfect for quilters who enjoy creating something that feels both vintage and modern. Whether you’re a beginner or a seasoned quilter, the Nana Flower Quilt Pattern offers an enjoyable and satisfying experience.
This pattern is known for its delicate flower blocks that come together beautifully to form a cohesive quilt. Each block resembles a blooming flower, offering a fresh and cheerful aesthetic. The design works well with a variety of fabric styles, from soft pastels to bold prints, allowing you to customize your quilt to match your personal taste.
In this detailed guide, we will walk you through everything you need to create the Nana Flower Quilt Pattern. From fabric selection and cutting measurements to assembling your quilt top step-by-step, you will have all the information needed to successfully complete this lovely project.
When preparing for the Nana Flower Quilt Pattern, it’s important to gather all the right materials. Having everything ready before you start will make the process smooth and enjoyable. This quilt requires a mix of main fabrics for the flowers, background fabric, and binding.
To begin, choose fabrics that contrast well so the flower design pops. Consider using small florals, solids, or gingham prints for the flowers and a neutral fabric like white or cream for the background. This contrast highlights the beauty of the Nana Flower Quilt Pattern.
Here is what you will need for a quilt measuring approximately 60” x 72”:
Precise cutting is crucial for the Nana Flower Quilt Pattern. Each flower block consists of petal pieces, a center square, and background pieces. You will need:
With these materials and cuts prepared, you’re ready to dive into assembling the stunning Nana Flower Quilt Pattern.
The success of the Nana Flower Quilt Pattern starts with accurate cutting. Having clean, precise cuts ensures that your quilt pieces fit together perfectly and results in a professional-looking finish.
Start by preparing the flower petal pieces. For each flower, cut four 5” x 5” squares from your chosen floral fabrics. These squares form the main petals in the block and should coordinate well together.
Next, cut the flower center squares. Each block needs one 4” x 4” square, which serves as the flower’s center. This is an opportunity to pick a bold color that complements or contrasts with the petals.
For the background, cut four 5” x 5” squares per block, then cut each square diagonally once to create triangles. These background triangles will frame the flower petals and form the negative space in the design.
If you plan to add sashing between your blocks, cut strips measuring 2” wide and as long as each block’s finished size (typically around 14” per strip). Sashing adds separation between the flower blocks and can make the quilt appear larger.
For the borders, cut 5” wide strips the length of the quilt sides and top. Borders frame the entire quilt and help pull the design together beautifully.
Before sewing, it’s helpful to lay out all the pieces for each block. This step ensures that colors are distributed evenly and the overall design of the Nana Flower Quilt Pattern looks balanced and harmonious.
Now that your fabric is cut, it’s time to assemble the Nana Flower Quilt Pattern. Follow this step-by-step guide to piece together your quilt blocks accurately and with ease.
Begin by constructing the flower units. Take the four petal squares and arrange them in a square formation with the center square placed in the middle. This layout forms the base of your flower block.
Next, attach the background triangles. Position one triangle at each corner of the flower formation. Align the right angles of the triangles with the outer corners of the petal squares. This step frames your flower and starts forming the block’s outer edges.
Sew the petals together first. Start with the top two petal squares, stitch them together using a 1/4” seam allowance. Repeat with the bottom two petals. Then, join these two pairs to the center square, creating a plus-sign shape with the flower center in the middle.
Add the background triangles by aligning and sewing one triangle to each corner. Press seams towards the background fabric to reduce bulk and create crisp edges.
If you’re using sashing, sew the sashing strips between each block. This adds space between your flowers and can help emphasize each block within the overall quilt.
Once all the blocks are assembled with or without sashing, join the rows together. Then, attach the border strips around the perimeter to frame the Nana Flower Quilt Pattern perfectly.
With your quilt top assembled, it’s time to move on to the finishing process. The finishing steps give the Nana Flower Quilt Pattern its final, polished look and prepare it for use or gifting.
Prepare your quilt sandwich. Lay the backing fabric right side down, batting in the middle, and the quilt top right side up. Smooth out any wrinkles to prevent puckering during quilting.
Baste the layers together using safety pins, spray baste, or long basting stitches. Basting keeps everything in place as you sew the quilt layers together.
Now, quilt your Nana Flower Quilt Pattern. You can choose simple straight-line quilting, echo quilting around the flowers, or free-motion quilting with floral or swirl motifs. Select a quilting style that complements the softness of the flower design.
Trim the excess batting and backing fabric after quilting. Ensure all edges are straight and clean before moving to binding.
Attach the binding by sewing it to the front of the quilt with a 1/4” seam, then fold it over to the back and hand stitch or machine stitch it in place. Choose a binding fabric that complements the borders and flower colors.
Finally, give your finished Nana Flower Quilt Pattern a gentle wash and dry to soften the fabrics and give the quilt that crinkled, cozy look that’s beloved in handmade quilts.
What size is the finished Nana Flower Quilt Pattern?
The finished quilt measures approximately 60” x 72”, but you can easily adjust it by adding or removing blocks.
Can beginners make the Nana Flower Quilt Pattern?
Yes! The Nana Flower Quilt Pattern is beginner-friendly, thanks to its simple shapes like squares and triangles.
What fabrics work best for this quilt?
Small florals, solids, and gingham fabrics look wonderful. Pair with a neutral background for the best contrast.
Do I need to use sashing?
Sashing is optional. Adding sashing helps define each flower block and can make the quilt larger.
Can this pattern be resized for a baby quilt or king-size quilt?
Absolutely! Simply adjust the number of blocks and border sizes to fit the desired quilt size.
What quilting design works best with this pattern?
Straight-line quilting or echo quilting around the flower blocks highlights the floral design beautifully.
The Nana Flower Quilt Pattern is a delightful and versatile project that brings joy both in the making and the using. Its charming floral design, simple construction, and adaptable size make it an excellent choice for quilters of all skill levels. Whether you use soft pastels, vibrant prints, or classic florals, this quilt will become a treasured piece in any home.
If you enjoyed this guide, feel free to share your thoughts or ask questions in the comments below. Have you tried making the Nana Flower Quilt Pattern? Let us know about your experience and any tips you have for fellow quilters!

