
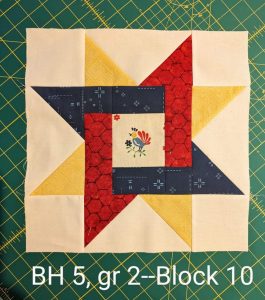
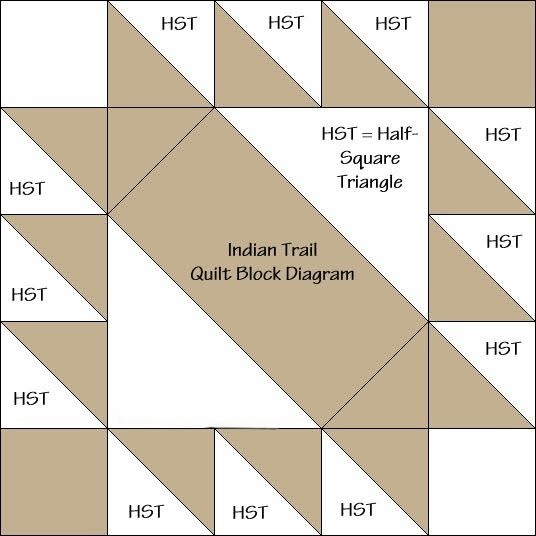
Star Oklohama Quilt Block Pattern
If you sew often, you know how messy your workspace can get. A sewing machine organizer is the perfect solution to keep everything you need close by and neatly arranged. Whether you’re working on quilting, patchwork, or simple repairs, an organizer will help make your creative process smoother and more enjoyable.
From spools of thread and scissors to needles and rulers, a sewing machine organizer stores your most-used tools in a tidy and accessible way. It wraps around or sits beneath your machine, saving you time and space while adding charm to your crafting area. Best of all, making your own is easy and fun, even if you’re a beginner!
In this post, you’ll learn how to create a DIY organizador para máquina de costura with step-by-step instructions, including fabric measurements and cutting tips. This project is perfect for anyone looking to personalize their sewing station with a practical and stylish handmade touch.

A sewing machine organizer is more than just a fabric accessory—it’s a game-changer for anyone who loves to sew. This simple item can bring structure and calm to your craft room.
First, it helps reduce clutter. With designated pockets for tools, threads, and gadgets, your workspace becomes more efficient. You’ll spend less time searching for scissors or measuring tape, and more time sewing.
Second, it’s a great time-saver. Having your essentials within reach means fewer interruptions while working on a project. Everything is organized right under or beside your sewing machine, just where you need it.
Third, a sewing machine organizer can be tailored to fit your machine and your needs. Want more pockets for different tools? You can easily adjust the pattern to include what matters most to you.
Fourth, it protects your table surface. The padded base helps keep the sewing machine steady while preventing scratches on the tabletop.
Fifth, this project is a perfect scrap-buster. If you have leftover quilting cottons or batting, you can reuse them creatively to build a beautiful and functional organizador para máquina de costura.
Lastly, making your own organizer adds a personal touch to your workspace. Choose colors and prints you love to bring personality and joy into your sewing environment.
Before starting your sewing machine organizer, it’s essential to prepare your materials and cut your fabrics accurately. Below is a complete list of supplies and fabric cuts you’ll need.
Materials:
Fabric Cuts:
Main Body Panel:
Pocket Panel:
Binding or bias tape:
Pocket Dividers (optional):
Side Tabs for ties (optional):
These dimensions create an organizer that fits comfortably under most domestic machines and drapes slightly over the front and sides, offering accessible storage without interfering with machine use.
Follow this simple step-by-step tutorial to sew your own sewing machine organizer at home. This project is great for beginners and can be completed in an afternoon.
Step 1: Fuse the Layers
Iron the fusible fleece to the wrong side of the main body fabric. Do the same with the pocket panel. This will give your organizador para máquina de costura structure and durability.
Step 2: Sew the Pocket Panel
Place the pocket panel main fabric and lining right sides together. Sew around the edges, leaving a small gap for turning. Clip the corners, turn right side out, and press. Topstitch along the top edge.
Step 3: Attach the Pocket Panel
Position the pocket piece along the bottom edge of the main body panel, aligning the raw edges. Pin in place. Stitch vertical lines through all layers to divide the panel into pockets. You can customize the width of each pocket depending on your tools.
Step 4: Add Side Ties or Tabs (optional)
If you’d like to tie the organizer around the machine or to the table, fold your 2” x 5” strips in half lengthwise, sew the long edge, turn right side out, and press. Pin to the sides of the organizer and baste in place.
Step 5: Assemble and Sew the Organizer
Place the lining fabric on the back of the assembled front panel (wrong sides together), creating a sandwich. Pin or clip the layers. Baste around all four edges to secure.
Step 6: Finish the Edges
Use bias tape to bind all around the edge of the sewing machine organizer. You can also sew right sides together with an extra backing piece, then turn and topstitch if you prefer. Either method will give a clean, professional finish.
Once complete, place the organizer under your machine and fill the pockets with scissors, thread, seam rippers, pens, and more. Now everything is within reach, and your sewing space is beautifully organized!
Your organizador para máquina de costura doesn’t have to be plain—get creative and personalize it to match your sewing style.
Start by choosing fabrics that reflect your personality. Use colorful prints, florals, or even novelty patterns related to sewing. Mixing fabrics can create visual interest and make each pocket pop.
You can also play with pocket sizes. Add elastic tops to hold bulkier items or create overlapping pockets for layered storage. Zippered compartments are great for sharp tools you want to keep safe.
Consider quilting the main body for added texture. Simple lines or decorative stitching between the layers of fabric and batting can add elegance and sturdiness to your sewing machine organizer.
Add labels or embroidery to each pocket if you want to identify what goes where. This not only helps with organization but adds a custom, handmade feel to your project.
Don’t forget functionality. Add a small pin cushion on one pocket corner or a detachable thread catcher bag. These extra features make your organizador para máquina de costura even more useful.
Finally, if you’re giving it as a gift, consider matching it with a fabric basket, needle book, or pouch for a complete sewing set. Handmade organizers are thoughtful and cherished by any sewing enthusiast.
Can I make a sewing machine organizer without a sewing machine?
It’s possible to sew by hand, but a machine will make the process faster and neater. If you enjoy hand-stitching, try using a heavy thread and sturdy needle for durable seams.
What kind of fabric works best?
Quilting cotton is ideal because it’s easy to work with and comes in endless prints. You can also use canvas or denim for a more durable option.
Can I wash my organizer?
Yes! If you use washable materials like cotton and pre-shrink them before cutting, your organizador para máquina de costura can be machine-washed. Just avoid overstuffing with delicate tools.
How can I secure the organizer to my sewing table?
You can add ties, Velcro, or non-slip backing. This helps keep it in place while you’re working.
What size should the pockets be?
That depends on your tools. Measure your scissors, pens, and other items to determine how wide and deep to sew each pocket.
Can I sell sewing machine organizers I make?
Yes, as long as it’s your original design or you have permission from a pattern creator. Handmade sewing machine organizers are popular at craft fairs and online shops.
A sewing machine organizer is a must-have for anyone who sews. It’s a functional, stylish, and beginner-friendly project that helps you stay organized and creative. With just a few fabric pieces and some basic sewing tools, you can create a custom organizador para máquina de costura that brings order and inspiration to your workspace.
From selecting your favorite prints to stitching practical pockets, this organizer is an enjoyable sewing adventure. Whether you’re making it for yourself or as a thoughtful handmade gift, the result is something useful and beautiful.
Have you made a sewing machine organizer before? What tools do you keep in yours? Share your experience and suggestions in the comments—we’d love to hear from you!

