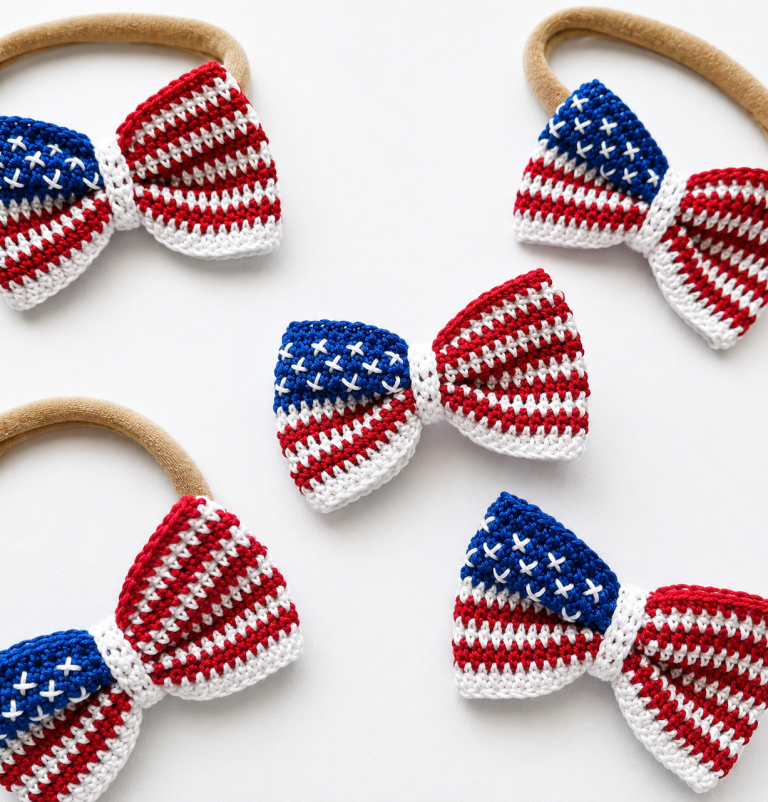
Crochet American Flag Bow Pattern
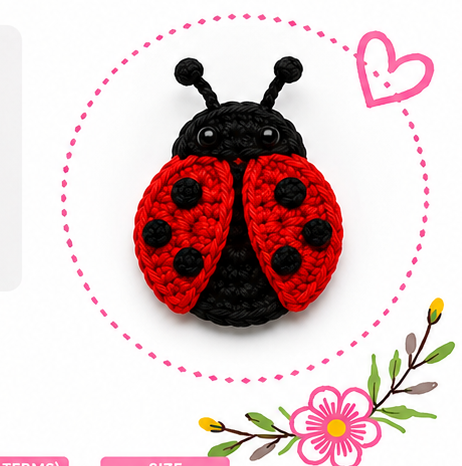
How to Crochet a Ladybug Pattern is a wonderful project for crafters who love creating cute and charming handmade items. Whether you are a beginner learning basic crochet techniques or an experienced crocheter looking for a quick and enjoyable project, a ladybug pattern can be both fun and rewarding.
These adorable creations can be used as decorations, appliqués, keychains, toys, gifts, or even embellishments for blankets and bags.One of the reasons why the How to Crochet a Ladybug Pattern project is so popular is because ladybugs are universally loved symbols of luck, happiness, and nature.
Their bright red bodies and distinctive black spots make them instantly recognizable, and they translate beautifully into crochet designs. With just a few simple stitches and basic materials, you can create a delightful crochet ladybug that looks professional and attractive.
Learning How to Crochet a Ladybug Pattern also helps improve your crochet skills. This project introduces techniques such as working in the round, shaping small amigurumi pieces, color changes, and simple embroidery details. Because the pattern is relatively small, it allows crocheters to practice important skills without committing to a large or complicated project.
Before starting your How to Crochet a Ladybug Pattern, gathering the proper materials will make the process much smoother and more enjoyable. Fortunately, this project requires only a few basic supplies that many crocheters already have at home.
A soft cotton or acrylic yarn works particularly well for crochet ladybugs. The traditional colors are red, black, and sometimes white for the eyes. Choosing high-quality yarn helps create clean stitches and a polished appearance.
A crochet hook appropriate for your yarn weight is essential. Many crocheters prefer a slightly smaller hook when making amigurumi-style projects because tighter stitches help prevent stuffing from showing through the fabric.
You will also need fiberfill stuffing if you are creating a three-dimensional ladybug. A small amount is usually enough due to the compact size of the project. Proper stuffing helps the finished piece maintain its shape.
Safety eyes can be used for a professional look, although embroidered eyes are a great alternative, especially if the project is intended for young children. Embroidery can add character while keeping the toy child-friendly.
A yarn needle is useful for weaving in ends and sewing pieces together. Taking time to secure all loose ends will ensure that your crochet ladybug remains durable and attractive.
Scissors complete the list of essential tools. Sharp scissors make it easier to trim yarn neatly and achieve a clean finish throughout the project.
When learning How to Crochet a Ladybug Pattern, understanding a few fundamental crochet techniques is extremely helpful. Even beginners can complete this project successfully by practicing the basic stitches involved.
Most crochet ladybug patterns begin with a magic ring. This technique allows crocheters to create a tightly closed center, which is ideal for circular amigurumi projects. It creates a neat and professional appearance.
Single crochet stitches are often the primary stitch used throughout the pattern. They produce a dense fabric that works perfectly for small stuffed creations. Mastering single crochet is one of the keys to successful amigurumi.
Increasing stitches helps create the rounded shape of the ladybug’s body. Increases are usually made by placing two single crochet stitches into the same stitch from the previous round. This gradually expands the circumference.
Decreasing stitches are equally important because they shape the top of the ladybug and close the body around the stuffing. Invisible decreases are often preferred because they create a smoother finish.
Color changes are another common feature of crochet ladybug patterns. Switching between red and black yarn allows crocheters to create realistic markings and distinctive body sections.
Finally, basic sewing and embroidery techniques help attach wings, eyes, antennae, and decorative spots. These finishing details bring the ladybug to life and make each project unique.
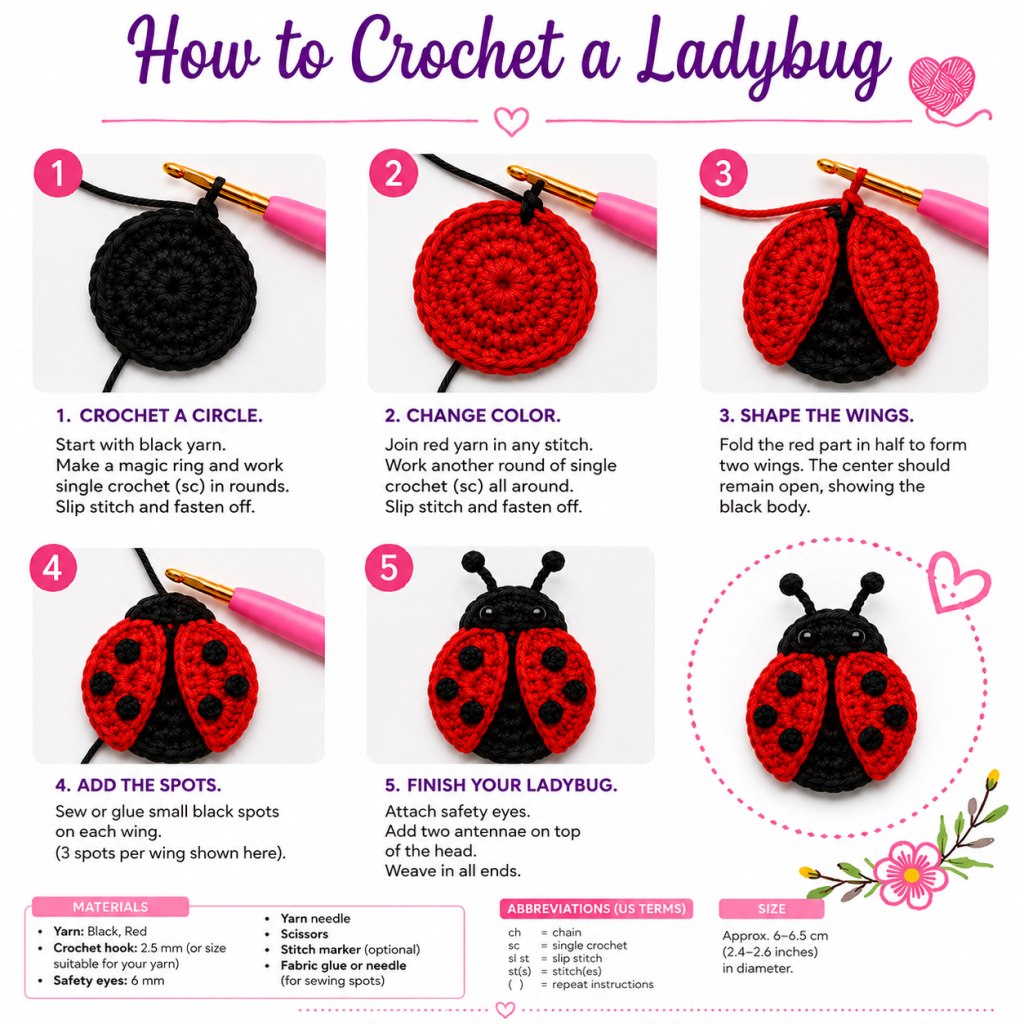
The process of creating a How to Crochet a Ladybug Pattern project can be broken down into manageable steps. Following a structured approach helps ensure success and reduces mistakes.
Begin by crocheting the body using black yarn. Most patterns start with a magic ring and gradually increase stitches to form a rounded base. Consistent stitch tension is important for achieving an even shape.
Once the base reaches the desired size, continue working rounds to build the height of the body. This creates the characteristic dome-like shape associated with ladybugs. Count your stitches carefully to maintain symmetry.
Switch to red yarn when creating the upper portion of the body. This color transition represents the ladybug’s wings and is one of the most recognizable features of the design.
As the body begins to close, add a small amount of fiberfill stuffing. Stuff gradually rather than overfilling, as too much stuffing can distort the shape and stretch the stitches.
Create separate black spots and sew them onto the red section. These spots can vary in size and arrangement, allowing you to personalize your crochet ladybug and make each one slightly different.
Finish by adding eyes, antennae, and any additional decorative details. Once all parts are securely attached and the yarn ends are woven in, your crochet ladybug is complete and ready to display.
One of the most enjoyable aspects of learning How to Crochet a Ladybug Pattern is discovering the many ways to customize and use your finished creations. These versatile projects can fit a variety of purposes.
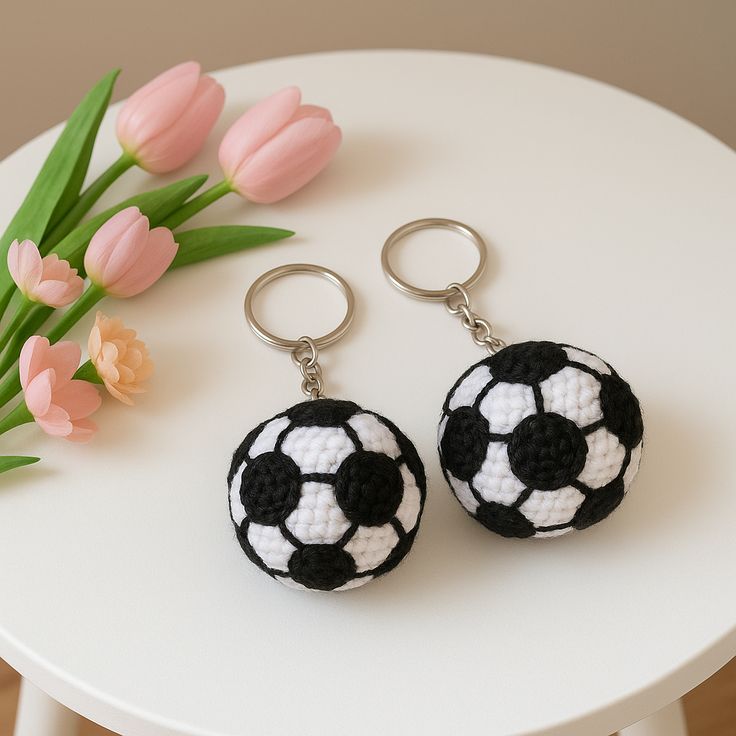
A crochet ladybug can be transformed into a keychain by attaching a metal ring. This creates a practical accessory that also showcases your crochet skills wherever you go.
Many crafters use crochet ladybugs as appliqués for blankets, hats, bags, and clothing. Adding a cheerful ladybug motif can instantly brighten an otherwise simple project.
Crochet ladybugs also make wonderful gifts. Their charming appearance appeals to both children and adults, making them suitable for birthdays, holidays, and special occasions.
Experimenting with different yarn colors can produce unique results. While traditional red and black remain popular, some crocheters enjoy creating fantasy-inspired versions using bright or pastel shades.
Larger crochet ladybugs can be used as decorative pillows or nursery decorations. By increasing the size of the pattern and using thicker yarn, you can create impressive statement pieces.
Finally, creating a collection of crochet insects alongside your ladybug can be a fun challenge. Bees, butterflies, caterpillars, and dragonflies complement ladybug projects beautifully and allow for endless creativity.
Yes. Many How to Crochet a Ladybug Pattern designs use basic stitches and simple shaping techniques, making them excellent beginner-friendly projects.
Cotton and acrylic yarns are both popular choices. Cotton provides excellent stitch definition, while acrylic offers softness and affordability.
Most small crochet ladybugs can be completed within one to three hours, depending on your skill level and the complexity of the pattern.
Absolutely. Flat ladybug appliqués do not require stuffing and are ideal for decorating clothing, bags, blankets, and accessories.
The hook size depends on your yarn weight. Many crocheters choose a slightly smaller hook than recommended to create tighter stitches for amigurumi projects.
Yes. Crochet ladybugs are thoughtful handmade gifts that symbolize luck and happiness, making them suitable for people of all ages.
Adding carefully placed black spots, embroidered details, antennae, and expressive eyes can greatly enhance realism and character.
In many cases, yes. Handmade crochet ladybugs are popular at craft fairs, online marketplaces, and local gift shops. Always check the terms of any specific pattern you use.
Learning How to Crochet a Ladybug Pattern is a rewarding experience that combines creativity, skill development, and the joy of making something by hand. From selecting the right materials and mastering basic crochet techniques to assembling the final details, every step contributes to a charming finished project. Whether you create a small appliqué, a stuffed amigurumi toy, a keychain, or a decorative accessory, crochet ladybugs offer endless opportunities for customization and personal expression.
With practice, you can experiment with different sizes, colors, and embellishments to make each ladybug truly unique. The techniques learned through this project can also be applied to many other crochet creations, helping you continue growing as a crocheter.
Have you tried making your own crochet ladybug? We would love to hear about your experience. Please leave your honest opinion, share your results, and send your suggestions for future crochet projects. Your feedback helps inspire and support the crochet community.


