Crochet Easy Mini Fish Pattern

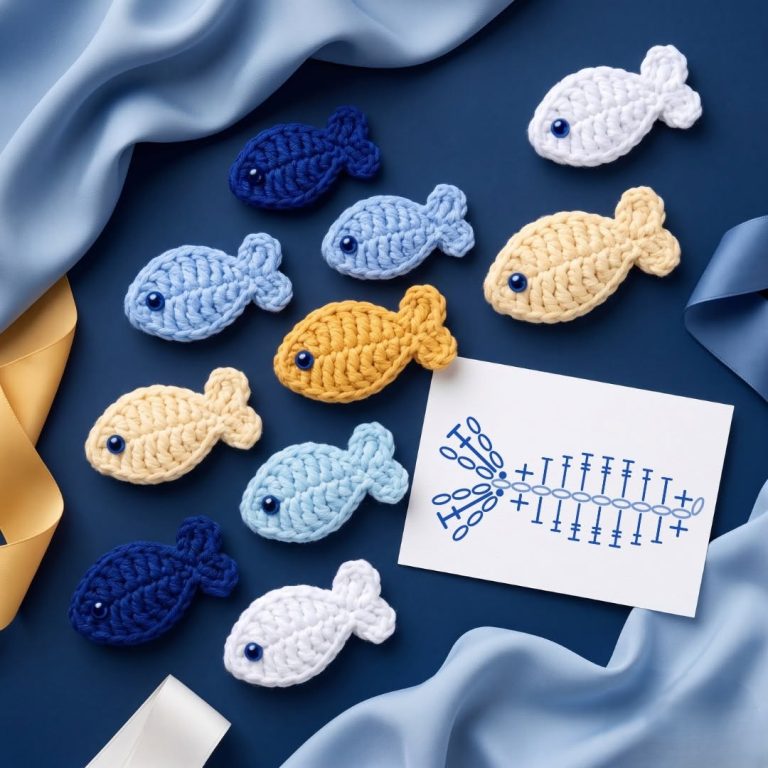
Crochet Easy Mini Fish Pattern is a delightful project that combines creativity, simplicity, and the timeless charm of handmade crochet. Whether you are just beginning your crochet journey or already have experience with amigurumi and miniature creations, this adorable little fish is a rewarding project that works up quickly while allowing you to practice essential crochet techniques.
Because of its compact size and endless color possibilities, this pattern can easily become one of your favorite projects for using leftover yarnOne of the reasons the Crochet Easy Mini Fish Pattern has become increasingly popular is its incredible versatility. These tiny fish can be transformed into keychains, baby mobile decorations, garlands, magnets, gift toppers, bookmarks, nursery ornaments, party favors, or playful toys.
Their small size means they require only a little yarn, making them a budget-friendly project while giving crafters plenty of opportunities to experiment with different color combinations and stitch textures.If you enjoy creating projects that are both practical and adorable, the Crochet Easy Mini Fish Pattern is an excellent choice. Throughout this tutorial, you will learn each step using standard US crochet terminology and abbreviations, making the instructions accessible to crocheters around the world. By the end of this guide, you will confidently know how to crochet a beautifully shaped mini fish, customize it with your favorite colors, and adapt the pattern into many creative handmade gifts.
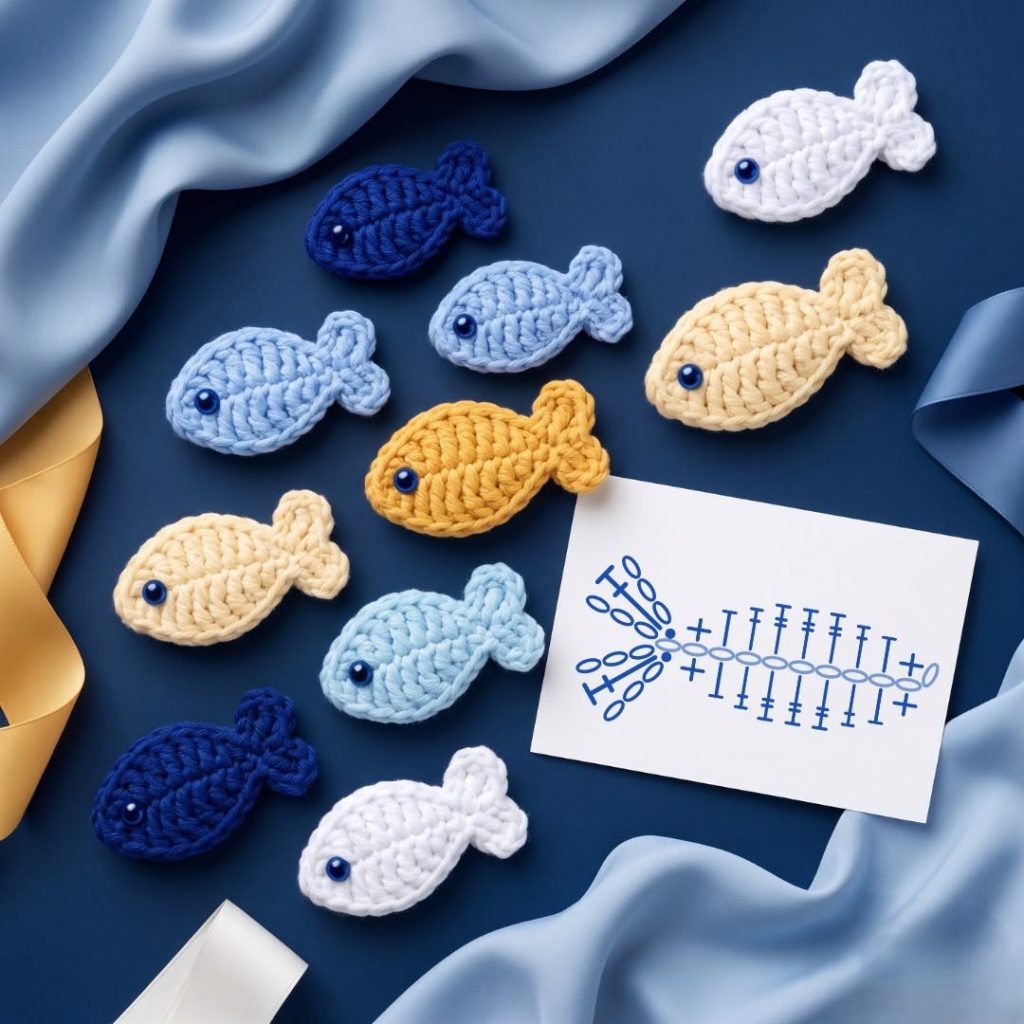
Before picking up your crochet hook, gathering the right materials will help make the project enjoyable and produce a neat, professional-looking result. Since this is a miniature design, lightweight yarn and consistent tension are especially important. Choosing soft cotton yarn provides excellent stitch definition, while acrylic yarn offers flexibility and vibrant color options.
For this project, you will typically need medium-weight (Category 4) cotton or acrylic yarn, a 3.0 mm to 3.5 mm crochet hook, polyester fiberfill for light stuffing, a yarn needle for weaving in ends, stitch markers, scissors, and 6 mm to 8 mm safety eyes if you want to give your fish an expressive appearance. Small embroidered eyes are also a wonderful option, especially if the finished fish will be used by young children.
Understanding the basic crochet abbreviations makes the pattern much easier to follow. The most commonly used stitches include MR (Magic Ring), ch (chain), sl st (slip stitch), sc (single crochet), inc (increase), dec (invisible decrease), hdc (half double crochet), and occasionally dc (double crochet) depending on how decorative you want the fins to be.
Using a Magic Ring (MR) is highly recommended because it creates a tightly closed center without leaving a visible hole. If you are not comfortable with this technique yet, you can substitute it by chaining two stitches and working into the second chain from the hook, although the Magic Ring generally produces a cleaner finish for amigurumi.
Maintaining even stitch tension is another important factor. Since miniature amigurumi pieces are lightly stuffed, loose stitches may reveal the stuffing inside. Keeping your stitches snug—but not overly tight—helps the fish maintain a smooth, rounded shape while still allowing the hook to move comfortably through each stitch.
Before beginning the pattern, it is helpful to count your stitches at the end of every round. This simple habit prevents small counting mistakes from becoming larger problems later, ensuring your Crochet Easy Mini Fish Pattern remains symmetrical from head to tail.
The fish begins at the nose and is worked continuously in spiral rounds. Using a stitch marker at the beginning of each round is highly recommended because this pattern does not require joining rounds with slip stitches.
Round 1:
MR, 6 sc into the Magic Ring. Pull the ring closed tightly. (6 sts)
Round 2:
Inc in each stitch around. (12 sts)
Round 3:
(Sc, inc) repeat around. (18 sts)
At this stage, the fish already begins forming a small rounded head. Work carefully with even tension, making sure each increase is placed in the correct stitch to maintain a smooth circular shape.
Round 4:
Sc in each stitch around. (18 sts)
Keeping this round without increases allows the head to become slightly elongated instead of perfectly round. This subtle shaping creates the characteristic fish profile seen in many miniature amigurumi projects.
Round 5:
Sc in each stitch around. (18 sts)
If using safety eyes, this is an excellent time to position them between Rounds 3 and 4 with approximately five to six stitches separating them. Test their placement before attaching the backing washers to ensure a balanced appearance.
Continue lightly stuffing only the front section of the fish. Avoid overfilling, as miniature projects look more natural when they retain a soft, rounded shape instead of becoming rigid. A small amount of fiberfill is usually enough for this size project.
Continue shaping the body by working a few straight rounds before beginning the gradual decreases that create the narrow tail section. Keeping the decreases symmetrical is the key to achieving the smooth silhouette typical of the **Crochet Easy Mini Fish Pattern.
Round 6:
Sc in each stitch around. (18 sts)
This round strengthens the middle portion of the fish and provides enough space for gentle stuffing. Add a little more fiberfill if needed, but remember that the tail should remain unstuffed for easier shaping later.
Round 7:
(Sc, dec) repeat around. (12 sts)
Work the invisible decrease (dec) by inserting your hook through the front loops of the next two stitches, yarn over, pull through both front loops, yarn over again, and complete the single crochet. This technique creates a much cleaner finish than a traditional decrease.
The body now begins narrowing naturally. Check that your stuffing is evenly distributed toward the head and center before continuing. Smooth the fibers gently with your fingers to avoid lumps inside the finished fish.
Round 8:
Sc in each stitch around. (12 sts)
This stabilizing round creates a graceful transition between the rounded body and the tail. Continue using your stitch marker to avoid losing track of the beginning of the round.
The tail is worked directly from the remaining stitches without fastening off. Flatten the opening of the body so the front and back edges align evenly. This creates the correct orientation for the tail fin.
Tail Row 1:
Ch 1, work 6 sc across both layers to close the opening.
Closing both layers simultaneously forms the base of the tail while sealing the body without additional sewing. This method produces a sturdy finish that holds its shape well over time.
Tail Row 2:
Ch 1, turn, sc in first stitch, hdc in next stitch, dc in next stitch, hdc in next stitch, sc in last stitch.
This combination of stitch heights creates a softly rounded tail with a natural fan-like appearance. If you prefer a wider tail, simply add one extra dc in the center before working the descending stitches.
Tail Row 3 (Optional Decorative Edge):
Ch 1, turn, sl st evenly around the tail edge.
A slip stitch border helps define the outline while reinforcing the fin. This optional round is especially attractive when using cotton yarn with excellent stitch definition.
Fasten off, leaving a short yarn tail. Weave the end securely through the stitches using a yarn needle, hiding it neatly inside the body. Avoid trimming the yarn too closely until you are certain it is fully secured.
The tiny side fins give the fish its playful personality. They are worked directly onto the body after the main shape is complete.
Join the yarn approximately halfway down the body.
For each fin:
Ch 2, 2 hdc in same stitch, ch 2, sl st in same stitch.
Fasten off and repeat on the opposite side, making sure both fins are positioned symmetrically. Even small adjustments in placement can dramatically improve the finished appearance.
If you prefer a flatter decorative fish—for appliqués or garlands—you may omit the stuffing entirely. Simply crochet two identical body pieces, lightly block them, and sew them together around the edges before attaching the tail and fins.
One of the greatest advantages of the Crochet Easy Mini Fish Pattern is how easily it can be personalized. By changing yarn colors, eye styles, or decorative details, every fish becomes unique while following the same basic construction.
Ocean-inspired shades such as navy blue, turquoise, sky blue, white, seafoam green, and sandy beige create realistic tropical fish. Bright rainbow colors produce cheerful decorations for children’s rooms, while pastel shades are perfect for baby showers and nursery mobiles.
Variegated yarn creates beautiful natural striping without changing colors manually. Self-striping cotton yarn is particularly effective because each fish develops its own distinctive pattern with very little effort.
Small embroidered details can also bring personality to each fish. A simple stitched smile, tiny blush cheeks, or contrasting fin edging add charm without making the project overly complicated.
For holiday decorations, consider seasonal color palettes. Red and white create festive ornaments, while metallic thread accents can transform these miniature fish into elegant handmade gifts or Christmas tree decorations.
Because the project uses only a small amount of yarn, it is ideal for reducing yarn scraps while practicing important amigurumi techniques such as increasing, decreasing, shaping, and finishing neatly.
One of the best features of the Crochet Easy Mini Fish Pattern is how adaptable it is. Once you have mastered the basic fish, you can create an entire school of miniature fish in different colors and sizes. Sew several together to make a decorative garland, attach one to a zipper pull, decorate a beach-themed tote bag, or use them as adorable appliqués on blankets, hats, and children’s clothing.
Another creative idea is to transform these mini fish into keychains or backpack charms. Simply attach a sturdy key ring through the top of the fish before closing the body or sew on a small metal loop afterward. Handmade accessories like these make thoughtful gifts for friends, teachers, and family members who appreciate handcrafted items.
If you are preparing favors for birthdays, baby showers, or ocean-themed parties, the Crochet Easy Mini Fish Pattern is a wonderful option. Each fish can be made in less than an hour once you become familiar with the pattern, allowing you to create matching sets without requiring a large investment of time or materials.
This pattern is also an excellent practice project for beginners who want to improve their amigurumi skills. The simple shaping teaches important techniques such as increasing, invisible decreasing, stuffing evenly, and maintaining consistent stitch tension. These skills can later be applied to larger crochet animals and decorative toys.
As your confidence grows, experiment with different yarn weights and hook sizes. Fine cotton yarn paired with a smaller hook creates delicate miniature fish perfect for earrings or jewelry, while bulky yarn produces larger plush fish suitable for children’s room décor.
Most importantly, enjoy the creative process. Handmade crochet projects are unique because every stitch reflects the maker’s personal style. Small variations in color placement, stitch tension, and embellishments ensure that no two Crochet Easy Mini Fish Pattern creations are ever exactly alike.
1. Is the Crochet Easy Mini Fish Pattern suitable for beginners?
Yes. This project is beginner-friendly because it uses basic US crochet stitches, including MR (Magic Ring), ch, sc, inc, dec, sl st, hdc, and dc. It is an excellent introduction to simple amigurumi construction.
2. What type of yarn works best?
Cotton yarn is highly recommended because it provides crisp stitch definition and helps the fish maintain its shape. Acrylic yarn also works well and offers a wide variety of vibrant colors.
3. Which crochet hook size should I use?
A 3.0 mm to 3.5 mm crochet hook is ideal for medium-weight yarn. Always choose a hook that creates tight stitches so the stuffing remains hidden.
4. Can I make the fish without stuffing?
Absolutely. If you want to use the fish as an appliqué, garland decoration, bookmark embellishment, or ornament, you can leave it unstuffed for a flatter finish.
5. How can I make a larger fish?
Simply use thicker yarn together with a larger crochet hook. The stitch count remains the same, but the finished fish will increase in size proportionally.
6. Are safety eyes necessary?
No. Safety eyes create a polished appearance, but embroidered eyes are an excellent alternative, especially for projects intended for babies or young children.
7. Can I sell finished fish made from this pattern?
Many designers allow the sale of finished handmade items while requesting that the original pattern not be redistributed. If you adapt this tutorial into your own finished products, always respect the copyright and licensing terms of any original inspiration.
8. How long does it take to complete one fish?
Most crocheters can finish one mini fish in approximately 30 to 60 minutes, depending on their experience and the level of detail they choose to add.
Video Tutorial:
The Crochet Easy Mini Fish Pattern is a charming and satisfying crochet project that combines simple construction with endless creative possibilities. Throughout this guide, you learned how to select appropriate materials, understand the essential US crochet abbreviations, crochet the fish body using MR, sc, inc, dec, hdc, dc, ch, and sl st, shape the tail and fins, add stuffing correctly, attach facial details, and personalize each fish with different colors and decorative touches.
Because this project is quick, economical, and enjoyable, it is perfect for beginners looking to build confidence as well as experienced crocheters searching for a relaxing pattern that uses small amounts of yarn. Whether you create a single fish, a colorful collection, or decorative accessories for gifts and home décor, the techniques learned here can easily be applied to many future amigurumi projects.
We hope this Crochet Easy Mini Fish Pattern tutorial has inspired you to pick up your crochet hook and enjoy creating your own adorable miniature fish. Handmade projects are always special because they reflect creativity, patience, and craftsmanship in every stitch.
If you enjoyed this tutorial, we would truly love to hear from you. Please leave your honest opinion about the pattern, share your experience making your mini fish, and let us know your suggestions for future crochet tutorials. Your feedback helps improve future patterns and inspires other crochet enthusiasts to start their own handmade creations. Happy crocheting!