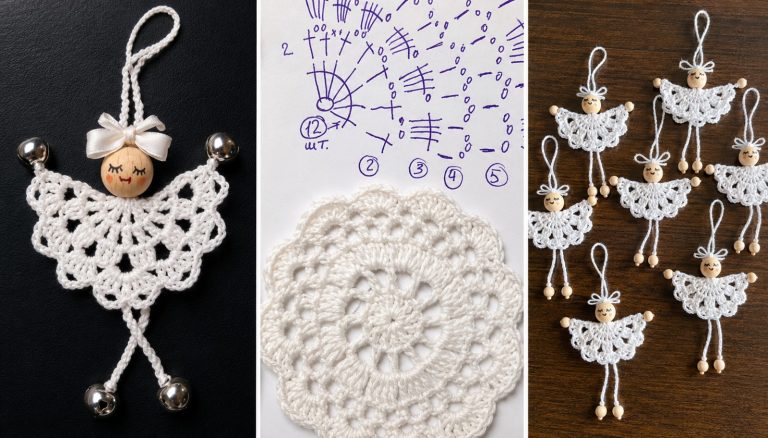
Crochet Super Easy Angel Pattern

The Crochet Super Easy Angel Pattern is one of the most charming and rewarding projects for crocheters of all skill levels. Whether you are decorating your home, creating thoughtful handmade gifts, or preparing ornaments for Christmas, this elegant little angel can be completed with only a small amount of yarn and a few basic crochet techniques.
Because the design is simple yet beautiful, it has become one of the favorite patterns among beginners and experienced crafters alike. Throughout this guide, you will learn every important detail needed to successfully create your own Crochet Super Easy Angel Pattern.
Handmade angels symbolize peace, hope, kindness, and love. Their timeless appearance makes them suitable not only for holiday decorations but also for baby showers, wedding favors, bookmarks, keychains, gift toppers, or keepsake ornaments. The beauty of this project lies in its versatility. By simply changing the yarn color, adding beads, ribbons, or wooden heads, each angel becomes completely unique while maintaining the elegant shape shown in the pattern.
This detailed tutorial explains the complete process using US crochet terminology and standard crochet abbreviations. Every round is carefully described so even beginners can confidently follow along. Besides the crochet instructions, you’ll also discover useful finishing tips, customization ideas, common mistakes to avoid, and practical advice that will help your finished angel look professional. By the end of this article, you will have all the knowledge necessary to confidently make your own Crochet Super Easy Angel Pattern from start to finish.
Before beginning the project, gather all your supplies. Using quality materials will greatly improve the final appearance of your angel.
Recommended materials include:
Cotton yarn is highly recommended because it provides excellent stitch definition while helping the wings hold their elegant shape. White is the traditional color, but ivory, gold, silver, pastel pink, or light blue all produce beautiful results.
Before starting, become familiar with these US crochet abbreviations:
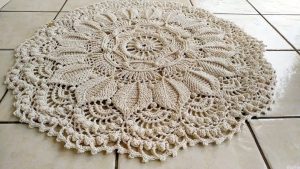
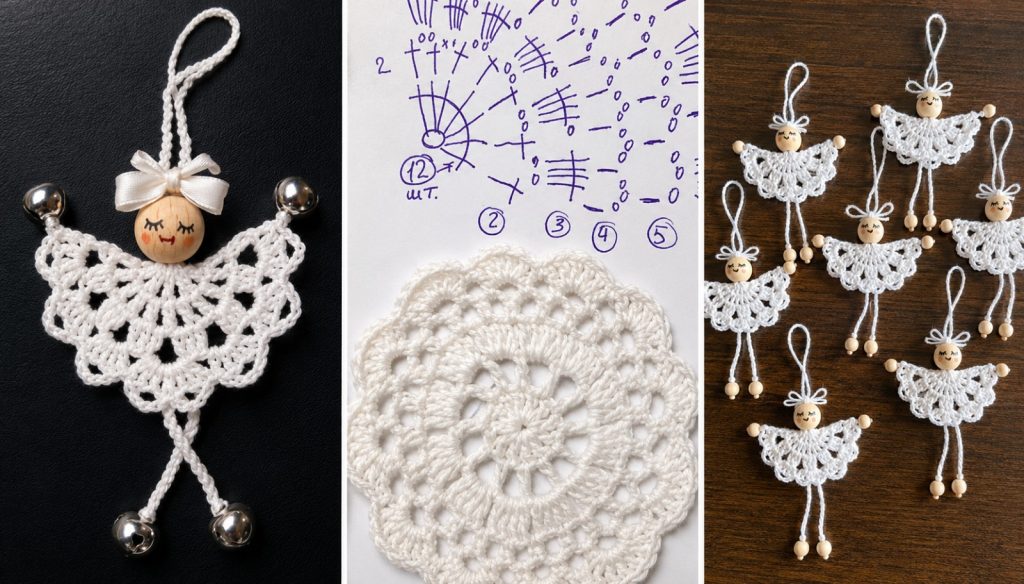
The angel shown in the inspiration photo is worked in the round beginning at the center of the wings. The body, wings, and decorative edging are all created from the same circular motif before adding the head and hanging loop.
Carefully count stitches after every round. Consistent stitch counts ensure both wings remain symmetrical.
Work with even tension throughout the project. Loose tension may cause floppy wings, while tight tension can distort the lace appearance.
Blocking the finished angel is highly recommended. Lightly dampen the crochet piece, pin it flat into shape, and allow it to dry completely before assembly.
The following instructions recreate the style of the Crochet Super Easy Angel Pattern while allowing flexibility for personal adjustments.
Round 1
MR.
Ch 3 (counts as first dc).
Work 15 dc into MR.
Join with sl st.
(16 dc)
Round 2
Ch 3.
Ch 2, dc in next st.
Repeat around.
Join.
This creates open chain spaces that become the decorative center.
Round 3
Sl st into first ch-2 space.
Ch 3.
(2 dc, ch 2, 3 dc) into each chain space around.
Join.
Beautiful shell shapes begin forming.
Round 4
Sl st into shell.
Ch 3.
Work:
3 dc
Ch 2
4 dc
into each shell.
Join.
The motif starts expanding into graceful wing sections.
Round 5
Continue increasing shells by placing:
4 dc
Ch 2
4 dc
inside every shell.
Join with sl st.
The lace becomes fuller and more decorative.
Round 6
Between shell groups work:
sc
Ch 3
sc
Then create larger fan stitches across each shell.
This produces the characteristic scalloped edge.
The lower center section naturally becomes the angel’s body while the two sides become elegant wings.
Do not pull stitches tightly during this round.
Allow each shell to spread naturally.
Once the crochet portion has been completed, the angel can be assembled.
Insert a wooden bead through the top center opening.
Secure the bead firmly with the crochet thread.
Create a hanging loop by chaining approximately 25–35 chains.
Join the loop securely above the head.
Tie a miniature satin ribbon beneath the hanging loop.
This creates the angel’s decorative bow.
For the arms, attach thread to both sides of the body.
Chain approximately 10 stitches for each arm.
Add tiny wooden beads to the ends if desired.
For the legs, attach thread beneath the body.
Chain two equal strands.
Secure decorative beads or miniature bells at each end.
The bells shown in the inspiration create gentle movement and festive charm.
If preferred, omit the legs entirely for a simpler ornament.
A small amount of fabric stiffener or diluted white glue brushed onto the wings can help maintain the lace shape for many years.
Allow everything to dry completely before displaying.
One of the greatest advantages of the Crochet Super Easy Angel Pattern is its endless customization possibilities.
Try metallic crochet thread for elegant holiday ornaments.
Pastel colors create beautiful nursery decorations.
Gold thread makes luxurious Christmas tree ornaments.
Miniature angels can become gift package decorations.
Larger versions can decorate wreaths or wall hangings.
Experiment with different wooden bead sizes to change the proportions.
Pearl beads add an elegant appearance.
Small crystals create sparkling holiday decorations.
Embroidery floss may be used for tiny facial details if desired, although many crocheters prefer leaving the face simple and peaceful.
Blocking greatly improves the finished appearance.
Pin every shell carefully to create perfectly symmetrical wings.
Steam blocking may also be used if appropriate for your yarn.
Avoid excessive moisture when using wooden beads.
Store finished angels flat inside tissue paper when not in use.
These ornaments also make thoughtful handmade gifts for birthdays, baptisms, weddings, Christmas celebrations, or memorial keepsakes.
Because the pattern works up quickly, many crocheters enjoy making several angels at once using different colors and decorative ribbons.
As your confidence grows, experiment with additional shell rounds to create larger wings or longer decorative skirts.
Keeping your stitch tension consistent throughout the project remains the secret to achieving a balanced and elegant final result.
Yes. Anyone familiar with basic stitches such as chain, single crochet, double crochet, and slip stitch can successfully complete this project with patience.
Cotton crochet thread provides excellent stitch definition and helps maintain the angel’s lace shape.
Yes, although cotton generally produces sharper lace details and better structure.
Most crocheters use a 1.50 mm to 2.00 mm hook depending on the yarn thickness and desired firmness.
Most crocheters finish one angel in approximately one to two hours, depending on experience.
Blocking is highly recommended because it opens the lace stitches and creates beautifully shaped wings.
Absolutely. Using thicker yarn and a larger hook automatically creates a larger finished ornament.
Yes, hand washing is recommended. Allow the angel to dry flat while maintaining its shape.
Generally, handmade finished items may be sold if they are your own work. Always respect any licensing or copyright restrictions that may apply to specific published patterns.
Video Tutorial:
The Crochet Super Easy Angel Pattern is a delightful project that combines elegance, simplicity, and creativity into a timeless handmade decoration. Throughout this tutorial, you learned how to prepare your materials, understand the essential US crochet stitches and abbreviations, crochet the lace motif step by step, assemble the angel with a wooden bead and hanging loop, and finish it with beautiful decorative details. You also discovered helpful techniques such as blocking, maintaining even stitch tension, and customizing the design with different colors, ribbons, and embellishments to create unique handmade angels for any occasion.
With only a small amount of yarn and a little practice, you can create meaningful keepsakes that are perfect for decorating your home, celebrating the holidays, or giving as heartfelt handmade gifts. Every angel you make will reflect your personal style while improving your crochet skills and confidence.
If you enjoyed this tutorial, please leave your honest opinion in the comments and share your suggestions. Your feedback helps inspire new crochet projects and allows other makers to learn from your experience. Happy crocheting!