Crochet Cat-shaped water bottle cover Pattern

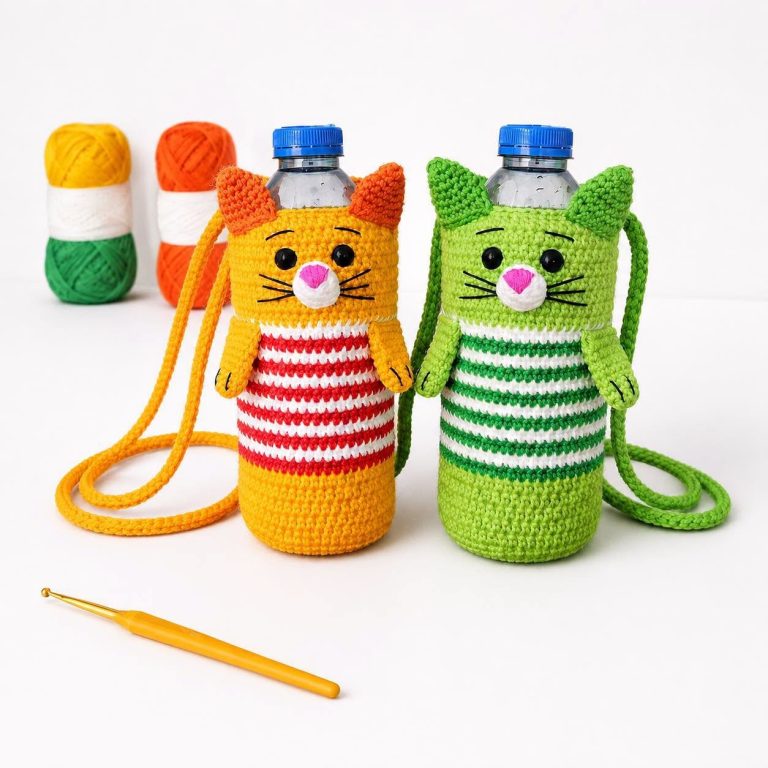
Crochet Cat-shaped water bottle cover Pattern is a playful and practical crochet project that transforms an ordinary reusable water bottle into a colorful handmade accessory with personality. Inspired by the cat-shaped bottle holders shown in the reference image, this design combines a sturdy cylindrical crochet bottle cover, a striped belly, dimensional ears, small paws, a cat muzzle, facial details, and a long shoulder strap.
The finished piece can help make a bottle easier to carry while giving crocheters an opportunity to practice several useful techniques in one project. Because bottle dimensions vary considerably, this pattern is designed to be adjustable rather than dependent on one exact stitch count. You will learn how to measure the bottle, crochet a fitted base, build the body in continuous or joined rounds, and shape the decorative cat elements. The result is a charming cat crochet bottle holder that can be customized with favorite colors, stripe combinations, and facial expressions.
One of the most important ideas behind this Crochet Cat-shaped water bottle cover Pattern is creating the correct fit before adding decorative details. A bottle holder should be snug enough to keep the bottle reasonably secure but not so tight that inserting and removing it becomes difficult. Cotton or a cotton-blend yarn is an excellent choice because it generally produces defined stitches and a firm fabric, while a hook slightly smaller than you might use for a soft garment can help create a dense structure. The project primarily uses common U.S. crochet terminology, including ch (chain), sl st (slip stitch), sc (single crochet), inc (increase), and dec (decrease). Beginners who already understand basic crochet rounds can use this project to develop shaping skills, while experienced crocheters can easily adapt the instructions to different bottle sizes.
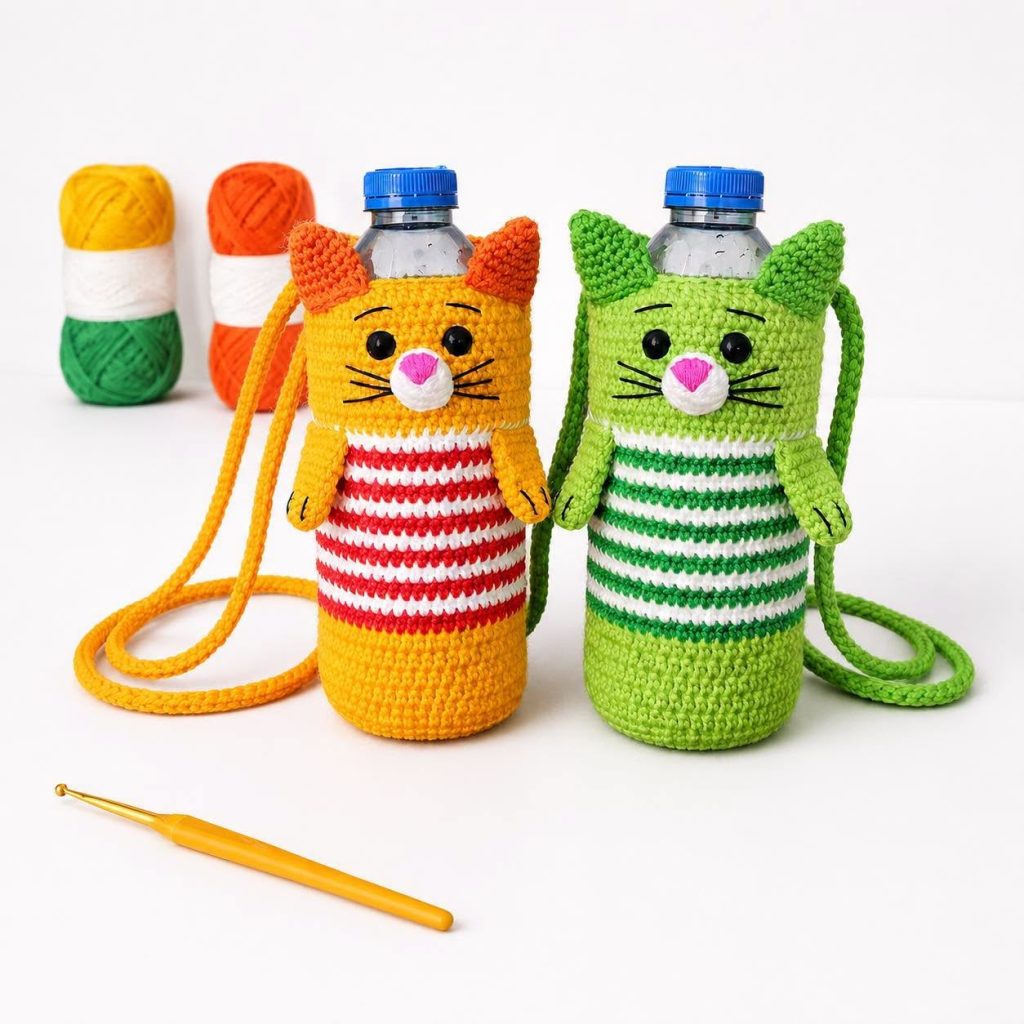
The cat appearance comes from layering simple shapes over the basic bottle sleeve. The lower section is worked as a stable circular base, the middle can feature alternating crochet stripes, and the upper section becomes the cat’s head. Two triangular ears sit near the opening while a white muzzle, pink nose, dark eyes, whiskers, eyebrows, and small arms complete the character. A long crochet shoulder strap attached securely to both sides allows the bottle to be carried more comfortably. For a look similar to the photograph, try bright yellow with red-and-white stripes or light green with darker green-and-white stripes, but these colors are only suggestions. The construction method matters more than the palette, making the pattern a flexible foundation for many personalized cat bottle carriers.
For this Crochet Cat-shaped water bottle cover Pattern, choose a medium-weight cotton or cotton-blend yarn that creates a durable fabric without becoming excessively bulky. You will need one main color for the cat, white yarn for the muzzle and stripes, a contrasting color for the belly stripes, pink for the nose, and a small amount of black yarn or embroidery thread for the whiskers and eyebrows. You will also need an appropriate crochet hook, yarn needle, scissors, stitch markers, and optional safety eyes. If the cover may be used by a young child, embroidered eyes are generally preferable to detachable components.
The most frequently used abbreviation is sc, meaning single crochet in U.S. terminology. Insert the hook into the indicated stitch, yarn over, pull up one loop, yarn over again, and pull through both loops on the hook. Single crochet produces a compact fabric that works particularly well for bottle holders because it offers more structure than very open decorative stitches. Most of the main body can therefore be completed using simple single crochet rounds.
You will also use ch, which means chain. To make a chain, yarn over and pull the yarn through the loop already on the hook. Chains can begin small components and are especially useful for creating the shoulder strap. Sl st, or slip stitch, is made by inserting the hook into a stitch, yarning over, and pulling the yarn directly through both the stitch and the loop on the hook. Slip stitches are useful for joining rounds and finishing edges.
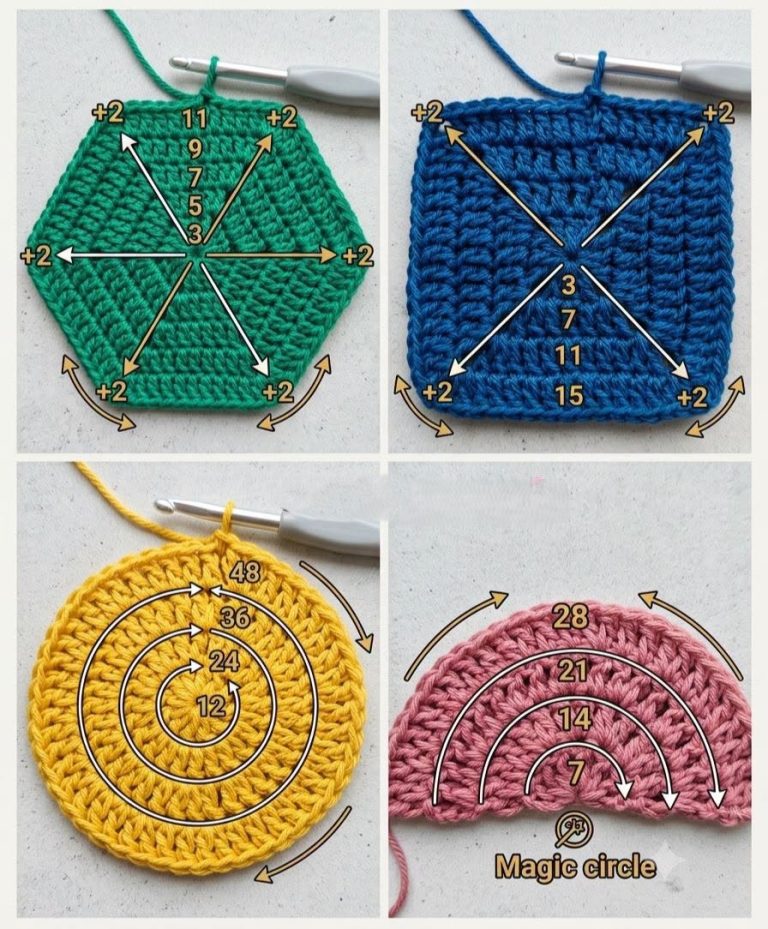
Another important technique is the increase (inc). In this project, an increase normally means working two single crochet stitches into the same stitch. Increases allow a small center circle to expand into a flat disc for the bottom of the bottle holder. A typical progression distributes increases evenly around each round so the base grows smoothly without forming a bowl too early or becoming excessively wavy.
Before beginning, measure the diameter of your bottle across its bottom and its circumference around the widest section. Also measure from the bottom to the point where you want the crochet cover to finish. The reference design leaves the bottle neck and cap exposed, which makes drinking and refilling convenient. Your finished crochet base should be approximately the same diameter as the bottle bottom, or slightly smaller because crochet fabric naturally stretches.
Gauge for a crochet water bottle holder does not need to match a universal number because yarn, hook, tension, and bottle size will differ. Instead, use the actual bottle as your gauge guide. After every few rounds, place the work against the bottle. If the base extends well beyond its edge, stop increasing sooner. If it remains significantly smaller, continue increasing. This direct fitting method makes the pattern much easier to adapt.
Begin with a magic ring in your main cat color. Work 6 sc into the ring and gently pull the center closed. If you prefer not to use a magic ring, ch 2 and work 6 sc into the second chain from the hook. Place a stitch marker in the first stitch when working in continuous rounds. For Round 2, work 2 sc into each stitch around, giving you 12 stitches.
Continue increasing evenly. A useful formula is Round 3: (sc in next stitch, inc in next stitch) around. Round 4 can be (sc in next 2 stitches, inc) around, followed by (sc in next 3 stitches, inc) for the next round. Continue this logical sequence until the disc is approximately the size of your bottle’s base. The goal is a flat circle, so adjust your increases if the yarn and tension cause noticeable curling or rippling.
Once the bottom is large enough, stop increasing. Work 1 sc in each stitch around. After several rounds without increases, the fabric will naturally begin traveling upward and forming a cylindrical sleeve. Place the bottle inside periodically to check the fit. The sides should gently hug it rather than squeezing it. If the cover is too loose, a carefully positioned decrease round can reduce the circumference.
Continue the main color until the solid lower section reaches the desired height. To reproduce the striped appearance in the image, introduce your contrasting belly color. Work one or more rounds in the contrasting color and then change to white. Alternate these colors to create horizontal crochet stripes. Carrying unused yarn can work for short color changes, but cutting and securely weaving the ends often creates a cleaner interior for beginners.
For a yellow cat inspired by the photograph, a combination of yellow, white, and bright red creates a cheerful striped body. For the green version, use light green as the main color with white and a deeper green for the stripes. Keep each stripe approximately the same number of rounds for an orderly appearance. You can also vary their widths if you prefer a more playful handmade design.
After completing the striped section, switch completely back to the main cat color. Continue working 1 sc in each stitch around until the upper body reaches close to the bottle shoulder. This solid section becomes the cat’s head, so leave enough height for the eyes, muzzle, whiskers, and ears. Finish the upper edge with a neat round of sc or sl st, ensuring that the opening remains wide enough for the bottle to slide in and out comfortably.
The ears are what immediately turn the simple bottle sleeve into a recognizable crochet cat bottle cover. Make two matching triangular pieces in the main or contrasting color. One easy method is to begin with a short foundation chain and work rows of sc, decreasing at both sides as you move upward. For example, start with approximately 8–10 stitches, depending on your yarn, and gradually reduce the stitch count until only one or two stitches remain.
Fasten off each ear while leaving a long tail for sewing. Position the ears along the top edge with one toward each side of the face. Before permanently attaching them, place the bottle inside the cover and check the overall proportions. The ears should stand above the crochet head without blocking the bottle opening. Sew along the lower edge several times using the yarn needle so the ears remain secure during regular handling.
For the muzzle, crochet a small white circle or slightly oval shape. Begin with a magic ring, work several sc into it, and use evenly distributed increases for another round or two until the piece reaches the desired diameter. Keep it relatively small so there is still space for the eyes and whiskers. Sew the white muzzle onto the center of the face, taking care not to distort the main body stitches.
Use pink yarn to embroider a small triangular cat nose in the upper center of the muzzle. Several short stitches placed close together can form the triangle. A short vertical stitch beneath it can suggest the mouth. Add whiskers with black embroidery thread or thin yarn, creating approximately three straight lines extending from each side of the muzzle. Embroidering these details gives you considerable control over the expression.
Place two dark eyes above the muzzle. Safety eyes can create a polished appearance when they are installed before the inside becomes difficult to reach, but embroidered crochet eyes are a practical alternative. Add small curved eyebrows above them if you want to reproduce the expressive appearance of the pictured cats. Take time with facial placement because moving an eye only one or two stitches can noticeably change the character’s expression.
Finally, crochet two little arms. Begin with a small magic ring or short chain and work a narrow tube of sc in continuous rounds. Slightly taper the lower end using decreases, then flatten the upper portion before sewing each arm to the sides of the body. Small embroidered lines near the ends can represent paws or claws. Keep these embellishments simple so they complement rather than overpower the striped bottle-cover design.
A strong crochet shoulder strap makes this project more than a decorative sleeve. For a simple strap, chain to your desired finished length and work back along the chain using slip stitches or single crochet. Another method is to create a narrow band several stitches wide and work rows until it reaches the required length. Remember that crochet can stretch under the weight of a full water bottle, so making the strap slightly shorter than the final desired measurement may be helpful.
For additional stability, use a relatively firm tension when crocheting the strap. A single row of chains alone may stretch considerably, while two or more structured rows generally provide better support. You can also work a cord-style strap by crocheting tightly around a foundation. Before attaching it, gently pull on the completed strap to see how much it lengthens. Adjust the size if necessary.
Attach one end of the strap to each upper side of the cat-shaped bottle holder. Do not rely on a single stitch for attachment because a filled bottle can place considerable stress on that point. Instead, sew the end across several body stitches and reinforce it with multiple passes of yarn. Test both attachment areas by pulling firmly but carefully before placing the bottle inside.
Next, inspect the entire project and weave in every loose end. Use the yarn needle to run each yarn tail through several stitches on the wrong side, change direction, and weave through additional stitches before trimming. Pay particular attention to color-change areas, ears, arms, and strap connections. Neat finishing improves both the appearance and durability of the completed Crochet Cat-shaped water bottle cover Pattern.
Try the finished carrier with the intended bottle. The bottom should sit flat, the sides should remain reasonably smooth, and the bottle should not easily slide out through the top during ordinary carrying. If the opening feels too loose, you can add a final slightly tighter round or work a few evenly distributed decreases. Avoid making the opening so restrictive that removing the bottle becomes inconvenient.
Customization is one of the most enjoyable parts of this pattern. Make a tabby-inspired version with earthy stripes, a black cat with a white muzzle, a pastel cat for a softer look, or a bright multicolored version using leftover yarn. You can also adjust the ears, eye shape, stripe width, strap length, and facial embroidery. The same basic construction can accommodate many standard bottle shapes simply by changing the base diameter and number of body rounds.
Frequently Asked Questions About the Crochet Cat-shaped Water Bottle Cover Pattern
What crochet skill level is recommended for this project?
An adventurous beginner who understands chains, single crochet, increases, decreases, and working in rounds should be able to complete this project. The facial embroidery and assembly require patience, but the basic construction uses straightforward crochet techniques.
What does sc mean in U.S. crochet terminology?
Sc means single crochet. Insert the hook into the stitch, yarn over and pull up a loop, then yarn over and pull through both loops. It is the primary stitch used throughout this bottle holder because it creates a dense and stable fabric.
What does inc mean in this pattern?
Inc means increase. Unless otherwise specified, make an increase by working 2 sc into the same stitch. Increases are particularly important while forming the flat circular base.
What does dec mean?
Dec means decrease. A single crochet decrease combines two stitches into one. It can be used when the bottle narrows or when shaping small pieces such as the arms and ears.
How do I adapt the pattern to a different water bottle?
Start by crocheting the base according to the actual diameter of your bottle. Continue increasing until the circle fits the bottom, then stop increasing and crochet upward. Test the cover on the bottle frequently rather than depending exclusively on a fixed stitch count.
What yarn works well for a crochet water bottle holder?
Cotton and cotton-blend yarns are useful because they can create a firm fabric with clearly defined stitches. A medium-weight yarn is convenient for many bottles, although thinner or thicker yarn can also work when the hook size and stitch count are adjusted.
Can I make the striped section without changing colors so frequently?
Yes. The stripes are decorative rather than structural. You can make the entire body in one color, use wider stripes, alternate only two colors, or create your own color sequence.
How long should the shoulder strap be?
That depends on whether you want the bottle carried by hand, over one shoulder, or crossbody. Measure the intended wearer and remember that crochet may stretch once a filled bottle adds weight. Test the strap before final attachment whenever possible.
Can I use safety eyes?
Safety eyes can be used for projects intended for appropriate users, but they are still separate components. For items that may be handled by small children, embroidered facial features avoid detachable eye pieces and can still produce an attractive cat expression.
Why is my circular base becoming wavy?
A wavy base usually indicates that the circle is receiving too many increases for your particular yarn and tension. Reduce the frequency of increases and check whether the fabric begins lying flat again.
Why is my base curling into a bowl?
Curling can indicate insufficient increases or particularly tight tension. Add increases more evenly or reconsider the hook size. A slight upward curve is not necessarily a problem once the side walls begin, but the bottom should fit the bottle comfortably.
How can I keep the strap from stretching too much?
Use tight, structured stitches instead of an unsupported chain, make the strap slightly shorter than the desired final length, and reinforce both attachment points. Cotton yarn may also provide a firmer result than very elastic fibers.
Can this pattern be made without the arms?
Absolutely. The arms, muzzle, eyebrows, stripes, and other decorative elements can be modified or omitted. The essential structure consists of the fitted circular base, cylindrical body, upper opening, and securely attached carrying strap.
How do I wash the finished bottle holder?
Follow the care instructions for the specific yarn you used. If the project contains safety eyes or other attached components, handle those areas carefully. Allow the holder to dry completely before storing it around a bottle.
Conclusion
Video Tutorial:
The Crochet Cat-shaped water bottle cover Pattern combines practical construction with the charm of a handmade cat character. Starting with a flat circular base, you learned how to use single crochet, controlled increases, simple color changes, and continuous body rounds to build a cover that can be adapted directly to the dimensions of your bottle.
You also learned how to transform that basic sleeve by adding a striped belly, triangular crochet cat ears, a white muzzle, embroidered nose and whiskers, expressive eyes, little arms, and a reinforced crochet shoulder strap. Each component is relatively simple on its own, which makes the complete project a useful way to practice shaping, assembly, embroidery, and finishing techniques.
Most importantly, treat the measurements as adjustable guidelines rather than rigid numbers. Checking the work against the actual bottle throughout the process is the easiest way to achieve a comfortable fit. Once you understand the construction, experiment with different colors, stripe arrangements, facial expressions, and cat styles to create a truly personal version.
If you make your own Crochet Cat-shaped water bottle cover Pattern, leave your sincere opinion about the project and share any suggestions or creative modifications you would add. Your ideas about colors, details, strap styles, and alternative cat designs can provide wonderful inspiration for future handmade projects.