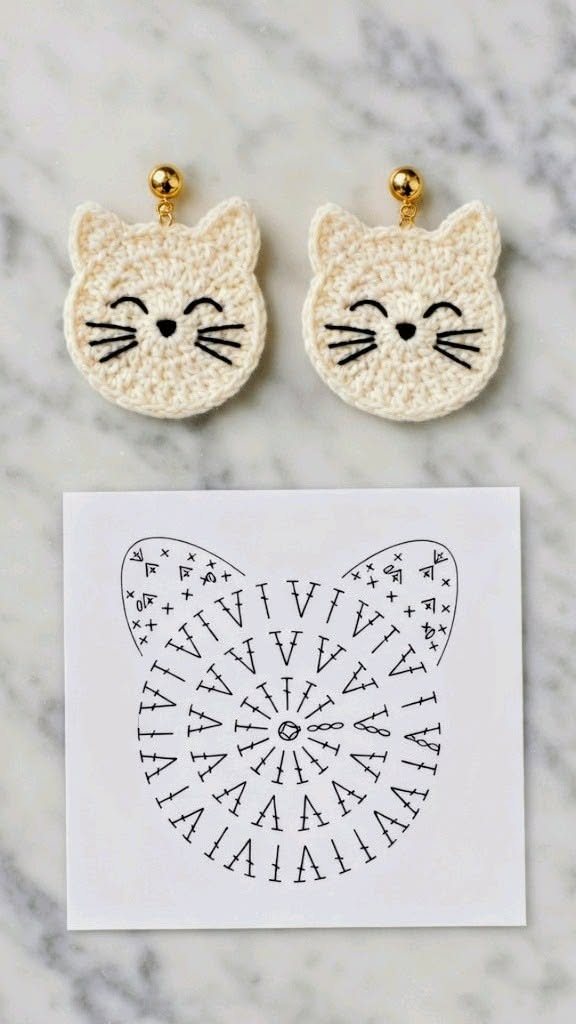
Crochet Kitten Earrings Pattern

The Crochet Kitten Earrings Pattern is a delightful and beginner-friendly crochet project that combines creativity, style, and the timeless charm of adorable kittens. These lightweight earrings are perfect for cat lovers, handmade gift ideas, craft fairs, and anyone looking to create unique accessories with just a small amount of yarn.
Throughout this guide, you will learn how to create a beautiful pair of kitten earrings using standard US crochet terminology while following a clear, detailed, and easy-to-understand process.Crocheting miniature accessories has become increasingly popular because these projects are quick to complete while allowing crocheters to practice precision and improve their stitch consistency.
A Crochet Kitten Earrings Pattern is an excellent example of a small project that offers impressive results without requiring a large investment of time or materials. Whether you are making these earrings for yourself or selling handmade jewelry, this pattern provides endless opportunities for customization through different yarn colors, embroidery details, and hardware choices.
This article explains each stage of the project using US crochet abbreviations, detailed stitch instructions, finishing techniques, and assembly tips. Every section has been carefully organized to help beginners and experienced crocheters achieve professional-looking results. By the end of this tutorial, you will understand how to crochet the kitten face, shape the ears, embroider the facial features, stiffen the finished pieces if desired, and attach the earring findings securely for long-lasting wear.
Before beginning your Crochet Kitten Earrings Pattern, gather all materials so the project flows smoothly from start to finish.
You will need lightweight cotton yarn (Category 2 or 3), a 2.25 mm–2.75 mm crochet hook, tapestry needle, black embroidery floss, stitch marker, scissors, jump rings, and earring posts or hooks. Cotton yarn is recommended because it provides crisp stitch definition and helps the earrings maintain their shape.
Using a smaller hook than normally recommended creates tighter stitches. Dense fabric helps the kitten face look cleaner and prevents the stuffing-free design from becoming floppy.
MR = Magic Ring
ch = chain
sl st = slip stitch
sc = single crochet
inc = 2 sc in same stitch
hdc = half double crochet
dc = double crochet
st = stitch
rep = repeat
FO = fasten off
The kitten is crocheted from the center outward in continuous rounds. The ears are shaped naturally during the final rounds instead of being made separately.
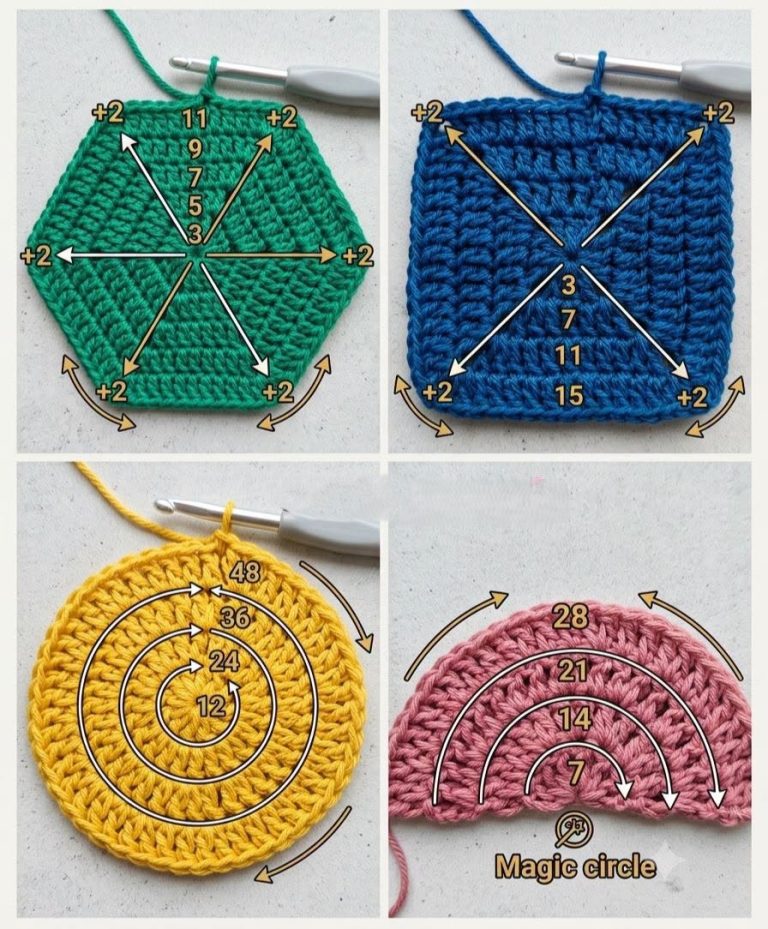
Round 1
MR, ch 1, work 6 sc into the Magic Ring.
Pull the ring closed tightly.
(6 sts)
Round 2
Inc in each stitch around.
(12 sts)
Round 3
Sc, inc around.
(18 sts)
Round 4
Sc in next 2 sts, inc around.
(24 sts)
The circle should now appear flat and even.
Continue adjusting your tension if necessary.
The kitten face begins to develop its rounded shape.
The ears are what transform the simple crochet circle into a recognizable kitten silhouette. Instead of sewing separate ears, this pattern forms them directly into the last round.
Continue with one round of even stitches if your tension requires a slightly larger face.
Ch 2.
Work:
sc
hdc
dc
hdc
sc
into consecutive stitches.
The increase in stitch height naturally creates a pointed ear.
Continue crocheting evenly across the top of the head.
Repeat the same sequence:
sc
hdc
dc
hdc
sc
The ears should mirror one another.
After both ears are completed, continue with sc until reaching the beginning of the round.
Finish with one sl st.
FO, leaving a long tail for weaving.
Weave all yarn tails securely into the back of the work.
Lightly shape the ears using your fingers before tightening the remaining ends.
If desired, lightly steam-block the finished piece without flattening the ears.
The embroidered facial features give personality to your Crochet Kitten Earrings Pattern. Take your time during this stage because symmetrical embroidery creates a polished appearance.
Thread black embroidery floss onto a tapestry needle.
Using satin stitches, embroider a small upside-down triangle for the nose.
Position the nose approximately halfway between the center and lower edge of the face.
Next, embroider two gently curved closed eyes.
Each eye may consist of three or four small stitches forming a soft smile shape.
Maintain equal spacing from the center.
Now embroider three whiskers on each side.
Keep each whisker approximately the same length.
Small details make a significant visual difference.
Secure all embroidery on the back using tiny knots hidden beneath the crochet stitches.
Trim excess floss carefully.
If desired, add tiny pink embroidery inside each ear.
Another option is using soft pastel yarn for decorative highlights.
Some crocheters prefer adding a tiny blush with fabric-safe textile paint.
For extra durability, apply a light coat of diluted fabric stiffener or textile glue to the back only.
Allow the crochet piece to dry completely before attaching jewelry hardware.
Blocking is optional but often improves the overall symmetry.
Once both kitten faces are complete, it is time to transform them into wearable accessories.
Use a small jump ring attached near the center between the ears.
Attach the jump ring through several crochet stitches instead of only one for better support.
Connect the jump ring to your chosen earring hardware.
Ball stud earrings provide a modern appearance.
French hooks create a lightweight dangling effect.
Lever-back findings offer additional security for everyday wear.
Check that both earrings hang evenly.
Compare their orientation before fully closing each jump ring.
If necessary, adjust the placement slightly.
One of the greatest advantages of the Crochet Kitten Earrings Pattern is its versatility.
Experiment with different yarn colors such as gray, black, orange, brown, white, or calico-inspired combinations.
Add tiny embroidered bows for a playful design.
Create seasonal versions using holiday colors.
Tiny flowers can be embroidered beside one ear.
Pearl beads may be sewn onto the center for an elegant finish.
Glitter thread creates festive earrings for celebrations.
Metallic embroidery floss adds sparkle without overwhelming the design.
These earrings also make excellent gifts for birthdays, Mother’s Day, Christmas, Valentine’s Day, and craft exchange events.
Because they require very little yarn, they are perfect stash-busting projects.
Many makers also sell handmade kitten earrings successfully at artisan markets thanks to their adorable appearance and quick production time.
Care for the finished earrings by storing them flat in a jewelry box away from moisture.
If cleaning becomes necessary, gently wipe them with a slightly damp cloth and allow them to air dry completely.
Avoid machine washing or soaking, as excessive moisture may soften the finished shape.
With proper care, your handmade crochet earrings can remain beautiful for years.
Is this a beginner-friendly project?
Yes. Anyone familiar with basic US crochet stitches such as sc, hdc, dc, and the Magic Ring can complete this project successfully.
What yarn works best?
Mercerized cotton yarn is highly recommended because it creates firm stitches, excellent stitch definition, and durable earrings.
Can I make larger kitten earrings?
Absolutely. Simply use thicker yarn and a larger crochet hook while following the same stitch sequence.
How do I keep the ears standing upright?
Using tight tension, cotton yarn, and optional fabric stiffener helps maintain the ear shape.
Can I sell finished kitten earrings?
Yes. Handmade finished products are commonly sold at craft fairs, online shops, and local markets, provided you respect any applicable rights associated with specific pattern sources if you are following a designer’s original pattern.
Can I use safety eyes?
For earrings, embroidered facial features are recommended because they are lighter, safer, and more durable.
What is the best hook size?
Most crocheters achieve excellent results with a 2.25 mm or 2.5 mm crochet hook.
How long does the project take?
Most makers can complete a pair in approximately one to two hours, depending on experience and embroidery detail.
The Crochet Kitten Earrings Pattern is a charming project that combines creativity with practical crochet techniques. Throughout this article, you learned how to prepare the materials, understand the essential US crochet abbreviations, crochet the kitten face from a Magic Ring, shape the ears directly into the final round, embroider expressive facial details, finish the fabric neatly, and attach professional-looking earring hardware. You also discovered several ideas for personalizing the design with different yarn colors, decorative embroidery, and finishing methods to create unique handmade accessories.
Whether you are making these adorable kitten earrings for yourself, as thoughtful gifts, or to sell at craft fairs, this project is an excellent way to practice precision while creating something both fun and functional. We hope this detailed guide has inspired you to pick up your hook and enjoy every stitch of your next crochet adventure.
If you found this tutorial helpful, please leave your honest opinion in the comments and share your suggestions. Your feedback helps improve future crochet tutorials and inspires even more creative handmade projects.