Crochet Girl keychain Pattern

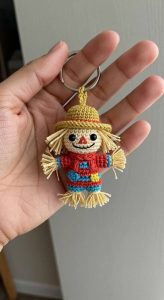
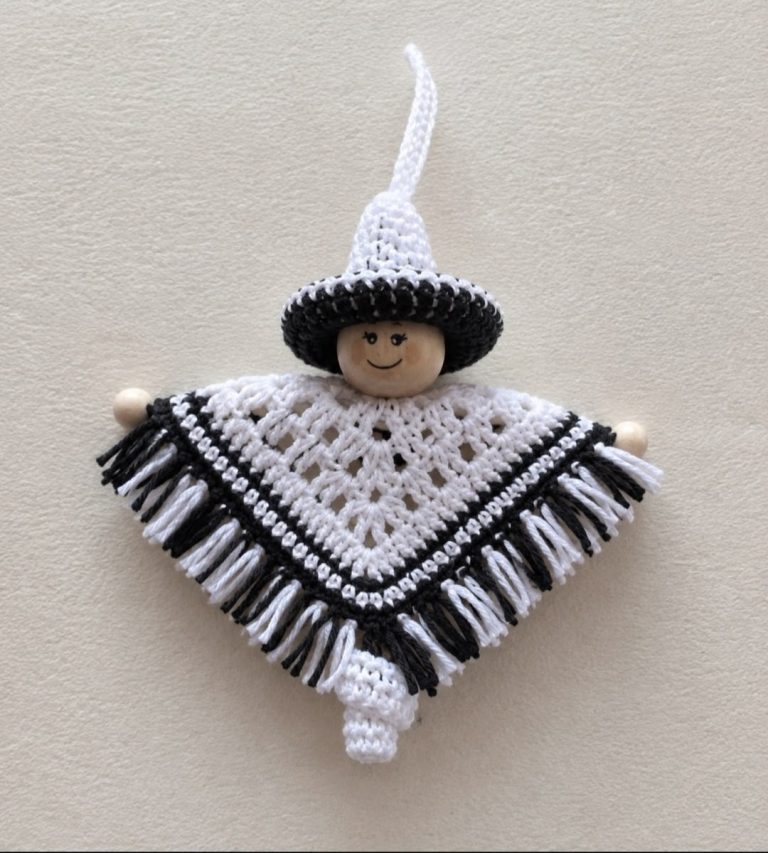
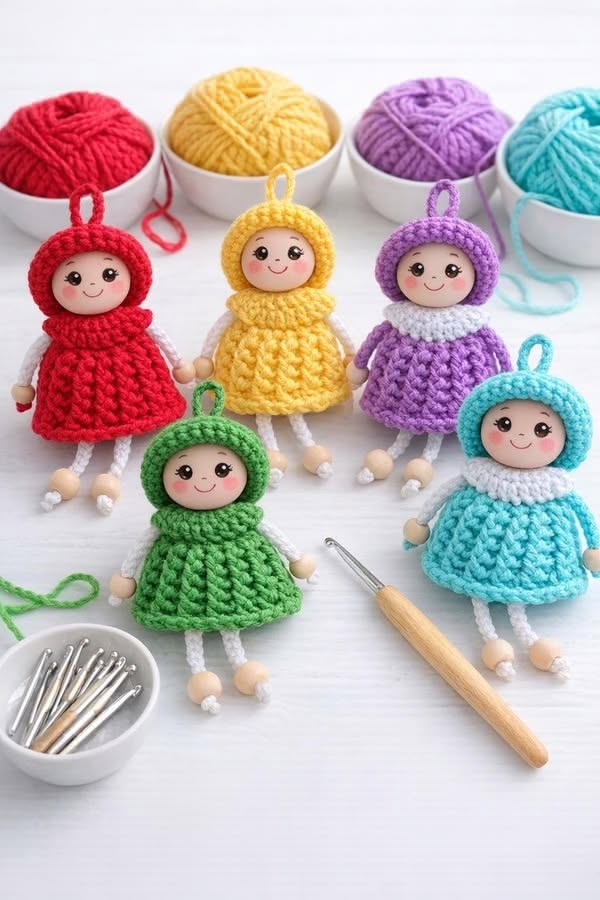
The Crochet Girl keychain Pattern is a charming and creative project that combines the beauty of amigurumi with the practicality of a handmade accessory. Whether you are looking for a thoughtful gift, a craft fair bestseller, or a fun decoration for your keys or backpack, this adorable crochet doll is a perfect choice.
Its small size makes it beginner-friendly while still offering enough detail to help crocheters improve their skills. Throughout this guide, you will learn how to create your own Crochet Girl keychain Pattern using common US crochet abbreviations and techniques.
Crocheting miniature dolls is an enjoyable way to practice shaping, color changes, and simple embroidery. A Crochet Girl keychain Pattern can be customized with different yarn colors, facial expressions, hairstyles, and accessories, allowing every finished project to become unique. Handmade keychains are popular because they require only a small amount of yarn, making them an excellent stash-busting project while creating something beautiful and practical.
If you love creating handmade accessories, this project will quickly become one of your favorites. Besides being relaxing, crocheting these tiny dolls allows you to experiment with textures and colors without committing to a large project. This detailed guide explains every important step using US crochet terminology, helping you confidently complete your own Crochet Girl keychain Pattern from the first magic ring to the final assembly.
Choose a soft cotton or cotton-blend yarn in several colors. One color will be used for the dress, another for the hood or hat, one for the skin tone, and white yarn for the collar and sleeves. Cotton yarn gives the doll a neat finish and helps maintain its shape over time.
A crochet hook between 2.0 mm and 2.5 mm usually works well for amigurumi. The stitches should remain tight enough so the stuffing does not show through. If your stitches appear loose, simply use a smaller hook.
Additional materials include polyester fiberfill, embroidery thread for the face, a tapestry needle, stitch markers, scissors, wooden beads for the hands and feet if desired, and a keychain ring with a small jump ring.
The project mainly uses common US crochet stitches, including MR (Magic Ring), ch (chain), sl st (slip stitch), sc (single crochet), inc (increase), dec (invisible decrease), BLO (back loop only), FLO (front loop only), hdc (half double crochet), and dc (double crochet). Learning these abbreviations before starting makes the pattern much easier to follow.
Always count your stitches carefully at the end of every round. Using a stitch marker in the first stitch of each round helps prevent mistakes and keeps the shaping symmetrical.
Before beginning, prepare all colors and organize your supplies. Working in a clean, well-lit area helps you notice stitch placement more easily and improves the overall appearance of the finished keychain.
Begin with the head by making a Magic Ring (MR). Work 6 sc into the ring. Pull it tightly closed before continuing. This creates a neat center without leaving a visible hole.
Round 2: Work inc in every stitch around for a total of 12 stitches.
Round 3: (sc, inc) repeat around for 18 stitches.
Round 4: (2 sc, inc) repeat around for 24 stitches. Continue increasing gradually until the desired head size is reached.
Work several rounds with sc in each stitch without increasing. These rounds create the smooth sides of the head. Keep the stitch tension consistent for an even shape.
Insert the safety eyes before closing the head, leaving approximately 8 to 10 stitches between them. Embroider a tiny smile with black embroidery thread and add soft pink cheeks using embroidery floss or fabric-safe blush.
Begin decreasing with invisible decreases: (2 sc, dec) repeated around, followed by (1 sc, dec) and finally dec around until only a small opening remains. Stuff the head firmly with fiberfill before closing completely.
Finish the head with a slip stitch and weave in the yarn tail securely. The head should feel firm but not overstuffed, maintaining a perfectly round shape for the finished Crochet Girl keychain Pattern.
Start the body with the dress color. Create another Magic Ring with 6 sc. Continue increasing gradually until reaching approximately 24 stitches around. This forms the base of the skirt.
To create the flared dress, work one round in BLO. This creates a folding line while leaving the front loops available for decorative details if desired. Continue working several rounds of sc while increasing slightly to produce a gentle bell-shaped skirt.
For the upper body, stop increasing and crochet evenly for several rounds. Gradually decrease near the neckline until the body matches the diameter of the head. Stuff the body lightly while maintaining a balanced shape.
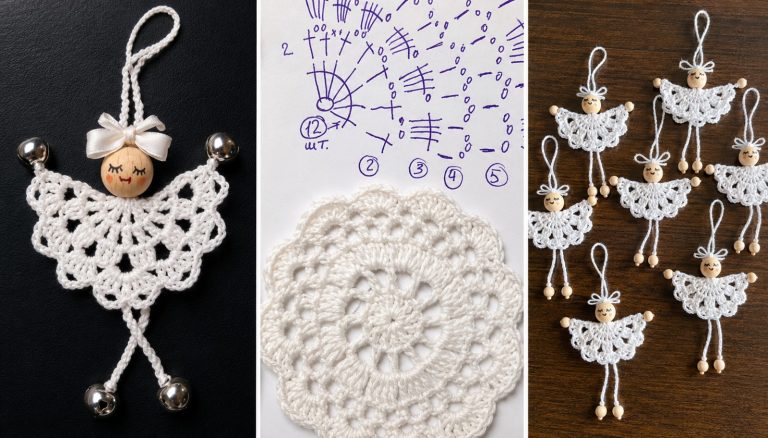
The sleeves are simple tubes. Chain a small number of stitches, join into a round, and work sc evenly for several rounds. Attach small wooden beads or crocheted hands before sewing the sleeves securely to both sides of the body.
The hood is worked separately. Begin with a chain that fits comfortably around the completed head. Crochet rows of sc or hdc, shaping the top using decreases until it fits neatly. Sew the hood around the head, leaving the face completely visible.
Attach the finished head to the body using a tapestry needle and matching yarn. Secure all pieces firmly since keychains receive frequent handling. Finally, attach a sturdy hanging loop with chains and connect the metal key ring through the loop.
Small embroidered eyelashes instantly give the doll a sweet expression. Tiny blush circles on the cheeks make the finished Crochet Girl keychain Pattern look even more cheerful and friendly.
You can personalize every doll by changing dress colors, adding bows, flowers, tiny pockets, or miniature scarves. Seasonal color combinations also make wonderful holiday gifts and craft fair collections.
If you want a slightly larger doll, simply use thicker yarn with a larger hook while following the same stitch sequence. Likewise, thinner yarn creates an even more delicate miniature keychain.
Maintain consistent tension throughout the project. Tight stitches help preserve the doll’s shape and improve durability, especially for accessories that will be carried daily.
After assembly, gently shape the stuffing using your fingers before weaving in every yarn end securely. Double-check all sewn pieces, ensuring nothing becomes loose during regular use.
The completed Crochet Girl keychain Pattern can be attached to backpacks, handbags, purses, zipper pulls, or keys. It also makes a thoughtful handmade gift for birthdays, baby showers, holidays, teacher appreciation gifts, or party favors.
Is the Crochet Girl keychain Pattern suitable for beginners?
Yes. Beginners who already know basic single crochet, increases, decreases, and working in the round can complete this project with patience.
What yarn works best?
Cotton or cotton-blend yarn is recommended because it creates neat stitches and helps the doll keep its shape.
Which crochet hook should I use?
Most crocheters achieve excellent results with a 2.0 mm to 2.5 mm hook, depending on yarn thickness and personal tension.
How do I make the doll sturdier?
Stuff the head firmly, secure every sewn piece with multiple passes of yarn, and weave in all yarn tails carefully.
Can I wash the finished keychain?
Yes. Hand washing with mild soap and allowing it to air dry is usually the safest option.
Can I customize the hairstyle and clothing?
Absolutely. You can add braids, ponytails, bangs, flowers, hats, different collars, and dresses in endless color combinations.
Can I sell finished keychains?
If you created the item yourself and the original pattern allows commercial use of finished products, handmade keychains are often excellent items for local markets and craft fairs.
How can I make the face look more expressive?
Carefully position the eyes evenly, embroider a gentle smile, add subtle eyebrows, and lightly blush the cheeks for a warm appearance.
Video Tutorial:
The Crochet Girl keychain Pattern is a delightful project that combines creativity, practical crochet skills, and endless opportunities for customization. Throughout this article, you learned how to prepare the materials, understand the essential US crochet abbreviations, crochet the head, body, sleeves, and hood, assemble all the pieces securely, and add finishing touches that give each doll its own personality. By following these step-by-step instructions, you can confidently create a durable and charming handmade keychain suitable for personal use, thoughtful gifts, or craft market sales.
Thank you for reading this complete guide. I hope this tutorial inspires you to create your own colorful collection of crochet girl keychains. If you enjoyed this article, please leave your honest opinion in the comments and share your suggestions or creative ideas. Your feedback helps improve future crochet tutorials and inspires other makers to start their own handmade projects.