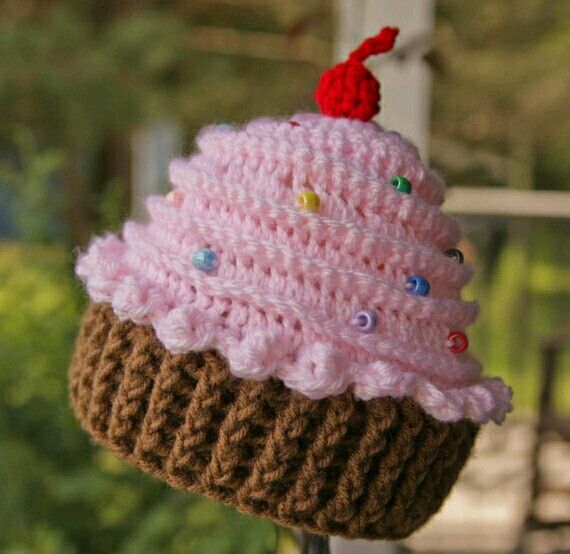
Crochet Cupcake Hat Pattern
How to Craft Yarn Horse Pattern projects are becoming increasingly popular among crafters who love creative handmade decorations, soft toys, and personalized gifts.
Creating a beautiful yarn horse can be both relaxing and rewarding, especially for beginners who want to explore simple yarn crafts with impressive results.
Whether you are making a decorative piece for your home or a charming toy for a child, learning the basics of a How to Craft Yarn Horse Pattern can open the door to endless creative possibilities.
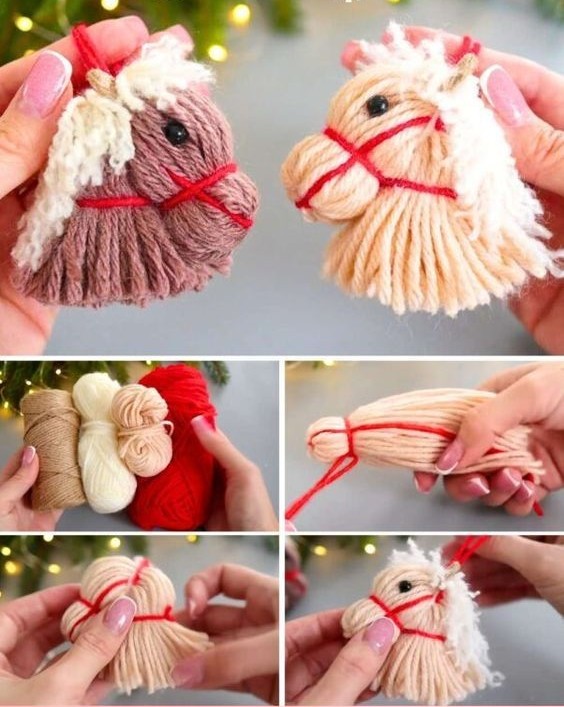
Many people enjoy working with yarn because it is affordable, versatile, and easy to find in different colors and textures. A handmade yarn horse brings warmth and personality to any craft collection, and the process itself allows you to express your creativity in a unique way. From selecting the right yarn to shaping the horse’s mane and tail, every step contributes to the final masterpiece. This type of project is also perfect for those who enjoy relaxing hobbies that reduce stress while improving crafting skills.
Another reason why the How to Craft Yarn Horse Pattern trend continues to grow is its accessibility. You do not need expensive equipment or advanced crafting experience to begin. With basic supplies such as yarn, scissors, stuffing, and patience, anyone can create an adorable yarn horse. These handmade creations are also excellent for seasonal decorations, nursery themes, birthday gifts, or even small business craft collections. By following practical techniques and understanding the crafting process, you can create professional-looking yarn horses that stand out beautifully.
Selecting quality materials is one of the most important parts of creating a successful How to Craft Yarn Horse Pattern. The yarn you choose will affect the appearance, softness, and durability of your finished project. Acrylic yarn is often recommended for beginners because it is affordable, lightweight, and available in many colors. Cotton yarn can also work well if you want a firmer texture and more defined details.
The thickness of the yarn also matters when making a yarn horse. Medium-weight yarn is usually easier to handle because it provides enough structure while remaining flexible. Thicker yarn can create a fluffy and oversized horse, while thinner yarn allows for more delicate details. Neutral shades like brown, cream, gray, and white are popular choices because they resemble real horses, but colorful fantasy-inspired yarn horses are also becoming trendy among craft enthusiasts.
Stuffing material plays an essential role in shaping your yarn horse properly. Polyester fiberfill is commonly used because it creates a soft and balanced texture. Avoid overstuffing the horse since this can distort the body shape. Small amounts of stuffing added gradually help maintain symmetry and create a smoother appearance.
Scissors and crafting needles are equally important for neat results. Sharp scissors make cutting yarn easier and cleaner, especially when trimming the mane and tail. Large-eye tapestry needles help weave loose ends into the project without damaging the yarn fibers. Good tools can significantly improve the overall crafting experience.
Safety eyes or embroidered eyes can be added to bring personality to the yarn horse. Embroidered eyes are often safer for small children because they eliminate detachable parts. Some crafters also enjoy adding small decorative accessories such as bows, ribbons, or tiny fabric saddles to personalize their creations further.
Organizing your workspace before starting can save time and reduce frustration. Keeping all materials within reach helps maintain focus during the crafting process. A clean and comfortable workspace also encourages creativity and allows you to enjoy every stage of the How to Craft Yarn Horse Pattern experience.
Starting a How to Craft Yarn Horse Pattern may seem challenging at first, but breaking the project into smaller steps makes it much easier to manage. The first step usually involves creating the horse’s body. Many crafters begin by wrapping yarn around cardboard templates to form pom-poms or shaped sections that become the body and head.
After creating the body pieces, attach them securely using strong knots or stitching techniques. Ensuring that all sections are firmly connected helps the horse maintain its structure over time. Taking extra care during assembly prevents loose parts and improves durability.
The legs can be made using braided yarn strands or tightly wrapped yarn bundles. Consistent leg length is important for balance and appearance. Some crafters insert lightweight wire inside the legs to make the horse poseable, although this step is optional and should be done carefully if the item is intended for children.
One of the most exciting stages is crafting the mane and tail. Long strands of yarn can be attached individually to create a realistic flowing effect. Brushing the yarn gently with a comb may create a softer and fuller texture. Mixing different shades of yarn can also add depth and dimension to the mane.
Facial details give the yarn horse its personality and charm. Small stitched nostrils, embroidered smiles, and carefully placed eyes can completely transform the final look. Taking time to refine these details often makes the project appear more professional and visually appealing.
Once all parts are assembled, inspect the horse carefully for loose ends or uneven sections. Trimming excess yarn and reinforcing weak areas will improve the final presentation. Completing a handmade How to Craft Yarn Horse Pattern project brings a sense of accomplishment and creates a unique craft piece that reflects your personal creativity.
One of the best aspects of a How to Craft Yarn Horse Pattern is the ability to customize the design according to your own preferences. Some crafters enjoy creating realistic horses inspired by specific breeds, while others prefer whimsical fantasy horses with bright rainbow colors and decorative accessories.
Adding miniature clothing or accessories can make your yarn horse even more special. Tiny scarves, blankets, or decorative saddles add extra personality and visual appeal. Seasonal accessories are also popular, especially during holidays when themed decorations become highly desired.
Different yarn textures can completely change the appearance of the horse. Fuzzy yarn creates a soft plush effect, while smooth yarn provides a cleaner and more detailed finish. Combining textures can add interesting visual contrast and make your project stand out from traditional designs.
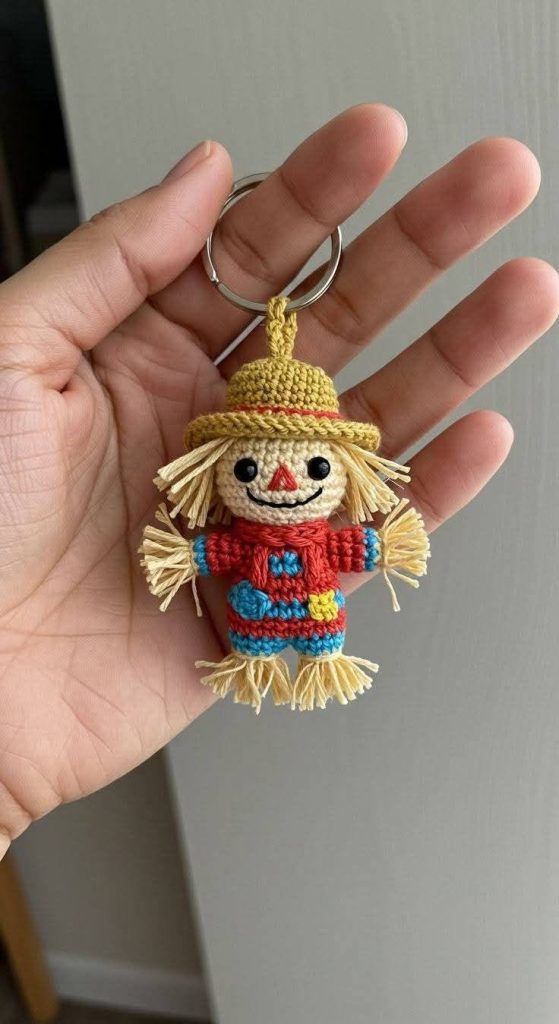
You can also experiment with horse sizes. Small yarn horses make excellent keychains, ornaments, or desk decorations, while larger versions can become nursery decorations or cuddly handmade toys. Scaling the project allows crafters to explore various creative possibilities using the same basic techniques.
Color combinations offer another exciting opportunity for personalization. Traditional horse shades remain timeless, but pastel colors, metallic yarns, and ombre patterns can create modern and artistic interpretations. Personalized color schemes are especially popular for gifts and themed room decorations.
Photography and presentation also matter if you plan to showcase or sell your creations online. Natural lighting and simple backgrounds help highlight the details of the yarn horse. Sharing your How to Craft Yarn Horse Pattern creations on social media can inspire other crafters and help build a creative community around handmade yarn projects.
Improving your How to Craft Yarn Horse Pattern skills takes patience, practice, and attention to detail. Beginners often improve quickly by starting with simple designs before moving on to more advanced patterns. Repeating the same project multiple times helps build confidence and consistency.
Learning proper tension control is essential when working with yarn crafts. Uneven tension can create irregular shapes or weak connections. Practicing smooth and steady wrapping or stitching techniques helps produce cleaner and more professional-looking results.
Studying horse anatomy can also improve the realism of your yarn horse projects. Observing the proportions of the head, body, legs, and mane allows you to create more balanced and visually accurate designs. Even simplified versions benefit from good proportions.
Keeping extra yarn nearby is always a smart idea. Running out of yarn in the middle of a project can disrupt color consistency and delay progress. Buying slightly more material than needed ensures a smoother crafting experience and provides leftovers for future decorative details.
Joining crafting communities can provide valuable inspiration and support. Many yarn enthusiasts share techniques, ideas, and troubleshooting tips that help beginners improve their skills faster. Watching tutorials and practicing regularly can significantly enhance your crafting abilities over time.
Most importantly, enjoy the creative process and avoid rushing through the project. Handmade crafts often become more meaningful when created with patience and care. Every completed How to Craft Yarn Horse Pattern project represents creativity, dedication, and the joy of making something unique by hand.
Acrylic yarn is often the best choice for beginners because it is affordable, easy to work with, and available in many colors. Cotton yarn can also be used for more structured designs.
Yes, many How to Craft Yarn Horse Pattern projects are beginner-friendly. Simple designs require only basic crafting tools and easy techniques.
The time depends on the complexity and size of the project. Small yarn horses may take a few hours, while detailed designs can require several days.
Older children can participate in safe crafting steps such as wrapping yarn or choosing colors. Adult supervision is recommended when using scissors or needles.
Using layered yarn colors, detailed facial embroidery, and properly shaped body proportions can help create a more realistic appearance.
Yes, many crafters sell handmade yarn horses at craft fairs, online marketplaces, and social media shops. Original designs and high-quality craftsmanship often attract more buyers.
Popular accessories include ribbons, miniature saddles, scarves, bows, and decorative flowers. Seasonal themes are also very popular.
Most yarn horses can be cleaned gently using mild soap and cold water. Allow the item to air dry completely before handling again.
Learning How to Craft Yarn Horse Pattern projects is a wonderful way to combine creativity, relaxation, and handmade artistry into one enjoyable hobby. Throughout this article, you discovered how to select the right materials, follow essential crafting steps, personalize your designs, and improve your overall yarn crafting skills. With patience and imagination, anyone can create beautiful yarn horses that serve as charming decorations, thoughtful gifts, or even products for a handmade business.
The beauty of yarn crafting lies in its flexibility and creative freedom. Every yarn horse can reflect your personal style through colors, textures, and decorative details. As you continue practicing and experimenting with new ideas, your confidence and skills will naturally grow.
Feel free to share your honest opinion about this article and your experience creating a How to Craft Yarn Horse Pattern. Suggestions, creative ideas, and personal crafting tips are always welcome and can inspire other readers who are beginning their own yarn crafting journey.
